Last Updated on January 26, 2023
Hammering is usually seen as the fastest and easiest way to attach objects, but what happens when you don’t have a screwdriver handy? Believe it or not, you can actually hammer in a screw if you have the patience and skill. It does take more time than using a screwdriver, but knowing how to do this is quite convenient.
You can hammer a screw by tapping it firmly into the surface, using light taps, and gradually increasing the force, but make sure the head of the screw is facing the right way. Hammering in a screw can be done with the right tools and instructions that are easy to follow.
It’s possible to nail screws with a hammer, and we’ll show you how. We will discuss every step of the process so that you have all the information on how to safely and effectively hammer in a screw at the end of this article.
Can You Hammer in a Screw: Get the Right Answer
While hammering in a screw may be possible, it is not the best idea, especially if you are working with drywall or any other fragile surfaces. It is also recommended to avoid hammering screws on concrete walls, brick, tiles, and sheet metal.
Hammering screws into the wall can seem like a time-saving solution, but it may not be worth the risk. Not only will it make big holes in your walls, but the force of the hammering can also strip out the thread on the screw. This will keep it from being able to anchor into the wall properly and support something heavy when you hang it up.
Also, hammering screws into your drywall can lead to cracks and even be dangerous as the hammer might slip off the screw and hit you. It is better to take that extra few minutes and use a manual or electric screwdriver instead.
But a hammer can come in handy when you don’t have access to a tool like a screwdriver, but it should only be seen as an emergency measure. If the screws are driven in with too much force or at the wrong angle, you risk damaging your work surface and yourself.
How to Nail a Screw with a Hammer?
A screw is one of the most basic and essential elements of carpentry. While it might seem simple, nailing a drywall screw into the wall can be tricky if you don’t have the right tools and know-how. With this step-by-step guide, you’ll be an expert.
Step 01: Make a Pencil Mark
Making a pencil mark on the wall before you start pounding in nails is one of the process’s simplest yet most important steps. Doing this will ensure that the nail goes in straight, making it much easier to hammer into the wall.
Even if you’re experienced at nailing screws, it’s always best to start with a pencil mark. This way, you can avoid potential mistakes and ensure that your nails go perfectly straight every time.
Step 02: Take a Slightly Smaller Nail than the Screw
If you’re using a screw that’s too big for the nail, hammering it into the wall will be difficult. It will also rip large holes in the wall. In this case, the screw doesn’t stick tightly and quickly emerges from the wall.
On the other hand, if your screw is too small, it will be hard to tap the screw into the wall. You can place the nail at a 45-degree angle. This will give you more leverage and make it easier to drive the nail into the wall.
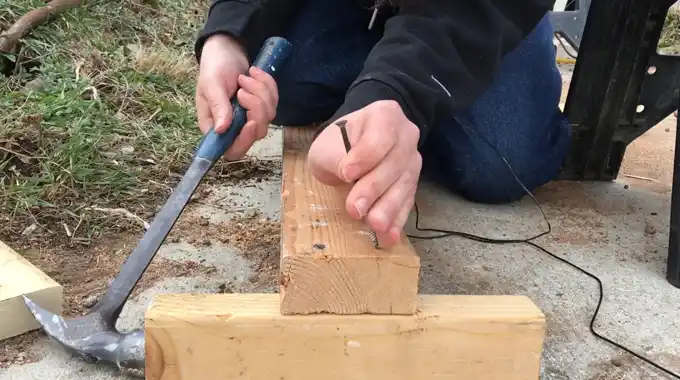
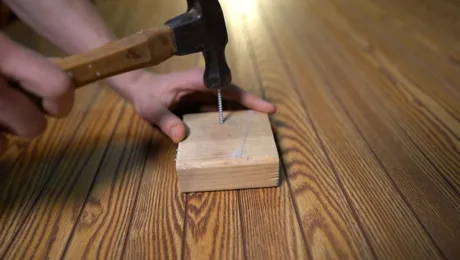
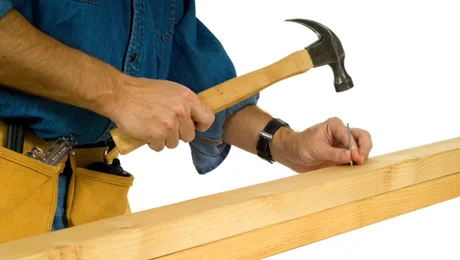
Step 03: Hammering the Nail into the Surface
Now, hammer the drywall screw into the surface to make a pilot hole. This is done by holding the nail against the surface where you want the screw to go and then using the hammer to tap it lightly. You want to ensure the nail is level so the screw will go in evenly.
Step 04. Remove the Nail
If you’re trying to remove a nail with a hammer, position the hammer’s claw over the head of the nail. Then, holding the hammer securely, use your other hand to twist the nail back and forth until it loosens.
Once the nail is loose, you can use your hammer or plier to pull it out. There are different pliers, but you’ll want to use needle nose pliers for this task.
Step 05. Insert the Wall plug
A wall plug is a small plastic or metal tube inserted into the wall before screwing. This provides extra support for the screws, making them less likely to come loose over time.
To insert a wall plug, start by holding it up to the hole you created with the nail. Then, use your hammer to tap it in until it’s flush with the wall.
Step 06. Screwing in the Screw
Now, it’s time to screw in the screw. Start by holding the screw up to the hole. Then, use your screwdriver to turn the screw clockwise until it’s tight. Be careful not to over-tighten the screw, or you might strip the threads and make removing them difficult.
Precautions to Take
Take some precautions if you’re going to drill into the wall with a hammer to avoid damaging the wall.
- Wear safety goggles and a mask to protect your eyes from flying debris.
- Do not use a screw that is too big for the nail.
- Use a piece of cardboard as a backing to avoid damaging the wall if you miss the screw.
- Be extra careful not to overdrive the screw and cause it to strip.
- Do not use a hammer if you are not confident in your abilities.
Can I Hammer in a Stripped Screw?
It is possible to hammer in a stripped screw, although it can be tricky. If you are looking for a stripped screw to be hammered inside, ensure the screw head is clean and free of chips.
Be careful not to damage the head of the screw, as this will make it even more difficult for the hammering process.
- First, prepare the screw and its stripped hole by cleaning out any debris that may be lodged in the head of the screw or around the edges of the hole with a small brush or piece of cloth.
- To help fill in the gap between the stripped screw and its hole, you can use super glue or a product known as Loctite Threadlocker, which will create a tight bond between them.
- Once the glue has dried, you can attempt to hammer in the stripped screw using an ordinary hammer or, even better, an impact driver, which will provide more torque than a regular hammer.
- When hitting screws into place, be sure to do so at a slight angle so that it is easier to get it started and to reduce the chances of further damaging its hole by over-tightening it with your hammering action.
- Place your hammer on one side of the stripped screw and gently tap it into place until it is flush with its surrounding surface area.
- You may also need to countersink your screw slightly with a drill bit if it is raised above its surface area due to over-tightening from your hammering action.
- Finally, use a ratchet and socket set for the final tightening of your now successfully hammered-in stripped screw once any countersinking has been completed to ensure that it remains firmly locked in place until removal is needed again down the line.
Are Screws Strong Enough to Use a Hammer?
Screws are generally durable enough to use a hammer on them, but it’s important to note that excessive force could cause the screw head to break off.
Hammering a screw can be an effective way of fastening it into place, but it is always best practice to use a hand tool such as a screwdriver or even an electric drill to ensure the most secure connection.
Also, depending on the type of screws being used, it may be necessary to pre-drill holes before inserting the screw for it to stay in place properly.
What Happens If I Hammer a Screw?
Hammering a screw into place can often result in success, and it may stay securely down. But this is not always guaranteed, and the screw could pop back up after being hammered down.
If you’re insistent on using hammering as your preferred method for putting screws in place, then you should make sure that you use an appropriate size of nails or pegs along with the screws to ensure they stay securely in place and don’t come loose over time.
It’s also essential that you don’t exceed the manufacturer’s recommended torque rating when hammering down so as not to cause damage to either the screws or whatever material they are being inserted into.
Is it Possible to Hammer a Wood Screw in?
It’s possible to drive wood screws into materials with a hammer. But this method should only be used on softwood such as pine, fir, or cedar. Using a hammer on hardwood can result in the splitting of the wood.
To ensure that the screw is driven correctly in, it is recommended to pre-drill the hole with an appropriate drill bit before inserting the screw. This will help prevent splitting and make driving the screw easier.
What Should be Avoided When Using a Hammer on a Screw?
Several safety measures should be considered when using a hammer to drive screws to avoid any potential injuries or damage to both people and property, such as:
- One should always keep their hands away from where they are striking the screw head as there is a risk of flying debris from the hammering motion and backfire from the force of impact.
- Avoid awkward positions, such as standing on uneven surfaces, which can lead to muscle strain and slipping due to an unstable footing.
- Extra force should not be applied when striking; otherwise, you risk damaging the surface of your project and possibly even breaking off part of your screw head.
Get Secure Objects by Simply Hammering in Screws
Hammering in a screw is incredibly useful for any DIYer or home improver. Not only is it great for affixing items to walls or other surfaces without having to pre-drill holes, but it’s also a great way to save time and money on projects.
Before attempting the task, however, ensure that you have the right kind of screws and hammers and the tools necessary for successful completion. Also, before hammering anything into place, ensure that the material is secure and that all other safety steps have been considered.
If done correctly, hammering in screws can add reinforcement and security, making any project safer and more secure.
You Can Also Read:


