Last Updated on September 16, 2023
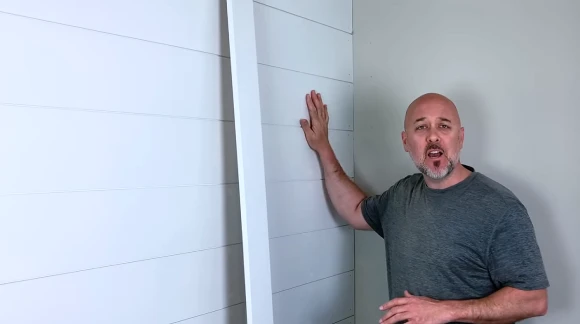
Adding the charming and timeless appeal of wood shiplap to your indoor spaces can transform the ambiance of your home. Depending on your design goals, you can use shiplap to create a rustic farmhouse look or a modern coastal vibe. But can you put shiplap over the stucco to give them a polished, professional appearance?
You can make your stucco walls more interesting by embracing wood shiplap’s rustic charm and adding dimension. Shiplap installation over stucco not only introduces a touch of character but also presents a unique set of challenges and opportunities.
This article will explain to you the process of installing wood shiplap siding over stucco walls. We’ll also discuss whether painting the shiplap before or after installation is necessary.
How Can You Put Shiplap Over Stucco: Follow the Steps
You’ll need to follow a few key steps to put wood shiplap siding over a stucco wall.
- Step 01: Gather materials
- Step 02: Prepare the surface
- Step 03: Attach furring strips
- Step 04: Cut shiplap boards
- Step 05: Apply construction adhesive
- Step 06: Attach shiplap boards
- Step 07: Continue installing rows
- Step 08: Finishing touches
Let’s explore each step more closely.
Step 01: Gather Materials
You will need all the necessary materials to install wood shiplap over stucco. These include:
- Wood shiplap boards
- Furring strips or wooden battens
- Construction adhesive
- Galvanized screws or nails
- Level
- Measuring tape
- Saw
- Drill/driver
- Caulk and caulk gun
- Primer and paint (if desired)
- Safety equipment (goggles, gloves, etc.)
Step 02: Prepare the Surface
Before beginning, make sure the stucco surface is clean, dry, and free of any debris. This will ensure proper adhesion of the wood shiplap to the stucco wall.
Start by thoroughly cleaning the surface using a pressure washer, stiff brush, and soapy water. Pay special attention to any areas with dirt or grime buildup.
Once clean, allow the stucco to dry completely before proceeding. Moisture can interfere with the adhesion process and compromise the integrity of your installation.
Inspect the stucco for any cracks or damage and repair them as necessary using an appropriate filler or patching compound. Take your time during this step, as it will set a strong foundation for your wood shiplap installation.
Step 03: Attach Furring Strips
To ensure proper installation of the wood shiplap, place furring strips vertically on the stucco wall. Use construction adhesive and galvanized screws or nails to secure them in place.
The furring strips create a flat surface for the shiplap boards to be attached to, preventing any unevenness caused by the stucco texture. It is important to space the furring strips evenly, typically 16 to 24 inches apart, depending on the size of your shiplap boards.
This ensures that each board has enough support and prevents sagging or warping over time. Care to align each strip properly and ensure they are fastened securely.
Step 04: Cut Shiplap Boards
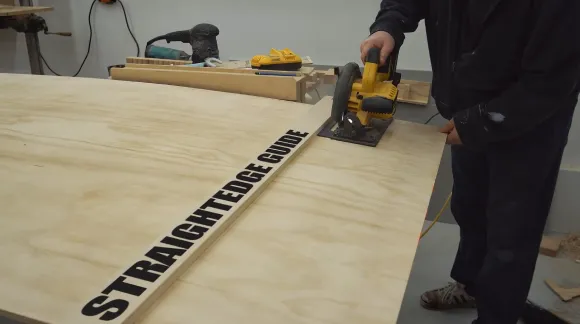
To determine the size of shiplap boards needed, measure the height and width of the wall and use a saw to cut them accordingly. Make sure to account for any windows or doors in your measurements.
When cutting the shiplap boards, it’s essential to have a straight edge as a guide for your saw. Be mindful of any electrical outlets or switches on the wall. You may need to create notches or holes in the shiplap boards to accommodate these fixtures.
Also, think about how the shiplap boards will run vertically or horizontally, affecting how you cut them.
Step 05: Apply Construction Adhesive
Once you’ve cut the shiplap boards to the appropriate size, it’s time to apply construction adhesive. The construction adhesive will provide extra stability and prevent any potential warping or movement of the shiplap boards in the future.
Start by applying a generous amount of construction adhesive to the back of each shiplap board. Use a caulking gun or a trowel to spread it evenly across the surface, covering all edges and corners.
Press firmly against the furring strips to create a strong bond between the board and the wall. Repeat this process for each board until they are all securely attached.
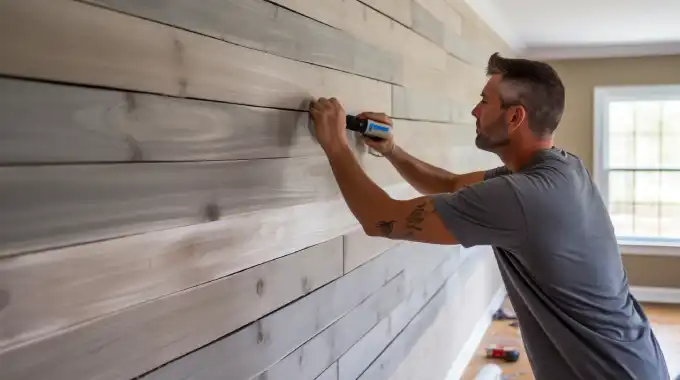
Step 06: Attach Shiplap Boards
Ensure the shiplap boards are level and aligned properly before securing them to the furring strips with galvanized screws or nails.
Take your time to carefully position each board, ensuring they are flush against each other, and there are no gaps or unevenness. Once you have confirmed their alignment, proceed to attach the boards using galvanized screws or nails.
It is recommended to place the fasteners through the overlapping part of the shiplap boards to hide them from view. This will give your finished project a clean and seamless appearance.
Step 07: Continue Installing Rows
As you continue attaching the rows of shiplap boards, remember to overlap them and use a level to ensure they are straight and even.
By overlapping the boards, you create a tight seal that helps prevent moisture from seeping through. A level will guarantee that each board is perfectly aligned, eliminating potential gaps or unevenness. Trim the last board in each row to fit the wall space accurately if necessary.
Step 08: Finishing Touches
Once you have installed all the rows of shiplap over your stucco wall, it’s time to add those finishing touches.
Start by inspecting the gaps between the boards. Use a caulk gun to apply a bead of caulk along any visible gaps or seams to create a seamless look. Smooth out the caulk with your finger or a putty knife for a clean finish.
Next, check for any rough edges on the shiplap boards that may need sanding. Use medium-grit sandpaper to smooth them down until they are even and smooth to the touch. According to your preferences, prime and paint the shiplap boards after installation.
Can I install shiplap over textured stucco?
You can definitely install wood shiplap over textured stucco, but achieving a completely flat surface might be a bit more challenging.
When dealing with textured stucco, it’s important first to assess the level of texture and determine if it needs to be smoothed out before installation. If the texture is minimal, you can proceed without any adjustments. But, if the texture is significant, consider using a sander or filler to smooth out the uneven areas.
Should I paint the shiplap before or after installation?
Installing the shiplap before painting may be easier, as it allows for better accessibility to all surfaces. Painting the wood shiplap boards before installation ensures that every nook and cranny is covered with paint. Painting beforehand also prevents potential drips or splatters on your newly installed shiplap.
Touch-up painting may still be necessary after installation, especially if visible screw heads or blemishes need covering up.
Transform Your Stucco Space with Stylish Wood Shiplap
Installing wood shiplap over a stucco wall is a practical and stylish option for transforming your space. You can successfully attach the shiplap to the textured surface by following the proper techniques discussed above.
It is recommended to paint the shiplap before installation to ensure complete coverage. Remember to use appropriate tools and materials for a seamless finish.
With this simple yet effective method, you can achieve a stunning and unique look for your walls, making your friends green with envy.