Last Updated on March 20, 2023
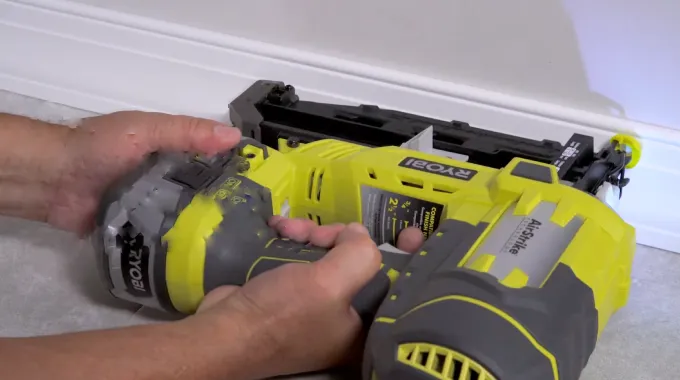
One essential tool for many home renovation projects is a nail gun. This is why many people ask: Can you use a nail gun on drywall? The answer is yes, but taking the time to choose the right type of nail gun and nails for your particular project pays off in the end with greater accuracy and less damage to your walls.
We will explain how to select the right nail gun and nails for drywall installation, as well as some tips and considerations that will help you get the best results. We’ll also discuss if you should use a nail gun to shoot screws and why nails might pop out of drywall. Read on to learn more.
How to Choose the Right Nail Gun with the Right Nails to Use on Drywall?
Steps You Should Follow to Choose the Right Nail Gun
Choosing the right nail gun can be a difficult and overwhelming task. With so many different nail guns, ranging from manual to pneumatic and electric models, it can be tricky to determine which tool will best suit your needs.
The main factor to consider when choosing a nail gun is the type of job you plan to use it for. Here are 10 steps for desiring the right nail gun for attaching drywall:

Step 01: Determine the size of the area you will be covering. This will help you decide the type of nail gun that is most suitable for your needs.
Step 02: Consider the type of framing or studs you will be attaching the drywall to. Some nail guns are better suited for certain types of framing, such as wood or metal.
Step 03: Decide on a power source. Nail guns can be pneumatic (powered by compressed air), cordless (powered by a battery), or electric (powered by a cord). Each type has its own advantages and disadvantages.
Step 04: Look for a nail gun with a magazine that can hold a sufficient number of nails. This will help you avoid having to stop and reload the nail gun frequently.
Step 05: Choose a nail gun with a depth adjustment feature. This will allow you to control the depth of the nails and ensure that they are not driven too far into the drywall.
Step 06: Consider the weight and size of the nail gun. You will be using the nail gun for an extended period of time, so it is important to choose one that is comfortable and easy to handle.
Step 07: Check the warranty and customer service options offered by the manufacturer. A good warranty and reliable customer service can provide peace of mind and protect your investment.
Step 08: Read reviews and ask for suggestions from other professionals or DIY enthusiasts. This can help you find a high-quality product that has proven to be effective and reliable.
Step 09: Determine your budget. Nail guns can range in price from relatively inexpensive to quite costly. Consider your needs and what you can afford before making a decision.
Step 10: Purchase the nail gun and any necessary accessories, such as nails and hoses. Make sure you have everything you need to get started on your project.
How to Pick the Right Nail According to Your Nail Gun?
Picking the right nail for your nail gun is essential to ensure that you get a secure, long-lasting hold and finish. Here are 10 steps for choosing the right nails for attaching drywall:
Step 01: Determine the kind of nail gun you will be using. Different nail guns require different types of nails, so it is important to know which one you have.
Step 02: Consider the length of the nails. For drywall, you will want to use nails that are at least 1-1/4 inches long. This will help ensure that they provide sufficient support and do not pull through the drywall.
Step 03: Choose nails with a smooth shank. Nails with smooth shanks are less likely to cause cracks in the drywall.
Step 04: Select the right material for the nails. Galvanized nails are a good choice for drywall, as they are rust-resistant and will not stain the drywall.
Step 05: Consider the type of head on the nails. Nails with a flat head or a decorative head may be more visually appealing, but they can be more difficult to cover with a joint compound. Nails with a smaller, round head may be easier to conceal.
Step 06: Look for nails that are specifically designed for use with drywall. These may have features such as a coating that helps them grip the drywall more effectively.
Step 07: Determine the number of nails you will need.
Step 08: Check the packaging of the nails to ensure they are compatible with your nail gun. Some nails may be too long or too short to work with certain nail guns.
Step 09L Read reviews and ask for recommendations from other contractors or DIY enthusiasts. This will assist you in finding high-quality nails that will work well for your needs.
Step 10: Purchase enough nails to complete the job, but be sure to also have some extras on hand in case you need them. It is better to have too many nails than not enough.
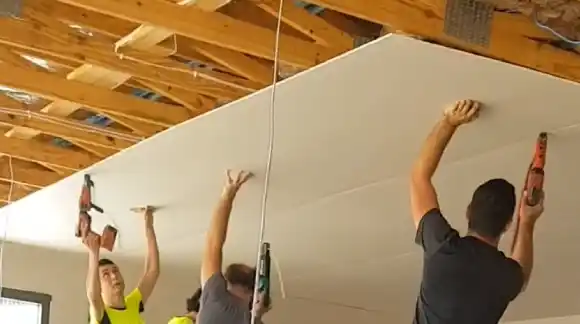
How Do You Nail into Drywall Using a Nail Gun?
Using a nail gun to secure nails in drywall is an easy and efficient way to complete your project. Here are the steps for nailing a nail into drywall using a nail gun:
Step 01: Gather your materials. You will need a nail gun, nails, safety goggles, ear protection, and a drill or screwdriver (if using an electric nail gun).
Step 02: Set up your work area. Make sure you have enough space to work comfortably and that the area is well-ventilated.
Step 03: Put on your safety goggles and ear protection. Protecting your eyes and ears when using a nail gun is important.
Step 04: Load the nail gun with nails. Consult the manufacturer’s instructions for specific details on how to do this.
Step 05: Connect the nail gun to an air compressor or plug it in, depending on the type of nail gun you are using.
Step 06: Test the nail gun to make sure it is working properly. Follow the manufacturer’s instructions for testing the nail gun.
Step 07: Hold the nail gun with both hands, keeping your fingers away from the nozzle.
Step 08: Position the nozzle of the nail gun against the drywall where you want to place the nail. Make sure the nail gun is perpendicular to the drywall.
Step 09: Press the trigger of the nail gun to drive the nail into the drywall.
Step 10: Repeat the process as needed to attach the drywall to the framing or studs.
Additional Tips on Drywall Nail Guns
Tip 01: To ensure tool longevity and safety, use a nail gun exclusively for soft materials like wood or drywall. Driving nails into harder substances such as brick or concrete can cause damage to the tool, resulting in hazardous consequences.
Tip 02: Be sure to drive your nails straight. Driving nails at an angle is not advised. Doing so could cause the nails to bend or break or could damage both it and your project, leading to undesired results. Use caution when operating any equipment.
Tip 03: Drive nails with care, particularly in less visible or accessible areas, to avoid weakening structures and potential damage.
Tip 04: Ensure safe usage when working with a nail gun. Protect your eyes, ears, and head by wearing the appropriate safety gear: glasses, earplugs, and a hard hat.
Tip 05: Working with a nail gun can be hazardous without proper knowledge and training. You should receive training or thoroughly read the manufacturer’s instructions using a nail gun. It is essential to understand the capabilities of nail guns before using them. Failing to do so can lead to unsafe results. Proper instruction ensures the safe and successful use of this powerful tool.
Tip 06: Faulty or damaged nail guns can have disastrous effects, from improper attachment to potential harm. So it is essential to ensure the unit is in good working order before use. Employers and employees must take caution when using nail guns, as they are highly precise tools.
Tip 07: Exercise caution when using a nail gun. Its use is intended for specific materials only, and deviating from this can result in potential harm or property damage.
Tip 08: Ensure nails are correctly loaded and aligned to prevent potential injury or damage from improper placement. A nail gun requires exacting accuracy for safe usage.
Tip 09: Properly secure your workpiece before using a nail gun. A securely clamped surface prevents the displacement of materials and ensures that nails are placed correctly to avoid damage or injury.
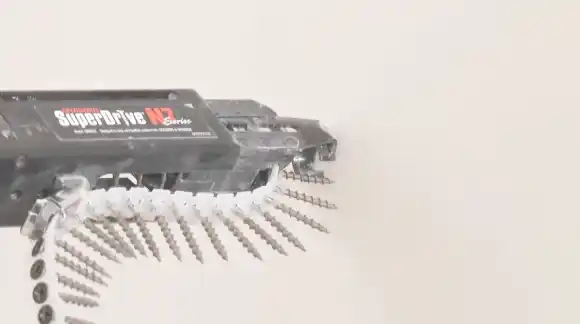
Should You Use Nail Guns to Shoot Screws?
Nail guns are typically designed for shooting nails, but some models may also include an adapter for using screw-collated strips or washer head screws. Using nail guns to shoot screws is not recommended because nail guns are not designed for this purpose.
Nail guns are designed to shoot nails, thin, pointed fasteners are used to hold materials together. Screws are different from nails in that they have threads, which allow them to be tightened or loosened by turning them with a screwdriver or drill.
Screws are typically used for applications requiring a stronger or more adjustable hold. Shooting screws using a nail gun can potentially damage the tool and result in improper screw placement, which can weaken the structure and potentially cause damage or failure.
Using the correct tool for the job is important to ensure safe and effective results.
Why Do Nails Pop Out of Drywall?
Nails can pop out of drywall for a variety of reasons. Some common causes include:
1. Nails that are too short
If the nails used to attach the drywall are too short, they might not be able to reach the framing behind the drywall. This can cause the nails to loosen over time and eventually pop out of the drywall.
2. Nails that are too thin
Thin nails may not have enough strength to securely hold the drywall in place, especially if the drywall is subjected to heavy loads or vibration.
3. Drywall that is damaged or wet
If the drywall has been damaged or exposed to water, it may become weaker and more prone to nail popping.
4. Poor installation techniques
If the nails are not driven straight or are not spaced correctly, they may become loose and ultimately pop out of the drywall.
To prevent nails from popping out of the drywall, use the correct size and length of nails for the job, to ensure that the nails are driven in straight and spaced correctly, and to ensure that the drywall is in good condition before installing it.
If you are concerned about the stability of the drywall, consider using heavier-duty fasteners to secure the drywall to the framing.
Final Thoughts
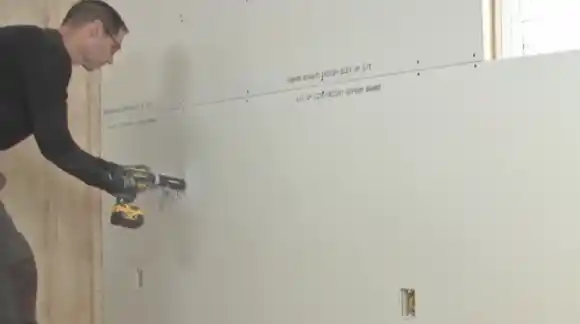
A nail gun can be a useful tool for attaching drywall to wooden framing, as long as you choose the proper nail gun with the nails required.
Several types of nail guns are designed specifically for use on drywall, including pneumatic, electric, and hybrid nail guns and drywall screw guns. Choosing the right size and length of screw or nail for the job is important as following proper safety precautions when using a nail gun.
Depending on whether you are uncertain about the resilience of the drywall, you might want to use heavier-duty fasteners, such as screws or toggle bolts.
If you’re planning a drywall project, be sure to do your research and choose the best tools and materials for the job. A little bit of preparation can go a long way in helping you achieve the best possible results.