Last Updated on September 16, 2023
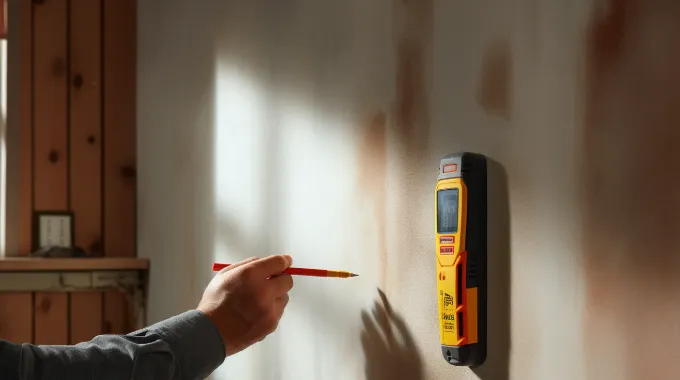
Finding studs hidden beneath cement boards and tiles is often challenging in home improvement projects. Even with an experienced eye, it is hard to detect the hidden studs. Now you may want to know whether a stud finder works through cement board.
Stud finders are essential tools that assist in locating studs behind cement boards, making fixtures and accessories easy to install. These devices utilize innovative technology to penetrate the density of cement board and accurately pinpoint stud locations.
This article explains how stud finders work through cement boards, exploring magnetic and electronic options.
How Does Stud Finder Work Through Cement Boards?
If you’re working with cement boards and tiles, two types of stud finders can assist you:
- Magnetic stud finders
- Electronic stud finders
- Edge finders
- Center finders
- Instant finders
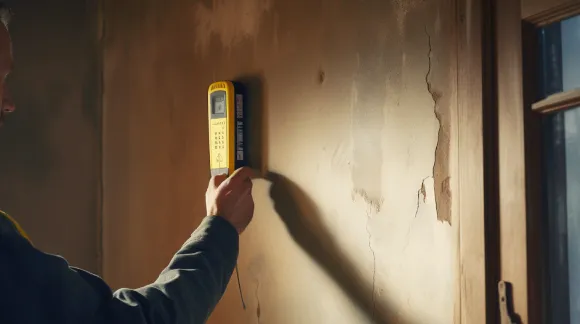
01: Magnetic Stud Finders
Run the magnetic stud finder along the wall surface to find studs through the cement board. It will be drawn to the metal screws or nails used to attach the board to wooden studs. These devices work by utilizing a small magnet attracted to the metal fasteners in the wall.
As you move the magnet across the surface, it detects and indicates the presence of a stud. This method is simple, cost-effective, and requires no batteries or calibration. And magnetic stud finders can only detect metal fasteners.
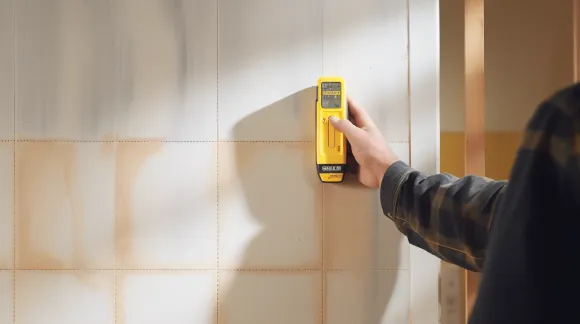
02: Electronic Stud Finders
Regarding electronic stud finders, there are three main types that you should be aware of: edge finders, center finders, and instant finders.
- Edge Finders
You can interpret the results accurately through cement board with edge finders, although it may require some skill. These devices locate the edges of studs by detecting the density change from the stud to the empty space between studs.
They are designed to indicate the width of the stud, allowing you to locate its center precisely. While edge finders are less expensive than center finders, their effectiveness on cement boards depends on your proficiency in interpretation.
- Center Finders
A center finder can accurately locate the exact center of studs on cement board walls. This advanced electronic tool goes beyond just finding the edges of studs and provides precise positioning for objects like shelves or hooks.
Center finders often include additional features such as depth measurement and live electrical wire detection, although these capabilities may vary depending on the model.
With a center finder, you can confidently install items on your cement board wall accurately and easily.
- Instant Finders
For quick and efficient stud detection on bumpy walls, try an instant finder that can accurately locate the edges and centers of multiple studs simultaneously.
These advanced detectors have multiple sensors and take multiple readings, eliminating the need to move them across cement board walls. With their ability to detect multiple studs simultaneously, these instant finders provide precise and reliable results.
How Do You Find Studs Through Cement Board with a Stud Finder?
To find studs through cement board with a stud finder, you need to follow a few key steps:
- Step 01: Choose the right mode
- Step 02: Calibrate the stud finder
- Step 03: Start from an edge
- Step 04: Overlap scans
- Step 05: Verify the pattern
- Step 06: Check for consistency
- Step 07: Confirm by tapping
Step 01: Choose the Right Mode
Professionals recommend electric stud finders because magnetic ones have limitations. So, we’re going to use electrical stud finders.
Select the appropriate mode on your stud finder to detect studs behind the cement board. Many electronic stud finders have different scanning modes designed for different wall materials.
Some models may offer a specific mode for detecting studs behind dense materials like cement board or tile. Before starting, consult the user manual of your stud finder to determine if it provides such a mode and how to activate it accurately.
Step 02: Calibrate the Stud Finder
Begin by placing the stud finder on a known area without studs and initiate the calibration process as directed. This procedure allows the device to adjust its sensitivity and detection capabilities, ensuring it can accurately locate studs behind various wall materials, including cement board.
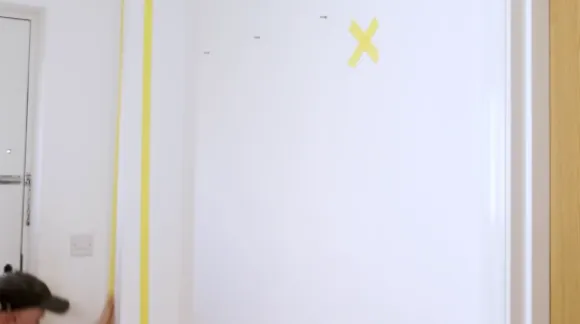
Step 03: Start from an Edge
Begin your search at the edge of the cement board, slowly sliding the stud finder horizontally across the surface. Ensure that you maintain a straight line while moving.
As you progress, pay close attention to any changes in density displayed by the stud finder. These density changes could indicate the presence of a stud.
To accurately determine the boundaries of these potential studs, mark the edges where density changes occur. This method will help you precisely and efficiently locate studs through a cement board.
Step 04: Overlap Scans
As you continue scanning along the wall, slightly overlap your scans with the previous ones to avoid missing any potential stud locations.
Step 05: Verify the Pattern
To ensure accuracy and reliability, you should verify the pattern of potential stud locations by continuing to scan along the wall. In most construction, studs are spaced either 16 or 24 inches apart.
Take your time and thoroughly scan the entire wall surface, noting any consistent intervals between potential stud locations. This will help you accurately identify where to find studs behind cement boards.
Step 06: Check for Consistency
Once you’ve identified potential stud locations, rescan those areas to ensure the density change remains consistent.
You can confirm that the studs produce a consistent density change throughout their length by rescanning the identified spots. Detecting studs reliably and avoiding errors and false readings during your project requires accurate consistency.
Step 07: Confirm with Tapping
Use a small hammer or knuckles to lightly tap on the wall to determine if a solid, dull thud indicates a stud. This method allows you to verify the initial stud positions you located.
Revolutionizing Home Improvement: Finding Studs on Cement Board Walls
Now you see, finding studs hidden behind cement boards is no longer a hindrance in your home improvement projects. Due to the existence of stud finders, locating studs has become more efficient, accurate, and reliable.
With magnetic and electronic options available, you can expect to detect studs effortlessly and accurately within seconds. By following the step-by-step process, you can ensure that your fixtures and accessories are anchored safely and securely onto the walls.
So, the next time you do a renovation or construction project, you can have confidence that a stud finder will do the job right.


