Last Updated on September 13, 2023
Painting cement boards is complex, but it’s actually pretty easy. You’ll be a pro with the right tools and steps in no time.
To finish your cement board, you have to fill in any joints and screw holes. You may also want to apply joint tape for added reinforcement. Next, skim-coat the surface with a thin layer of joint compound. Once the skim coat has dried, sand the surface to remove any imperfections and create a silky finish.
We’ll go over all the steps in detail. Don’t let the thought of finishing cement board for paint scare you. Prepare to reveal your painting skills on a professionally finished cement board surface.
How to Finish Cement Board For Paint: Step-By-Step Guide
To finish the cement board for painting, you need to follow a step-by-step guide. The steps are as follows:
Step #2: Fill Joints and Screw Holes
Step #3: Apply Joint Tape (if necessary)
Now let’s get into the details.
Step #1: Clean the Surface
Ensure your surface is free of dust or debris before starting to ensure a smooth and flawless paint job. Sweep the cement board surface with a broom to remove loose particles. Be thorough in this step, as even small bits of debris can affect the final outcome of your painting project.
Use a vacuum cleaner with an attachment designed for hard surfaces for more precise cleaning. It’ll help eliminate finer dust and debris in crevices on the cement board. Make sure to go over the entire surface area multiple times until you’re confident that all dirt has been removed.
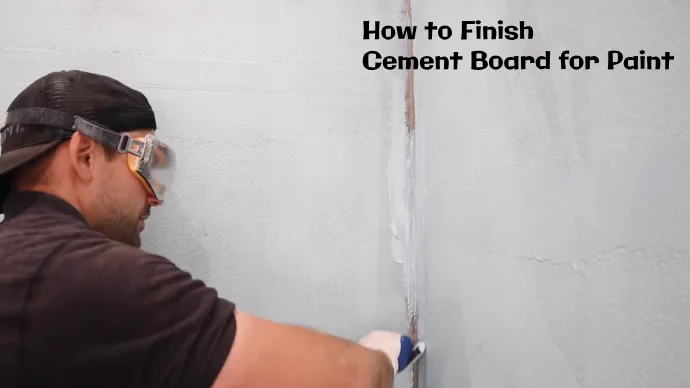
Step #2: Fill Joints and Screw Holes
Now fill in any joints or screw holes with a high-quality cement board filler. Use a putty knife to apply the filler, filling every joint and hole completely. Be sure to press down firmly on the putty knife to push the filler into all the crevices.
After filling in all the joints and screw holes, smooth the surface out with your putty knife to ensure the filler’s level with the cement board. Allow sufficient drying time before sanding down any rough spots or excess material.
This will ensure that your new coat of paint adheres properly and looks professional and polished.
Step #3: Apply Joint Tape (if necessary)
Creating a seamless and strong surface is essential for any successful renovation. Remember to apply self-adhesive fiberglass mesh joint tape over noticeable gaps or cracks between cement board sheets. This will provide additional strength and prevent the joints from cracking over time.
To do this, press the tape firmly onto the joint, ensuring it’s centered and flat. When applying the joint tape, you need to ensure that there are no air pockets or wrinkles in the tape, as this could weaken its effectiveness.
You should ensure you’re using high-quality tape designed for cement board use.
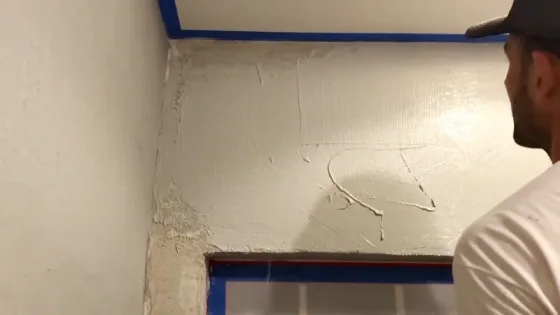
Step #4: Skim Coat
After applying the necessary joint tape, it’s time to smooth out the surface using a skim coat. This gives your cement board a flawless and polished look.
Mix the skim coat according to the manufacturer’s instructions, ensuring it’s lump-free. Then, using a trowel or putty knife, apply a thin layer of skim coat over the entire surface of the cement board. Make sure to spread it evenly so that there are no bumps or ridges.
As you apply the skim coat, fill in any gaps or imperfections left behind after applying joint compound and tape. Work slowly and carefully, taking care not to put too much pressure on, which can cause unevenness on the surface.
Once you’ve finished applying the skim coat, allow it to dry completely before proceeding with any further steps, such as sanding or painting.
Step #5: Sanding
To achieve a smooth and polished surface, lightly sand the skim coat with fine-grit sandpaper or a sanding block. This will ensure better adhesion for your next step.
Wrap the sandpaper around a block to get even pressure. Begin to sand the surface in circular motions gently. Ensure not to apply too much pressure, as this can damage the skim coat.
Keep going until all the high spots and roughness are gone. Once you have finished sanding, wipe away all of the dust with a clean cloth. Be sure to remove all of it so that none gets stuck under your paint, causing bumps or other imperfections.
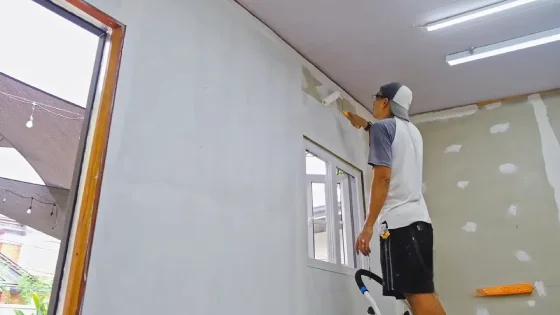
Step #6: Prime the Surface
After sanding the cement board, it’s time to prime the surface. This step is crucial in ensuring that your paint job looks fantastic and lasts long.
Applying a primer specifically designed for cement board will seal the surface and enhance paint adhesion. To apply the primer, you’ll need to follow the manufacturer’s instructions carefully.
Typically, you’ll need to apply one or two coats of primer with enough drying time between each coat. You need to wait until the first coat is completely dry before applying another layer.
Once you’ve finished priming, allow ample drying time before moving on to painting your desired color. You’re ready to paint your cement board now.
What type of paint do you use on the cement board?
You’ll want to ensure you use acrylic paint for the best results on your cement board so your hard work doesn’t go to waste.
Acrylic paint is water-based with excellent adhesion and durability properties, making it perfect for painting on a cement board.
It also dries quickly, which means you can apply a second coat in less time. Acrylic paint is especially important when painting new cement boards since oil-based primers can rough the surface.
This can prevent the paint from adhering properly, resulting in uneven coverage and peeling over time. Using acrylic paint ensures that your finished project looks great and lasts for a long time.
How long does paint last on the cement board?
Usually, a well-applied coat of paint can last up to 10-15 years before needing a fresh touch-up. But, this estimate is subject to various factors like the paint quality and exposure to external elements.
Factors such as harsh weather conditions, moisture exposure, and intense sunlight can all accelerate paint deterioration and shorten its lifespan.
To ensure your paint lasts as long as possible on cement board, follow proper surface preparation techniques before painting. Inspect and maintain the painted surface regularly.
Transform Your Cement Board Painting
Now you know how to finish cement boards for paint. Using our step-by-step guide, you can ensure your cement board is ready for any paint application.
In regards to choosing the right paint for the cement board, make sure to select one that’s specifically designed for this surface. This will ensure better adhesion and longer-lasting results.
Also, remember that the longevity of your painted cement board depends on various factors, such as exposure to sunlight and moisture levels. So, prepare to spice up your living space with fresh colors. Don’t let your cement board from being used, give it a facelift and admire its new, eye-catching look.


