Last Updated on September 16, 2023
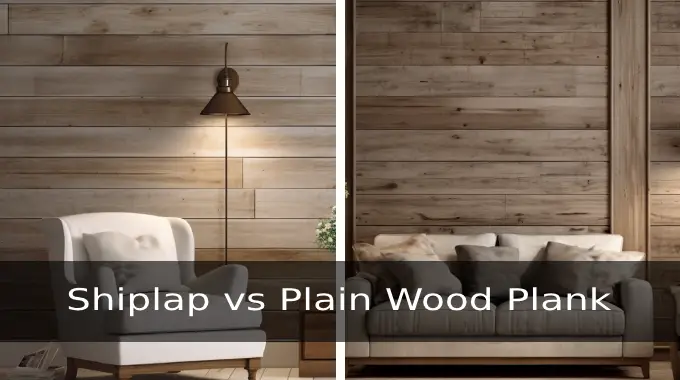
Finished shiplap edges of your interior walls help to achieve a polished and professional look. To accomplish this intricate task, there are a few methods that offer both aesthetics and structural integrity.
Using caulk is the best way. This involves applying a latex caulk to the seams where shiplap panels meet walls, corners, or moldings. Smoothing the caulk and allowing it to dry creates a tidy appearance that’s ready for painting.
The quarter-round molding method is another effective technique for concealing gaps between shiplap panels and defining their edges.
We will discuss these effective methods for finishing shiplap edges with a step-by-step guide.
How to Finish Shiplap Edges: 2 Methods (Step-By-Step)
Regarding finishing shiplap edges, you can use two effective methods. The following are among them:
- Method 1: Finishing shiplap edges using caulk
- Step 1: Apply the caulk
- Step 2: Smooth the caulk
- Step 3: Remove the excess caulk
- Step 4: Allow the caulk to dry
- Method 2: Trim out shiplap edges with quarter-round molding
- Step 1: Measure and cut the quarter-round molding
- Step 2: Attach quarter-round molding
- Step 3: Secure with nails
- Step 4: Fill the gaps and dry
Method 1: Finishing Shiplap Edges Using Caulk
Caulk is used to finish shiplap edges in four steps.
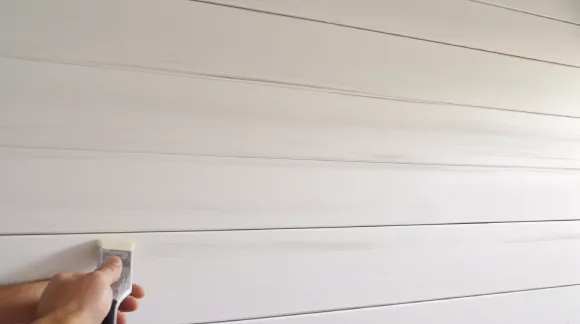
Step 1: Apply the Caulk
You’ll need to choose a paintable latex caulk specifically designed for wood. This type of caulk will adhere well to the shiplap panels and provide a smooth finish.
Using a caulk gun, apply a bead of caulk along the seams where the shiplap panels meet the inside wall corners, adjacent walls, or moldings.
Apply steady pressure on the caulk gun to ensure an even bead. Start from the top and work your way down for the best results.
Step 2: Smooth the Caulk
After applying the caulk, use a clean rag or your finger to smoothen it along the seams. By gently running your finger or rag along the caulk, you can ensure that it fills any gaps and creates a smooth surface.
Remember to wet your finger or rag before smoothing to prevent sticking, as latex caulk is water soluble.
Step 3: Remove the Excess Caulk
Before the caulk dries, use a damp cloth or sponge to remove any excess. Gently wipe away the excess caulk using a cloth or sponge, careful not to disturb the freshly applied caulk.
Take your time and thoroughly remove all traces of excess caulk for a clean and polished look.
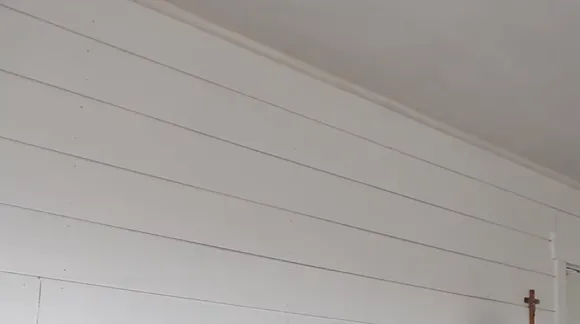
Step 4: Allow the Caulk to Dry
To ensure proper adhesion, let the caulk dry for approximately 24 hours before continuing with any further steps. During drying, the caulk will fully set and bond with the shiplap surface. Do not touch the caulk during this period to prevent any damage or imperfections.
Method 2: Trim Out Shiplap Edges With Quarter-Round Molding
To finish the edges of the shiplap with quarter-round molding, you need to follow four key steps.
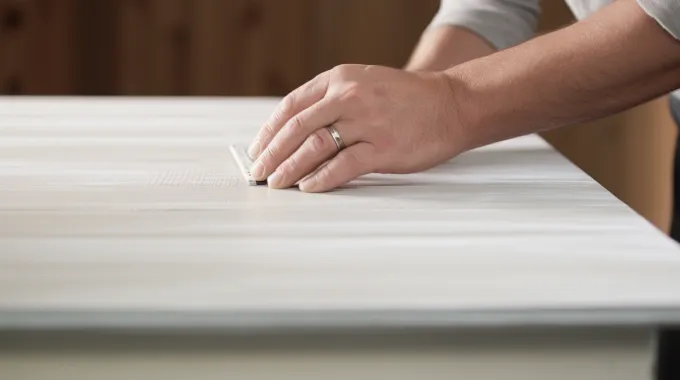
Step 1: Measure and Cut the Quarter-Round Molding
To begin with, you will need to cut quarter-round molding to the appropriate lengths at a 45-degree angle using a miter saw or table saw with safety measures. In this manner, your shiplap edges will be neatly finished and visually appealing.
For corners, cut the quarter-round molding at a complementary 45-degree angle to form a perfect 90-degree angle when joined together.
Take precise measurements and use the miter saw to create clean, accurate cuts for a professional-looking result.
Step 2: Attach Quarter-Round Molding
Now, apply a strong adhesive to the back of the quarter-round molding, pressing it firmly against the shiplap edge for a secure bond.
The adhesive will create a durable connection between the molding and the shiplap, preventing any gaps or movement.
Step 3: Secure With Nails
To ensure a neat appearance, use a nail gun to drive finishing nails through the quarter-round trim into the shiplap panel. Position the nails strategically along the trim length for optimal support.
Apply pressure as you push down on the nail gun trigger, allowing each nail to penetrate both the trim and panel securely. This will firmly secure the quarter-round molding, completing the finishing touch to your shiplap edges.
Step 4: Fill the Gaps and Dry
Now, use latex caulk to fill any gaps or seams between the quarter-round molding and the shiplap. Apply the caulk using a caulking gun, filling in any spaces between the molding and shiplap boards.
Smooth the caulk with a damp cloth or your finger for a clean and professional look. Allow the caulk to dry for about 24 hours.
What finish should you paint shiplap for a good outcome?
When deciding on the finish for painting shiplap, it’s crucial to consider both aesthetics and practicality.
A matte paint finish can give your shiplap walls a charming, understated elegance. It creates a smooth, non-reflective surface that adds depth to the texture of the wood.
The semi-gloss finish is better if your shiplap is in a traffic-heavy place, like an entryway or kitchen.
The semi-gloss finish not only adds a subtle sheen that complements the natural beauty of shiplap but also facilitates easier cleaning. Its smooth surface quickly removes splashes, smudges, and everyday wear marks.
In the end, the choice of finish depends on your desired look and the functional demands of the space in which your shiplap is installed.
What finish is more favorable for shiplap, a smooth or rough texture?
The choice between a smooth or rough texture for shiplap largely depends on personal preference and the aesthetic you aim to achieve in your project.
Opting for the smooth finished side can lend your space a more polished and refined look. It’s easier to clean and maintain, making it suitable for areas where hygiene might be a concern.
On the other hand, the rough edge can bring a rustic and authentic charm to your design. This texture can add depth and character to the environment, especially if you’re going for a more natural or weathered appearance.
Bring Your Shiplap Vision to Life
You now know how to finish shiplap edges impeccably with caulk and quarter-round molding. With meticulous attention to detail, our mentioned steps ensure that your shiplap project attains a flawless and professional appearance.
With caulk or quarter-round molding, you can elevate the aesthetics and durability of your shiplap walls by creating sleek lines.
The choice of finish, between matte or semi-gloss, depends on both the desired look and the practical requirements of the space. With these insights in hand, you’re ready to achieve shiplap perfection in your home.