
Last Updated on September 16, 2023
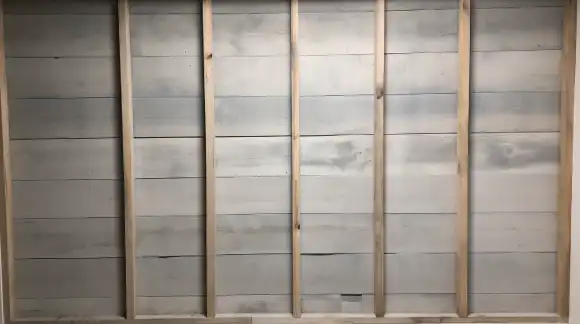
Installing the shiplap boards on concrete walls will transform your space, bringing a touch of rustic charm and warmth to an otherwise solid and industrial surface.
If you’re intrigued by seamlessly blending these two elements, you might wonder, “Can you glue shiplap to a concrete wall?”
You can certainly glue the shiplap to a concrete wall. The process of adhering shiplap to a concrete wall entails applying the adhesive to the backside of the shiplap boards and securing them to the prepared surface.
While adhesive provides the primary bond, using finishing nails can offer additional support during the curing process.
We will discuss how to glue shiplap to a concrete wall so you can confidently embark on this project to revamp your space.
How Can You Glue Shiplap to the Concrete Wall: Follow These Steps for Installation
To successfully glue a shiplap to a concrete wall, there are several key steps you need to follow.
Step 1: Prepare the surface
Step 2: Apply the adhesive
Step 3: Position and install the shiplap
Step 4: Secure the shiplap
Let’s go over the steps in detail so that you can successfully glue the shiplap to the concrete wall.
Step 1: Prepare the Surface
It is recommended that you lightly sand the concrete wall to create a slightly rough texture. This texture will help the adhesive grip onto the wall better, ensuring a more secure attachment for your shiplap.
After sanding, thoroughly clean the concrete wall surface to remove any dirt or debris before gluing the shiplap.
Use a broom or brush to sweep away loose dirt and dust, and then use a damp cloth or sponge to wipe down the entire surface. Pay close attention to any areas that may have accumulated grime or oil, as these can prevent proper adhesion.
Step 2: Apply the Adhesive
Once the surface is prepared, it’s time to apply the adhesive to the back of the shiplap boards.
Using a caulk gun, you will need to apply a generous amount of adhesive in a zigzag or wavy pattern across the length of each board. The goal is to cover a substantial portion of the board’s back surface with adhesive.
You need to apply the adhesive evenly, as this will help prevent any gaps or weak spots in the bond.
Take your time and be thorough in this process, as it will greatly contribute to the overall strength and stability of your shiplap installation on the concrete wall.
Step 3: Position and Install the Shiplap
Now, press the shiplap boards firmly against the concrete wall, starting from the bottom and working your way up.
Align the boards accurately to maintain the shiplap’s clean and professional appearance. Use a level to guide you during installation to ensure that the shiplap boards are both straight and level.
You should consider that wood can expand and contract due to changes in humidity and temperature.
Therefore, leaving a small gap between the edges of the shiplap boards and adjacent surfaces, such as the ceiling or corners, is recommended. This gap allows for wood movement without causing any damage or warping.
Step 4: Secure the Shiplap
Now that you’ve successfully positioned and installed the shiplap boards on the concrete wall, it’s time to secure them in place. To achieve this, you’ll need to use finishing nails or brad nails along with a hammer and a level.
Once you’ve applied the adhesive to the board’s backside and positioned it on the wall, gently hold the board in place.
Take your hammer and carefully drive the nails through the top edge of the shiplap board at an angle, aiming for the tongue portion of the board to conceal the nails from view.
Ensure each nail goes through the shiplap and into the concrete wall, securely anchoring the board.
To ensure consistent support, space out these nails evenly along the length of each board. As you continue with each subsequent board, remember to use a level to maintain proper alignment throughout this process.
How long does the adhesive take to cure after attaching a shiplap to a concrete wall?
The adhesive usually takes about 24 to 48 hours to fully cure after installing shiplap on concrete walls. You need to adhere to the manufacturer’s guidelines for the specific adhesive you use, as curing times can differ based on the product.
During this curing period, avoid any disturbance or stress on the shiplap boards to establish a strong and long-lasting bond between the wood and the concrete surface.
The curing process allows the adhesive to reach its maximum strength and ensures that the shiplap remains securely attached to the concrete wall.
Can you glue the shiplap to the painted concrete walls?

It is possible to glue shiplap to painted concrete walls, but you have to consider a few factors for a successful installation.
For starters, ensure the painted surface is clean, dry, and free of loose paint or debris. This will provide a better adhesive bond. Next, choose a high-quality construction adhesive suitable for wood and concrete surfaces.
Apply the adhesive to the back of the shiplap boards, ensuring even coverage. Press the shiplap firmly against the wall and use temporary supports to keep them in place while the adhesive sets.
Keep in mind that adhesive strength can vary, so it’s a good idea to follow the manufacturer’s recommendations for drying and curing times.
Perfectly Pair Shiplap and Concrete Using Glue
Gluing shiplap to a concrete wall is indeed possible. By following these four easy steps, you can successfully bring together the rustic beauty of shiplap and the sturdy surface of a concrete wall.
Proper surface preparation, adhesive application, and securing techniques are vital for a secure and lasting installation. Whether you want to add character to your interior or revamp an outdoor space, gluing shiplap to a concrete wall offers a creative and appealing solution.
Embrace the transformation and enjoy the fusion of these two distinct elements in your space.