Last Updated on July 30, 2023
Most of us are familiar with the traditional horizontal orientation when installing sheetrock. But can you hang sheetrock vertically?
You can definitely hang sheetrock vertically, and it can even provide some benefits over traditional horizontal installation methods. But, there are some essential considerations that you need to keep in mind before starting the project.
Factors such as the weight capacity of the sheetrock and the spacing of screws will impact the outcome of your installation. Also, consider whether the sheetrock should be tightly secured against the floor.
We’ll guide you through the process of hanging sheetrock vertically like a pro. So, let’s get started.
How to Hang Sheetrock Vertically? Step-by-Step Process
When hanging sheetrock vertically, there are several key steps that you should follow to ensure a successful installation. In a nutshell, here are the steps:
Step #1: Prepare the Workspace
Step #2: Measure and Cut the Panels
Step #3: Locate and Mark the Studs
Step #4: Install the First Panel
Step #5: Continue With The Remaining Panels
Step #6: Trim and Fit Around Obstacles
Step #7: Tape and Finish the Joints
Let’s now take a closer look at the details:
Step #1: Prepare the Workspace
Clear the area, wipe down the walls, and gather everything you need. You’ll need some stuff, including drywall panels, screws, a drill, a drywall knife, a T-square, and a tape measure. If needed, sharpen the drywall knife to ensure it’s nice and sharp.
Ensure that no debris or obstacles in your workspace could get in the way. You’ll want plenty of space to maneuver as you work on hanging the sheetrock vertically.
Step #2: Measure and Cut the Panels
Use a measuring tape to determine the length needed for each panel, and mark it with a pencil before cutting.
Make sure to use a sharp utility knife or saw to avoid jagged edges that could affect the final outcome of your work. If the wall height exceeds 8 feet, you may need to use longer panels or plan for an additional horizontal joint.
Step #3: Locate and Mark the Studs
Before beginning the installation process, you have to precisely locate and mark the studs on the floor and ceiling. This ensures a sturdy foundation for your project.
Use a stud finder or other methods to locate the vertical framing studs behind the wall. Once you’ve found them, mark their positions on both the floor and ceiling as a guide for when you begin hanging your sheetrock vertically.
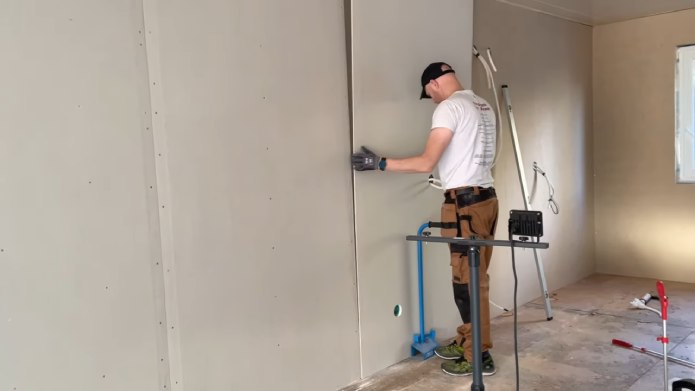
Step #4: Install the First Panel
Now it’s time to attach the first panel to the wall, aligning one edge with the corner and ensuring it is level and plumb.
You will need someone to hold the drywall panel vertically against the wall while you secure it with drywall screws. Start from the center and work your way outward.
Ensure that this first panel is securely fastened before adding additional panels. Take your time with this step, as it’ll set a strong foundation for your overall sheetrock installation project.
Step #5: Continue With The Remaining Panels
To maintain momentum, carefully align the edges of each subsequent panel tightly against the previous one. Use a T-square to ensure they are straight and vertical. This way, you can feel confident in the stability of your project.
Continue screwing the panels into the studs as before, ensuring they’re securely attached. Use a level to double-check that everything’s plumb and square.
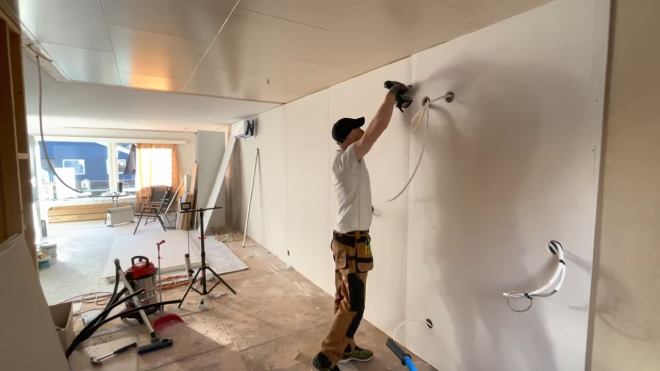
Step #6: Trim and Fit Around Obstacles
Trim and fit the drywall around any obstacles with precision cuts that seamlessly blend with the surrounding surface to achieve a polished finish.
To ensure a proper fit, measure and mark the cutouts on the panels for areas around electrical outlets, windows, or other obstacles. This helps accommodate the drywall in those specific areas.
Use a drywall knife to carefully cut out the necessary openings, ensuring the cut edges are clean and smooth.
Step #7: Tape and Finish the Joints
To achieve a flawless finish for your drywall installation, you need to tape and mud the joints. Apply drywall tape over the seams before spreading the joint compound (mud) to fill in any gaps. Use a drywall knife to smooth out the mud and let it dry completely before sanding lightly to create an even surface.
Step #8: Sand and Finish
Now that the joint compound is dry and smooth, it’s time to sand the entire surface to create a uniform finish.
You’ll want to use fine-grit sandpaper and work in a circular motion, removing any bumps or ridges left by the mud application process. Be careful not to over sand, as this can damage the sheetrock surface.
Once you’ve finished sanding, take some time to clean up all of the dust before applying primer. This will ensure that your paint or wall finish adheres properly and looks its best.
How much weight can sheetrock hold vertically?

A standard 1/2-inch thick sheetrock can support up to 50 pounds when properly installed and secured to the studs.
Using anchors or toggle bolts designed for heavier loads can increase its weight-bearing capacity to approximately 100 pounds.
How long does it take to install sheetrock?
Sheetrock installation time can be affected by various factors, including the size of the area that needs to be covered, the design’s complexity, and the workers’ skill level.
On average, it takes around 10 to 15 minutes for a skilled drywaller to hang a single 4X8 sheet of drywall. This time frame can vary depending on the circumstances mentioned above, as well as things like the type of drywall being used, the height and accessibility of the ceiling, and the amount of cutting and measuring needed.
Generally, a drywalling crew of two to four workers can take anywhere from six days to two weeks to hang and finish sheetrock in a new home.
Should sheetrock be tight or gap from the floor?
Make sure to leave a small gap on the floor when installing sheetrock, as this allows for natural movement and prevents damage to the drywall.
Without this gap, the flooring and walls will expand and contract with changes in temperature or humidity, causing stress on the drywall that could lead to cracks or other damage.
Should I hang the sheetrock from the top or bottom first?
You need to hang the uppermost panels first when installing sheetrock. This creates a stable base and allows gravity to assist in holding subsequent panels in place for a smoother and more professional-looking installation.
If you start from the top, your lower panels will be properly fitted and aligned with the upper ones.
How far apart are sheetrock screws?
When working on ceilings, it’s recommended that you space the screws no more than 12 inches apart. This closer spacing provides adequate support to prevent sagging.
On the other hand, when hanging sheetrock on walls, you can space the screws at a maximum of 16 inches apart. Make sure you leave a minimum distance of 3/8 inch from the ends and edges of the panels when placing screws to ensure their stability.
Master the Art of Hanging Vertical Sheetrock with Confidence
You’ve successfully learned how to hang sheetrock vertically. With these considerations and steps, you can tackle any vertical installation project with confidence.
Remember always to measure twice, cut once, and ensure that the sheetrock is level before securing it with screws. One important thing to remember is your sheetrock’s weight capacity.
Ensure not to exceed the maximum weight limit recommended by the manufacturer, as it could compromise the structure and safety of your walls or ceilings.
Spacing out your screws evenly will help distribute weight more effectively and reduce the risk of sagging over time.
You don’t have to be a pro to hang sheetrock vertically, but with some practice and patience you’ll get professional results.


