Last Updated on September 16, 2023
Outdated paneling can cast a shadow of stagnation over the ambiance of a room, leaving a space feeling confined and uninspiring. In such instances, the prospect of transformation can seem daunting, with the removal of the existing paneling presenting its own set of challenges.
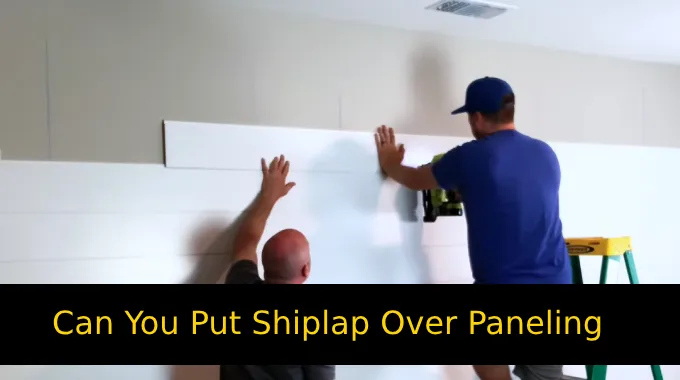
Now you might think, can you put shiplap over paneling to perfect your space without risking the expense and mess of a more extreme overhaul?
Shiplap offers a great way to modernize the look of outdated paneling, creating an open and airy feel. This versatile design element not only offers a fresh aesthetic but also the promise of an uncomplicated update that redefines the room’s appearance. But you need a perfect installation process to find the actual result.
Here, we’ll discuss how to update your space with shiplap over paneling in just seven simple steps. We’ll cover the best materials for the job, cutting techniques, and finishing.
Can You Put Shiplap over Paneling: Step-by-Step Process

When you’re considering putting shiplap over paneling, there are several key steps you’ll need to follow.
- Step 01: Materials and Preparation
- Step 02: Measuring and cutting
- Step 03: Wall studs and marking
- Step 04: Design considerations
- Step 05: Applying adhesive and attaching shiplap
- Step 06: Filling holes and finishing
- Step 07: Painting and sealing
Step 01: Materials and Preparation
Gather all the materials you’ll need for the project, including:
- Shiplap boards
- Measuring tape
- Circular or table saw
- Sandpaper
- Liquid nail paneling adhesive
- A stud finder,
- A level,
- A finish nailer,
- Wood filler,
- Paint, primer,
- Caulk and the appropriate painting tools
These materials will ensure that your shiplap installation is successful and long-lasting.
Step 02: Measuring and Cutting
Start by measuring the height and width of the wall to determine how much shiplap you’ll need for the installation. Take accurate measurements to ensure you have enough material for a seamless finish.
Shiplap panels typically come in 8 ft sheets, so if your wall is taller or wider, you may need to cut the shiplap and splice the panels using a table saw. Be sure to measure multiple times to avoid any mistakes resulting in wasted materials or an uneven installation.
Once you have determined the dimensions, calculate how many panels you will need based on their size and the area of your wall. Remember to account for any windows, doors, or other obstacles requiring additional cuts or adjustments.
Step 03: Wall Studs and Marking
Using a stud finder, locate and mark the positions of the wall studs. This is an important step before installing shiplap over paneling as it ensures that you have secure attachment points for your new wall covering.
Start by turning on the stud finder and running it along the wall in a slow, steady motion. When it detects a stud, it’ll emit a beeping sound or light up. Mark each stud with a pencil or masking tape to make them easily visible later on.
Most studs are spaced at 16-inch intervals, so keep this in mind as you go along.
Once you have marked all the studs, use a straightedge to create level lines on the wall where the shiplap will be installed. This will help guide your installation and ensure everything is straight and properly aligned.
Step 04: Design Considerations
When deciding between horizontal and vertical installation, consider the desired visual effect for your room.
Horizontal installation creates a sense of width, making your space appear larger and more open. It is a popular choice for modern or farmhouse themes, as it adds a sleek and contemporary touch.
On the other hand, vertical installation gives the illusion of height, making your room feel taller and more spacious. This style is often associated with vintage themes and can add an elegant and timeless look to your space.
Also, the shiplap’s direction can complement other design elements in the room. For example, horizontal shiplap can emphasize long stretches of walls or highlight architectural features such as windows or doors.
Conversely, vertical shiplap can draw attention to tall ceilings or create a focal point on one wall.
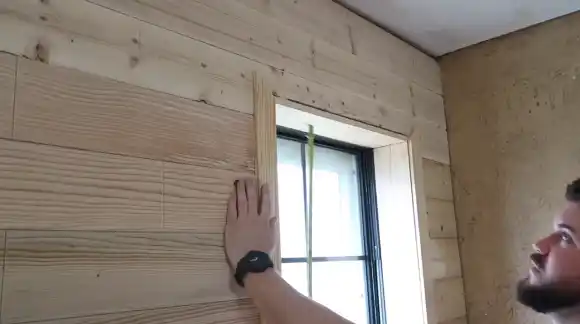
Step 05: Applying Adhesive and Attaching Shiplap
To ensure stability, apply liquid nail paneling glue behind each shiplap panel before attaching them to the wall. This adhesive will provide added support and prevent any movement or shifting of the panels over time.
Prior to gluing, ensure the existing paneling’s surface is clear of any dust or contaminants. Spread adhesive generously to the back of each shiplap panel, ensuring that it covers the entire surface area. Press the shiplap panel firmly to ensure proper adhesion.
Once you have applied the adhesive, use a finish nailer to secure each panel to the studs to enhance its stability further. Repeat this process for all subsequent panels, ensuring they are properly aligned and leveled prior to installation.
Step 06: Filling Holes and Finishing
After placing the shiplap panels, fill in any nail holes and seams with wood filler. Wood filler fills in the small gaps between panels and hides any visible nail holes, ensuring a smooth surface.
For applying wood filler, squeeze some onto your finger or putty knife and spread it over holes or seams. Make sure to wipe away any excess filler from the shiplap before it dries using a clean cloth or rag. This will prevent the need for extensive sanding later on.
As soon as the wood filler has dried completely, lightly sand any rough edges or surfaces to achieve a smooth finish. Sanding will also help blend the filled areas with the rest of the shiplap panels, creating a cohesive look.
Step 07: Painting and Sealing
Once the shiplap panels are filled and sanded, it’s time to paint them with your chosen color. By painting the panels before installation, you can save time and ensure that every nook and cranny receives an even coat of paint.
Remember to use water-based paint and primer for the best results. After attaching the shiplap, paint the entire wall to create a seamless appearance. Don’t forget to seal gaps between the shiplap and other surfaces using caulk. This will provide a clean finish while also preventing any moisture or air leaks.
Can I install shiplap over textured or uneven paneling?
You can apply shiplap over uneven or textured paneling, but addressing major irregularities is important before installation.
Before you begin, assess the condition of your existing paneling. If there are large bumps, dents, or grooves, it’s best to smooth them out for a flawless finish.
One option is to attach thin plywood directly over the paneling to create a level surface. Another option is to use furring strips, thin pieces of wood that can be secured horizontally across the wall studs. These strips will provide a smooth base for your shiplap installation.
Can I mix different wood types for a unique shiplap design?
Mixing different wood types can be a great option to create a unique shiplap design. Combining different types of wood can add visual interest and texture to your shiplap installation over paneling.
But make sure the different wood types are similar in thickness and dimension. This will help you achieve a smooth and uniform look. Staining or painting the different woods in coordinating colors can also help tie the design together and create a cohesive aesthetic.
Transform Your Home Decor with Stunning Shiplap
Embracing the art of shiplap installation over paneling is like weaving a tapestry of transformation. Like a master painter, accent wall ideas, brush away the imperfections, and create a stunning masterpiece.
Gather the right materials, plan and execute your shiplap installation carefully according to our guidelines, and enjoy the results. Don’t shy away from textured or uneven paneling; let it be your canvas for an even more unique design.
So go forth with confidence and embark on this allegorical journey of shiplap installation.


