Last Updated on September 13, 2023
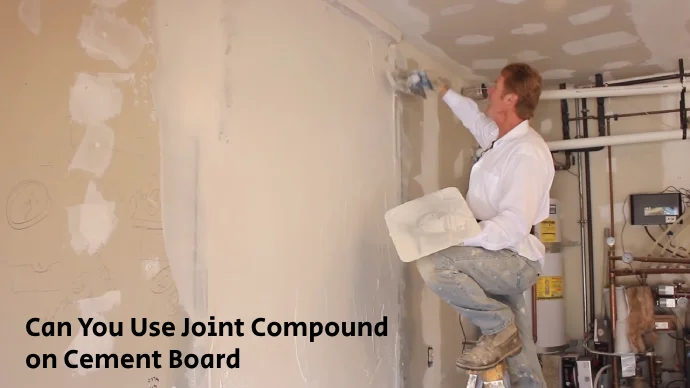
Cement board is a popular building material used for walls, floors, and ceilings due to its strength and ability to resist fire and moisture. So, it’s important to properly seal cement board joints to prevent water leakage and mold growth.
Joint compound is a common method used for sealing, but is it the best choice for cement boards? While drywall joint compound isn’t ideal for filling cement board joints, it can be used in certain circumstances as long as it won’t be exposed to moisture.
Check out this article to find out how joint compounds work on cement boards.
How to Use Joint Compounds on Cement Board?

To use joint compounds on the cement board, follow these steps:
- Step 1: Prepare the cement board surface
- Step 2: Gather your materials
- Step 3: Apply self-adhesive drywall tape
- Step 4: Apply the joint compound
- Step 5: Smooth the joint compound
- Step 6: Cover nail or screw dimples
- Step 7: Sand the surface
- Step 8: Apply finishing touches
- Step 9: Paint or finish the surface
Let’s discuss these steps in detail,
Step 1: Prepare the Cement Board Surface
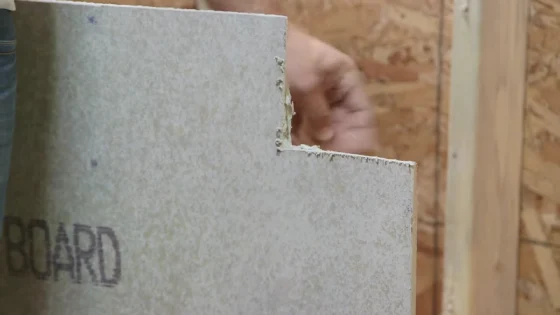
Ensure the cement board surface is well-prepared before applying joint compounds. Start by thoroughly inspecting the installed cement boards for gaps, cracks, holes, or uneven surfaces.
If you find any imperfections, such as small gaps or cracks, patch them with thin-set mortar to ensure a solid foundation. It is necessary to remove excess thin-set from cement board surfaces.
After, clean it thoroughly to remove dust and debris that may affect adhesion. Also, ensure the cement board surface is dry and in good condition before moving on to the next step.
Step 2: Gather Your Materials
Before beginning, gather all the materials needed. You’ll need self-adhesive drywall tape, joint compound, a drywall knife, and fine-grit sandpaper or a sanding block.
Self-adhesive drywall tape is essential for reinforcing the joints on the cement board. A joint compound will fill gaps or imperfections in the board’s surface. A drywall knife is necessary for applying and smoothing out the joint compound.
Finally, you’ll need a sanding block or fine-grit paper to achieve a smooth finish once the joint compound has dried.
Step 3: Apply Self-Adhesive Drywall Tape
Now, firmly press the self-adhesive drywall tape over the seams and joints on your wall to ensure proper adhesion. This will create a strong and durable foundation for your cement board installation.
Start by taping all the cement board seams and joints using this specialized tape. Make sure to apply enough pressure to ensure that the tape adheres securely to the surface. Pay special attention to corners and edges where extra reinforcement is needed.
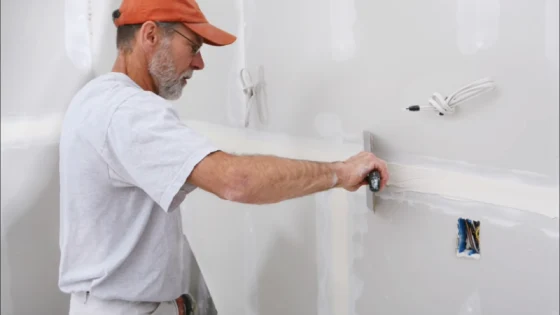
Step 4: Apply the Joint Compound
To create a smooth surface, load a small amount of joint compound onto the drywall knife and apply it at a 45-degree angle over the taped seams. This technique ensures proper adhesion and strengthens the bond.
As you hold the knife, maintain a consistent angle to achieve an even application. Use steady pressure to spread the compound thinly, extending it about 1/2 inch on each tape side.
This width guarantees a secure connection between the cement board and the joint compound. Applying a thin layer prevents excessive buildup and achieves better control over the final finish.
Step 5: Smooth the Joint Compound
After applying the joint compound, turn the knife and scrape off any excess compound using either the edge or flat part of the By removing any excess compound, you ensure that it is evenly spread over the tape, preventing any lumps or uneven surfaces.
Allow the compound to set for at least four hours or until it is hard to the touch. This ensures it fully dries and bonds with the cement board, providing a strong and durable surface. Waiting for this period also allows for easier sanding and further smoothing of the joint compound if necessary.
Step 6: Cover Nail or Screw Dimples
To cover the nail or screw dimples, apply a small amount of joint compound on your knife and fill in the depressions. Inspect the surface first for any depressions left by nails or screws. This step is crucial to ensure a smooth and even finish on your cement board.
Once you have applied the joint compound, use the knife to scrape off any excess compound and create a level surface. Allow the compound to set until it hardens completely. This typically takes several hours, but check the manufacturer’s instructions for specific drying times.
Step 7: Sand the Surface
Sanding the surface once the joint compound has dried will help achieve a smooth and level finish. To start, grab some fine-grit sandpaper or a sanding block. Carefully move it across the entire surface of the cement board, applying even pressure.
This process is crucial in eliminating any ridges or unevenness that may have occurred during the compound application. Be thorough in your sanding, paying close attention to areas with nail or screw dimples. By doing so, you ensure they are seamlessly blended into the rest of the surface.
Step 8: Apply Finishing Touches
Before moving on to the next steps, inspect the sanded surface for any remaining imperfections. After sanding, thoroughly examine the cement board surface to ensure a smooth and flawless finish. Look for any bumps, ridges, or uneven areas requiring additional attention.
If you notice any imperfections, apply a thin layer of joint compound using a putty knife or trowel. Spread it evenly over the problem areas and feather it towards the surrounding surface.
Step 9: Paint or Finish the Surface
Now that you have applied the finishing touches to your cement board, it’s time to paint or finish the surface. This will enhance the appearance of your cement board and provide added protection against moisture and wear.
Choose a high-quality paint or finish designed for cement boards, as ordinary paints may not adhere properly. Apply the paint evenly using a roller or brush, covering all areas thoroughly. Allow sufficient drying time between coats as specified by the manufacturer.
Once complete, your cement board will be ready for any decorative treatment or simply left as is, providing a durable and attractive surface for years.
Is Joint Compound Used to Seal Cement Board Seams?
Using a joint compound to seal cement board seams is not recommended because it lacks durability. It needs to be more durable for areas exposed to moisture, like bathrooms and kitchens. Using joint compounds on cement board seams can result in cracking or peeling, compromising the installation’s integrity.
You should instead use specialized cement board seam tape and follow up with cement-based mortar. This will create a strong, long-lasting seal that can handle high-moisture environments like bathrooms. Follow the manufacturer’s instructions for installing cement boards or their accessories.
Which Is the Right Compound to Use on Cement Board?
Selecting the appropriate substance to adorn a cement board necessitates a critical evaluation of its compatibility with the underlying layer and its robustness. Although joint compounds can offer expedient gap filling, they are susceptible to moisture and may eventually develop fissures.
Instead, the best option is a thin-set mortar containing cement, fine sand, and a water-retaining agent that bonds well with the cement backer board. Thin-set dries slowly, allowing adjustments during installation and creating a sturdy foundation for long-lasting results.
Is it possible to caulk cement board joints?
Sealing cement board joints with caulk is possible, but it may not be the best option for preventing water intrusion at butt joints. While the joint compound is commonly used for this purpose, caulk may not effectively seal the ends of fiber-cement siding boards.
If applied, it can result in water absorption and swelling. So consider the potential limitations of using caulk for this purpose. When necessary, choose an alternative method to ensure optimal moisture protection.
What is the recommended thickness of thinset for the cement board?
Limiting the thinset’s thickness of the cement board to a maximum of 3/16th of an inch is advisable. This type of cement is designed to create a robust bond between the cement board and the substrate, ensuring its durability.
Adhering to the manufacturer’s instructions and guidelines ensures impeccable application and utmost performance. Applying the joint compound at a precise thickness is also crucial. Using the right tools and techniques is important when handling this stuff.
Use Specialized Joint Compound For Cement Board Joints
We knew that filling cement board joints requires the right compound for a smooth finish. A joint compound may work for drywall, but a specialized option is necessary for a cement board.
While joint compound can be used on cement board, it requires specific steps and materials to achieve a successful outcome. You can create a smooth and finished surface on your cement board project by following the steps outlined above.
Remember to choose a setting-type joint compound specifically formulated for cement board and prepare the surface thoroughly before beginning. If you need further assistance, consult a professional contractor or home improvement expert to ensure your project succeeds.