Last Updated on August 2, 2023
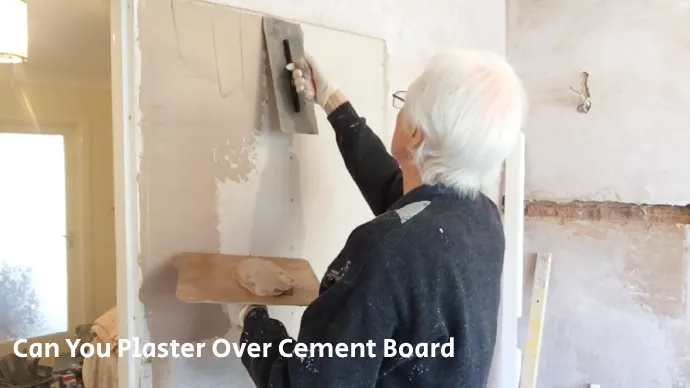
Picture yourself standing in front of a bare cement wall. It’s gray, rough, and lacks character. You want to give it a sleek finish, but you’re still determining if you can plaster over the cement board.
Plastering over cement boards is a practical and effective solution widely used in construction and renovation projects to produce smooth and appealing surfaces. It involves meticulous preparation, materials, and application techniques that produce durable and aesthetically pleasing outcomes.
This comprehensive guide outlines the necessary procedures to help you achieve a successful plastering project. Whether you are a DIY enthusiast or a professional in the field, the steps discussed here will help you achieve your plastering goals.
How Can You Plaster Over Cement Board?
There are several advantages to plastering over cement boards. It offers excellent protection against water damage, is easy to install, and is durable. Plastering over cement board can also add texture and character to your walls while providing a better soundproofing barrier than drywall alone.
To plaster over cement board, you can follow these general steps:
- Step 01: Prepare the surface
- Step 02: Apply a bonding agent
- Step 03: Mix the plaster
- Step 04: Apply the plaster
- Step 05: Level and smooth the plaster
- Step 06: Allow drying and curing
- Step 07: Sand and finish
Step 01: Prepare the Surface
Before starting, ensure the surface is spick and span, with no dust or debris in sight. Begin by thoroughly cleaning the cement board using a damp cloth.
Ensure to remove any loose debris or dirt that may be present on the surface. This will ensure that the plaster adheres properly to the cement board.
Next, allow the surface to dry completely before proceeding with plastering. Any moisture left on the cement board can negatively affect how well it bonds with the plaster.
Once you’ve confirmed that the surface is dry, you’re ready to apply a bonding agent onto your clean and prepared cement board.
Step 02: Apply a Bonding Agent
Apply a bonding agent to that sleek and smooth surface to ensure a strong plaster bond. Even though it may seem like an extra step, it’ll be worth it when your masterpiece stays put without any frustrating cracks or chips.
The bonding agent creates a rougher surface for the plaster to grip onto, ensuring adhesion and reducing the risk of separation over time. When applying the bonding agent, follow the manufacturer’s instructions carefully.
You’ll need a flat tool such as a paintbrush or trowel to apply a bonding agent. Start at one corner and work along the wall in overlapping strokes to ensure no spots are left untouched. Allow the bonding agent to dry before continuing with the plastering process.
Step 03: Mix the Plaster
Now it’s time to get your hands dirty and mix up that smooth and creamy plaster mixture. Start by grabbing a clean bucket and following the manufacturer’s instructions for mixing the plaster with water.
Make sure you achieve a lump-free consistency and use the recommended water-to-plaster ratio. This will ensure that your mixture is perfect for applying to your cement board surface.
As you mix, pay close attention to the texture of the plaster. It should be smooth but not too runny or thick. Keep stirring until you have achieved the desired consistency, then apply it to your cement board surface in the next step.
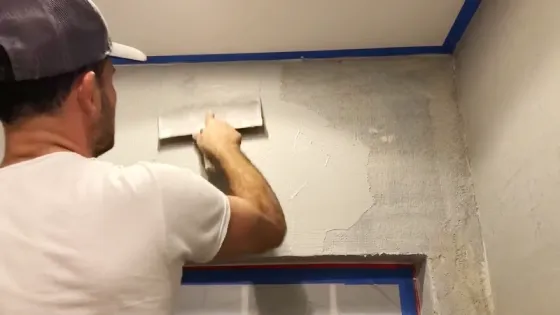
Step 04: Apply the Plaster
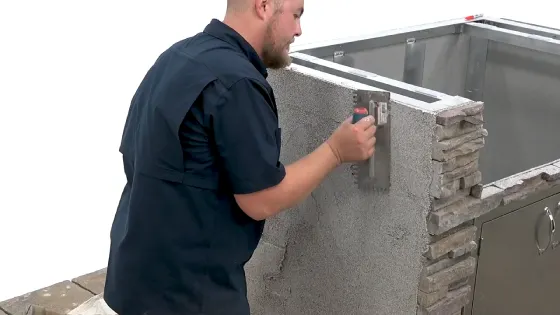
Smooth out your surface with the creamy mixture, transforming it into a work of art that will have everyone in awe. Use your flat-edged trowel to spread the plaster evenly across the cement board.
Ensure good contact between the two surfaces by applying sufficient pressure. Applying too much pressure can crack the plaster, so be careful not to do this.
As you work, pay close attention to any areas that may require more attention or additional layers of plaster. Smooth out any bumps or ridges by gently scraping them away with your trowel.
Once you’re satisfied with the coverage and appearance of your plastered surface, move on to the next step.
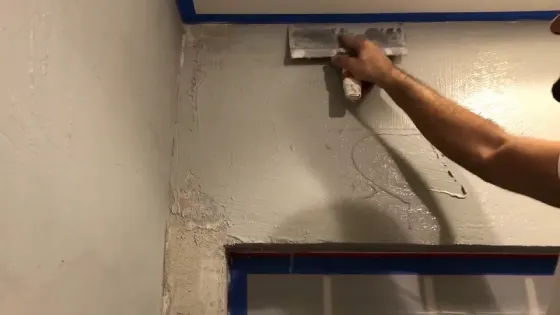
Step 05: Level and Smooth the Plaster
Get that perfect finish you desire by using a plastering trowel to level and smooth out the surface of your plaster.
Hold the trowel at an angle and gently sweep it over the surface, removing any excess plaster. Be careful not to overwork the plaster, as this can cause cracks or roughness in your final product.
Using a light touch, continue smoothing out the plaster until you achieve an even and uniform finish.
Step 06: Allow Drying and Curing
As you wait for the plaster to set and harden, imagine the transformation that’s taking place. From a wet, malleable substance to a solid, durable surface that’ll last for a long time.
Ensure that you allow the plaster enough time to dry and cure properly before moving on to sanding and finishing. Follow the manufacturer’s recommended drying times, which can vary depending on factors like environmental conditions and the thickness of the application.
Avoid touching or disturbing the plaster during this process, as it can cause cracking or unevenness in the final product. Remember that patience is key when working with plaster. Rushing through this stage could compromise the integrity of your work.
Step 07: Sand and Finish
Once the plaster’s fully cured, it’s time to take your project to the next level with a flawless finish that’ll leave you proud of your hard work.
Start by sanding any rough areas or imperfections using fine-grit sandpaper. Remove any dust created during the sanding process so it doesn’t interfere with your final finish.
After sanding, you can apply a suitable paint or finish if desired. The type of finish you choose will determine whether you use a brush or roller. Be sure to read and follow all instructions carefully before applying any product.
With a little extra care and attention in this final step, you can achieve a beautiful and professional-looking result that endures.
Transform Your Cement Board Surface into a Premium Piece
Plastering over cement board is definitely doable, but it requires careful preparation. To ensure success, it’s crucial to prime the surface with a bonding agent or water and PVA glue.
Applying a base coat can also help with adhesion and result in a smoother finish. It’s worth noting that certain types of plaster, like Venetian plaster, may not adhere well to the cement board surface.
Therefore, choosing the right plaster type for the job is essential. You can transform any cement board surface into a beautiful and durable plastered masterpiece with the proper techniques and materials.
Don’t rush the process. Follow these steps attentively to achieve a professional-grade outcome.