
Last Updated on July 30, 2023
Plasterboard is a commonly used building material for interior walls and ceilings due to its smooth and flat finish. One question that arises during construction or renovation is whether plastering is necessary.
Plastering involves applying plaster to a surface, but it is not always compulsory for plasterboard. This type of board is designed to provide a nice surface to paint on, eliminating the need for extensive plastering work.
In contrast, plastering is recommended if the plasterboard has visible joints, imperfections, or a desired higher-quality finish. In these cases, skimming, which involves applying a thin layer of plaster to achieve a smooth surface, is especially advantageous.
To ensure a successful outcome, it’s essential to understand the step-by-step process of plastering a plasterboard wall in more detail.
How Do You Plaster Plasterboard?
Plastering plasterboard is a crucial part of any construction project. It provides a smooth and seamless finish to walls and ceilings and helps protect the underlying structure from damage.
If you’re new to the world of plastering plasterboard, here are the steps you need to take:
- Step 01: Prepare the area
- Step 02: Mixing the plaster
- Step 03: Applying the first coat
- Step 04: Different techniques for different areas
- Step 05: Applying the second coat
- Step 06: Finishing touches
- Step 07: Drying and painting
Step 01: Prepare the Area
Before starting, ensure the area is ready by securely fixing and sealing any gaps or joints to prevent future cracks in your beautiful wall art canvas. Just like a painter prepares their canvas before creating a masterpiece, preparing the area ensures a smooth finish for your DIY project.
Check if the plasterboard is securely fixed to the wall or ceiling, and use screen tape to seal any gaps or joints properly. This will ensure no unsightly cracks once you finish your plastering job.
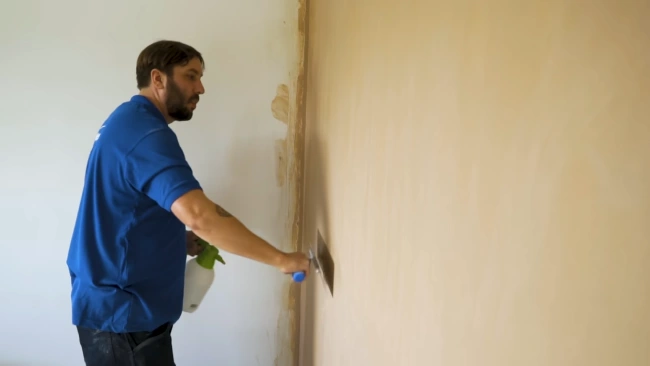
Step 02: Mixing the Plaster
Let’s add the plaster to water while stirring until achieving a creamy texture. During mixing, ensure the mixture remains consistent and removes all lumps.
You can use an electric mixer or a hand-held whisk, taking care not to overmix, as this can cause air bubbles in the plaster, affecting its final look.
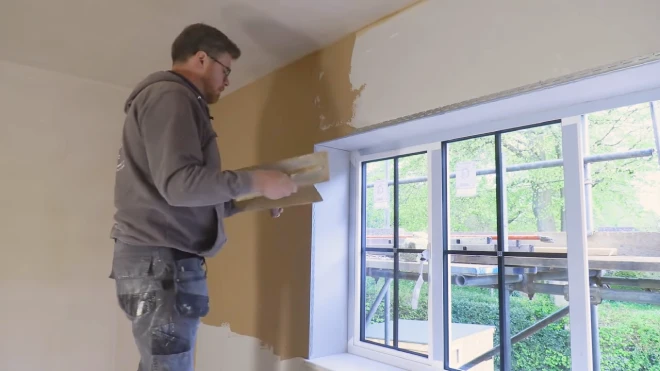
Step 03: Applying the First Coat
Now it’s time to apply the first coat of plaster using a trowel. Make sure to work from top to bottom and left to right while smoothing out any uneven parts along the way. As you apply the plaster, remember to use the trowel to address any small lines or imperfections that may arise.
Take your time and be thorough to ensure that the plaster is applied evenly across the surface, so do not rush.
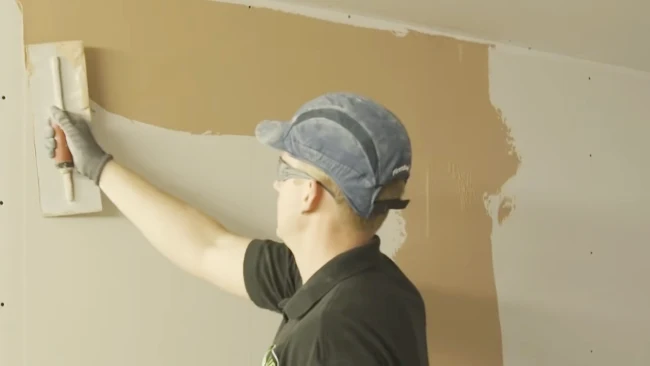
Step 04: Different Techniques for Different Areas
Adapting the direction and motion of your trowel based on the specific area you’re working on is crucial for achieving a desirable finish. Different techniques are required for ceilings, walls, and edges.
When plastering ceilings, make sure to work in sections and use a wider trowel to spread the plaster evenly. On walls, you’ll want to apply the plaster in an upward motion using a smaller trowel before smoothing it out with a larger one.
For edges, utilize a corner trowel to cover all areas evenly without leaving any gaps or bumps. Remember that each surface may require multiple coats depending on its condition and desired finish.
Step 05: Applying the Second Coat
You’re like a sculptor molding clay as you apply the second coat of plaster. With a steady hand, delicately smooth and polish the surface until it’s flawlessly smooth.
Applying water and smoothing with the trowel multiple times removes any lines or imperfections. Take your time in this process, ensuring that each section is completely covered and there are no cracks or bubbles in the surface.
Once you’ve finished with the second coat, you can move on to those finishing touches to complete your project and achieve that professional finish.
Step 06: Finishing Touches
Let’s add those final details to really make your wall shine. Use sandpaper or a sanding block to polish off any bumps or imperfections on the surface until you’re satisfied with the result. Check for any lines that might still be visible and smooth them out as well.
You want your wall to look as perfect as possible before moving on to drying and painting. Remember, taking extra time and care during this stage will pay off in the end with a flawless finish you are proud of.
Step 07: Drying and Painting
Let the plastered wall dry completely before putting on a fresh coat of paint. You must allow enough time for the plaster to dry completely, as painting too soon can cause cracks and other imperfections.
The drying time will depend on various factors such as humidity levels, temperature, and thickness of the plaster layer. So keep calm and wait until it is fully dried.
Once dried, you can paint your plastered wall according to your preference. A fresh coat of paint can enhance your room’s aesthetic appeal while also providing added protection to the underlying surface.
So go ahead and choose your favorite color or design and start painting.
Why do you need to skim plasterboard?
Creating a smooth, flawless finish on your walls is essential for achieving a professional and polished look that will leave you feeling proud of your home. This is where skim coat plaster comes in.
Skimming plasterboard provides an even surface that hides imperfections, such as joints and screw holes, creating a seamless appearance. It also fills in any depressions or bumps in the wall, ensuring your finished product looks perfect.
Also, skim coat plaster is moisture-resistant and durable, protecting your walls from damage while enhancing their aesthetics. Without it, painting or wallpapering would result in an uneven and unprofessional finish.
Can you paint over the plasterboard without plaster?
Plastering the plasterboard provides a smooth surface for the paint to adhere to. If you skip this step and try to paint directly onto the plasterboard, you may experience a number of issues. These include uneven application of paint, poor adhesion, and a rough and bumpy finish.
But you can put wallpaper over plasterboard without plastering that is suited for a small job. You will need to use wallpaper paste, and the types of finishes you can achieve depend on the paper quality you choose. However, plastering is a simple process that creates a perfect canvas for paint and will give you a better finish.
You should always note that when plastering the plasterboard, you should always wait for it to dry completely before applying any coat of paint. This ensures that the plaster is fully set and will not crack or peel under the weight of the paint.
Plastering Over Plasterboard for a Smooth Finish
The decision to plaster over plasterboard requires careful consideration of various factors. Plasterboard provides a smooth and level surface, but certain situations may require plastering for a flawless finish.
Adequate preparation, mixing, and multiple coats are vital to achieving the desired outcome. Attention to detail in the finishing touches ensures a professional and polished appearance.
Ultimately, a successful result depends on the condition of the plasterboard and the desired finish. Both should be carefully evaluated before proceeding with the project.
When weighing all relevant factors, unnecessary extra costs are avoidable and a successful and satisfying outcome is possible.


