Last Updated on January 21, 2023
Need an extra faucet on your metal sink? Then you have to drill a hole in it. Drilling a hole in a metal sink can seem daunting to the inexperienced handyperson, but it is quite easy with the appropriate tools and techniques.
With a spiral fluted step drill bit and a robust cordless drill, you can quickly drill a hole in the sink for a new faucet, soap dispenser, or any other fixture that needs a hole.
With this guide, you’ll have all the insider knowledge and critical steps for nailing projects involving drilling holes in metal sinks. We’ll also cover everything from selecting the correct drill bit for metal sinks to lubricating the sink area for better results, even a pro will be impressed with how smoothly your project goes.
Steps on How to Drill a Hole in Metal Sink
Drilling into metal sinks is easy and safe with the right tools and techniques. With the following steps, you’ll be able to drill a hole in your metal sink accurately and efficiently:
Step 1: Gather Materials
Before you begin drilling any hole, having all the materials and tools necessary for the job is essential. You will need the following:
Working Instrument:
- An electric cordless drill,
- Spiral fluted step drill bits,
- Clamps.
Personal Equipment:
- Protective gloves,
- Eyewear.
Step 2: Choose Your Location
Once you’ve gathered all your supplies, it’s time to select where precisely on the sink you want to make the hole. The usual place is at one end of the sink, either near or in the center.
It’s essential to consider stainless steel sink depths when choosing a spot for your faucet. Especially if there’s already existing hardware installed, such as a drain basket or sprayer hose.
Step 3: Search for Support Points
When drilling into metal sinks, you must find support points that will help keep the sink steady while you work. This could include clamps around certain stainless steel sink parts or attaching them to nearby countertops or walls. Use those to your advantage if your sink has pre-drilled holes that can be used as support points.
Step 4: Prepare Your Drill Bit
Choosing the right drill bit for your metal sink is essential to ensure a successful drilling project. Depending on which type of material you’re working with ( like aluminum, stainless steel, or brass), Cobalt drill bits provide optimal performance and superior results in obtaining smooth cutting edges.
Before selecting your drill bit size, it is also essential to consider how deep you need the hole to be. Deeper holes require bigger step drill bits, so choose one with a bigger diameter.
Step 5: Mark Where You Will Drill Your Hole
Using a marker or tape, mark off where you would like your hole drilled to ensure accuracy when drilling later. It may also be helpful to double-check that there are no plumbing lines or wiring behind where you plan to drill. If there are, move your marked area accordingly.
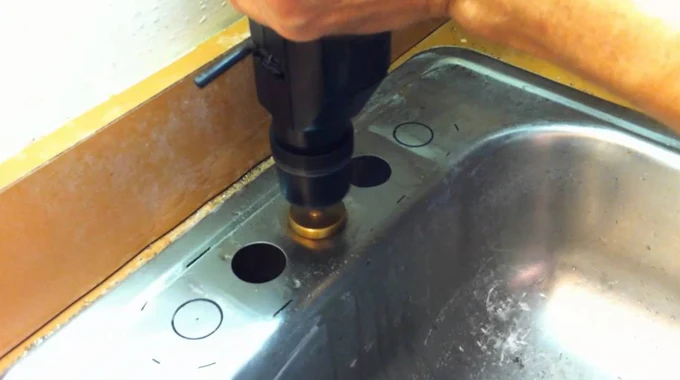
Step 6: Begin Drilling the Hole
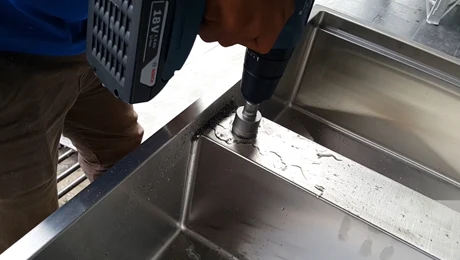
Once everything has been set up and prepared, go ahead and begin drilling your hole. Start by slowly pushing down on your trigger until your drill bit begins spinning. Then steadily increase the pressure until your desired depth has been reached.
When doing this step, ensure that both hands remain firmly on either side of the drill to maintain control throughout this process & do not rush. Also, ensure not to over-tighten the bit while drilling, as this can cause damage and inaccuracies in terms of the size and shape of the drilled hole itself.
Step 7: Clean Up the Area
Once finished with drilling, ensure that any materials used during this process are cleared from inside and outside the sink. This includes any sawdust created while using your drill bit and additional items. Finally, check once more that all safety protocols have been followed throughout this task before calling it complete.
Safety Tips When Drilling Holes In Metal Sink

A few extra moments to follow these safety guidelines can help prevent injury and property damage while completing the job:
1. Start with the Right Tools and Materials:
When drilling holes in a metal sink, it is paramount to have the right tools for the job. Ensure you have an appropriate step drill bit suitable for working on metals. The drill bit should also be sharpened and correctly sized for your desired hole size.
Also, ensure that you have all the necessary materials, such as protective eyewear, gloves, clamps, and other items, before beginning the task.
2. Mark Your Spot:
Before drilling any holes in your sink, it is essential to carefully mark where you intend to make each hole so that you don’t accidentally miss your target spot. You can use either a permanent marker or a small piece of masking tape as markers for where each hole will go.
Making these marks first will minimize potential damage and help ensure accuracy when making each hole.
3. Set Up Proper Ventilation:
Working with power tools generates a lot of heat which can be hazardous in enclosed spaces with no ventilation or air circulation. Thus, proper ventilation should always be set up before beginning work on any project involving drills or other power tools like grinders or saws.
Also, ensure you are working in an area with adequate ventilation so that harmful chemicals released from burned paint and fumes do not build up within the area or cause health problems from overexposure.
4. Wear Protective Gear:
As mentioned earlier, wear appropriate protective gear such as eye protection glasses and gloves when working on projects involving drills or power tools. This will help prevent unwanted debris from entering your eyes or skin during each project and offer additional protection.
5. Use Medium Speed Settings:
When drilling into a metal sink, use medium speed instead of high speed because higher speed causes more friction, causing the drill bit and stainless steel kitchen sink to heat up more quickly. This can then cause more harm than good if left unchecked. So adjust settings accordingly before starting each project.
6. Keep an Eye on Your Drill Bit’s Heat:
Keep an eye on how hot your drill bit is getting during use. To avoid any potential damage caused by an overheated drill bit melting through metal objects or catching fire as it drills through the material at high speed, immediately stop using it if it becomes overheated.
7. Don’t Touch the Cutting Area Immediately:
After completing a drill job, let the HSS drill bit and cut piece cool down. Touching them before cooling could result in severe burns from the hot metal surfaces exposed after drilling. This will help you avoid painful encounters with burning hot metals exposed from your handy work.
Is it Safe to Drill a Hole in a Metal Sink?
It is completely safe to drill holes in metal sinks. Still, the best way to ensure a successful project is by taking all the necessary precautions and following the recommended instructions mentioned above.
Before starting to drill, wear work gloves when handling tools and materials, as well as choose the correct size bit for your task. Proper preparation will ensure that your project goes smoothly and safely.
You Might Also Like: Is every Rotary Hammer Bit the same?
What Type of Bit is Best for Drilling Metal Sink?
The best type of bit for drilling into metal sinks is a hex-shank Titanium coated spiral fluted step drill. This type of bit features sharp edges explicitly designed for cutting through hard surfaces without causing too much vibration or excess heat buildup.
Also, this type of bit has multiple cutting edges, which provide longer-lasting results and allow you to adjust depending on the material you are working with easily. Furthermore, these bits have an easy-grip hex shank which provides better control while drilling, resulting in more accurate results.
You Also Might Be Interested: Why is it necessary to remove a hammer drill bit?
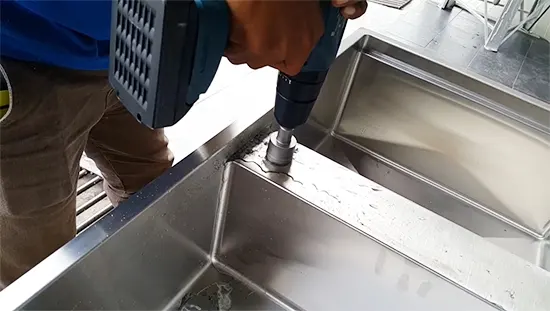
Can You Use a Regular Drill to Drill Through Metal Sinks?
With regular or cordless drills, it’s possible to take on metal sinks easily. Just remember to keep the drill running at 3,000 rpm for optimal results. For more demanding tasks like tackling thicker pieces of metal, consider powering up with an impact driver or hammer drill for maximum efficiency.
Also, using a particular bit designed for drilling through metal can help make the process easier and more efficient by reducing friction and heat buildup.
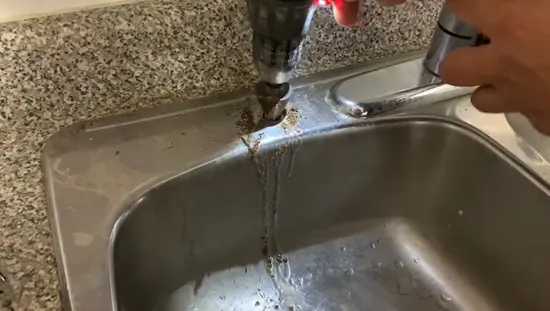
Does Lubricating Metal Sink Make it Easier to Drill?
Yes, lubricating the bit and the desired area of the metal sink before drilling can make the process significantly easier when drilling into metal sinks. Lubricating the bit with cutting oil or WD-40 helps reduce friction and heat buildup, allowing for smoother and more controlled drilling.
It is important to note that failure to lubricate correctly can cause excessive wear on both the bit and stainless steel sink surface and generate large amounts of heat, which can lead to a safety hazard if not handled correctly.
Drill Into Metal Sinks Easily – Use Proper Tools & Techniques
Drilling a hole in a metal sink may seem intimidating initially, but it should be relatively straightforward with the proper equipment and techniques. When selecting your drill bit, make sure it is made specifically for metal sinks and is of high quality.
Safety is paramount when drilling into any material, so wear protective equipment such as goggles and gloves while working. Also, lubricate your drill bit if necessary before drilling into the sink basin. This will help prevent damage to the sink surface and make your job easier overall.


