Last Updated on March 29, 2023
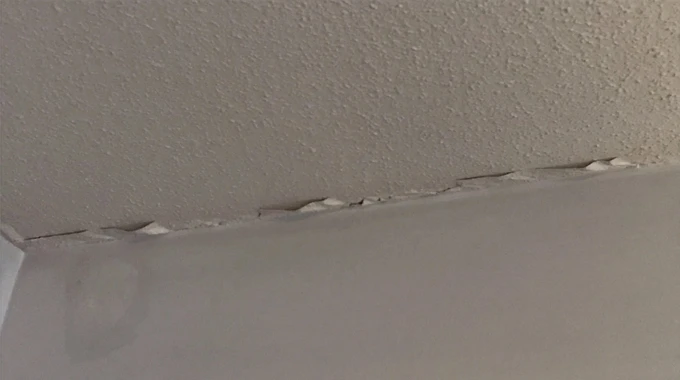
Have you seen those crumbly peeling on your drywall corners? Keep them from getting worse. When the drywall corner tape deteriorates, it can turn irreversible. So don’t leave it too long to fix it up.
But how to repair drywall corner tape that’s separating from the walls? With basic DIY know-how, you can quickly repair the damage. Teaming joint compound and mesh tape will eliminate full strips and minor peels.
We’ll help guide you through patching minor peels and replacing entire strips. We’ll uncover why tape comes loose, discuss patching options & examine essential safety tips when repairing damaged walls, so let’s do it.
How to Repair Drywall Corner Tape that is Separating From Corners?
Repairing drywall corner tape that separates from corners requires a certain amount of knowledge and skill. Depending on the severity of the separation, one of two methods may be necessary.
Method A. Patching Over Minor Peels
Minor drywall corner tape peels are simple to fix with a few simple steps. Here is a step-by-step guide to walk you through the repair process:
1. Wipe the Drywall Corner: Using a damp cloth, gently remove any crumbly old paint or debris from the area around the corner tape peel. This will help ensure that the joint compound and new paint adhere properly on the wall surface, giving it a smooth and even finish after repair.
2. Add Fast-Setting Joint Compound: After removing all debris, use the fast-setting joint compound to fill in any gaps or cracks in the corner tape peel. Use an applicator squeegee to spread it across the area where there are peels.
Be sure to press down hard enough so that it has full contact with the wall and fills in all gaps. Allow this compound to dry completely before proceeding.
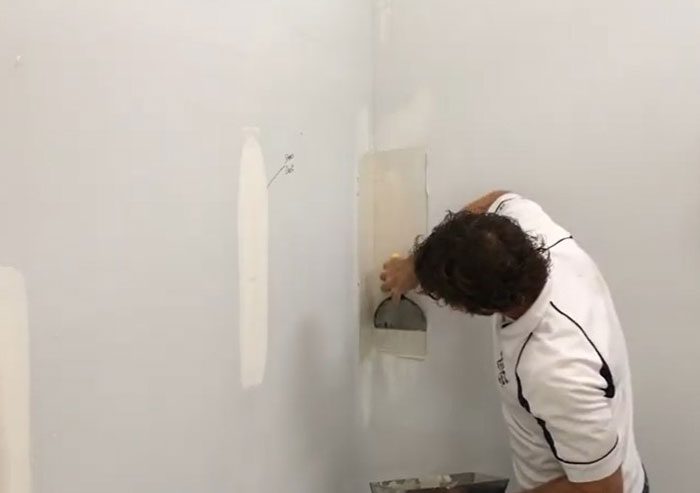
3. Spread the Joint Compound: Using a putty knife, spread an even layer of joint compound over the entire area of the corner tape peel, ensuring that it covers all exposed edges and corners.
Ensure no excess material is left behind, as this could cause bumps or irregularities when painting later. Let dry for 1-2 hours before continuing to the next step.
4. Sand the Surface: Once dried, lightly sand down any imperfections or bumps left behind by applying pressure with 120-grit sandpaper until you achieve an even surface free of any lumps or bumps caused by the excess joint compound application or uneven spreading/drying times.
5. Add Finishing Touches: Now that you have achieved an even finish nicely, you’ll want to add some finishing touches, such as painting over any exposed areas with a primer before following up with paint in whatever color fits best for your wall design needs.
Method B. Replacing Entire Strips of Tape
Replacing entire strips of tape can be a complicated process. Some key steps must be followed to ensure the tape is properly replaced and secure. Following this guide will help you have a successful and hassle-free replacement experience:
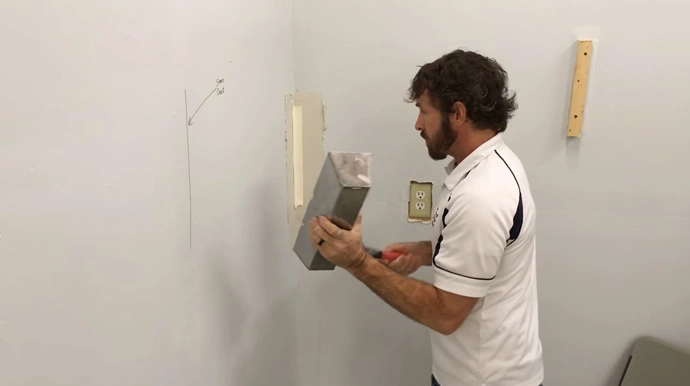
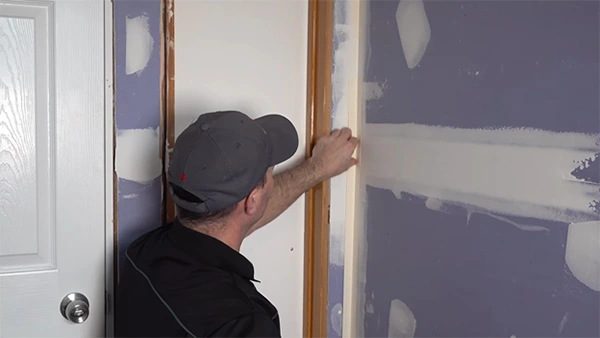
1. Prepare the Area: Before starting, it is vital to ensure that the area where the tape needs to be replaced is clean and free of dirt, dust, or any other debris. Also, ensure the surface is dry and free of any moisture.
2. Remove Existing Tape: Carefully remove the existing strip of tape by gently pulling one end out until it comes off easily. Take care not to rip or tear it, as this could cause damage to the surface below it.
It may also be necessary to use an adhesive remover (such as Goo Gone adhesive remover) if an excess adhesive is left behind after removal.
3. Inspect for Damage: Once all of the existing tapes have been removed, inspect the area for any damage that may have occurred during removal or from prior use of the tape. If there are any damages, repair them before proceeding with the installation of the new tape.
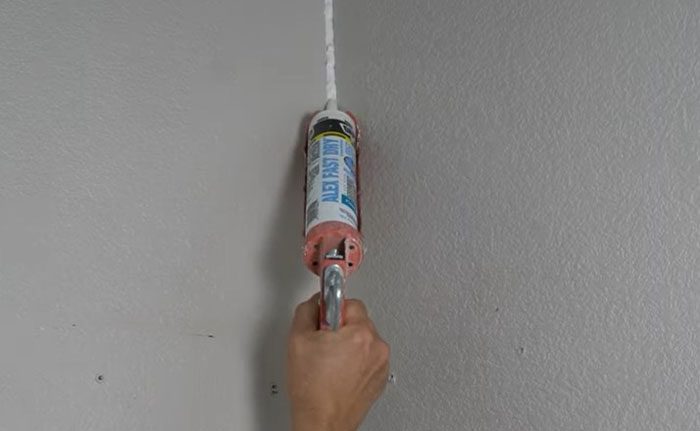
4. Prepare Adhesive: The adhesive used to attach a new strip of paper tape should be compatible with both the material being taped and with the particular type of tape itself. The adhesive should also have good adhesion properties so that it can hold up over time without losing its grip on either side of a joint or seam line.
Introduction
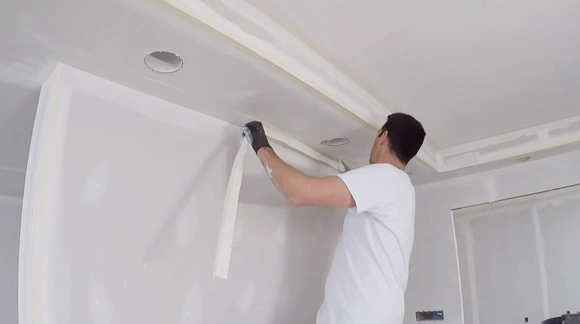
5. Apply Adhesive: Use a trowel or putty knife to spread thin-set or drywall compound evenly over the strip length that needs replacement. Ensure there are no gaps and it adheres securely to the wall. Allow this adhesive layer to dry for about an hour before proceeding with the installation.
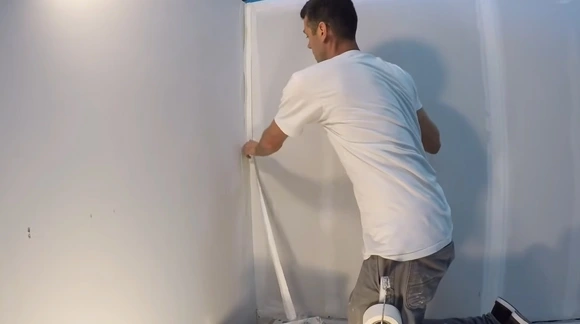
6. Install New Corner Tape: Once the adhesive has slightly dried, use a putty knife or drywall taping knife to press a new strip of corner tape onto it. Start from one end of the strip and ensure it is firmly pressed down onto the adhesive along its entire length.
Make sure not to leave any bubbles or gaps beneath it, as these can lead to weak spots in your repair job later on.
7. Allow Drying Time: After pressing down your new strip, allow at least 24 hours to dry completely before continuing with the other steps. This will ensure that your drywall repair job holds up longer in the long run and makes it easier for you to work with during further steps.
8. Add Finishing Touches: Finally, once everything has had ample time to dry, add finishing touches such as sanding down rough edges and reapplying paint or texture if desired. This helps create an even finish that looks professional and streak-free while ensuring all areas blend together seamlessly after repairs.
What Causes Drywall Corners Tape to Come Loose?

It’s common for drywall tape to start coming loose over time, leaving you with an unsightly wall. Knowing what causes drywall tape to come loose can help you prevent problems from occurring in the first place. Here are some of the common causes behind pesky wall repairs:
1. Poorly Installed Drywall Tape:
When drywall tape is not properly adhered to the wall, the adhesive will slowly wear away and eventually cause the tape to come loose.
Poorly installed drywall tape can be due to a lack of knowledge or experience in applying it, improper preparation of the wall surface before taping, or incorrect application of pressure-sensitive adhesive.
2. Moisture Exposure:
Drywall tape is made from a paper material susceptible to moisture damage. If exposed to high humidity levels, water vapor in the air, or direct contact with water during flooding, the adhesive backing can degrade and cause the tape to lose.
Regular inspection for any signs of moisture should be conducted so that necessary repairs can be made before any damage occurs.
3. Shrinkage:
The joint drywall compound shrinks slightly as it dries, which can create tension on drywall joint tape and cause it to come loose over time.
This shrinkage process also causes minor cracks in the wall joint, often filled with more drywall mud and covered with additional layers of tape. If not done correctly, this process can weaken the bond between tape and wall, causing it to become loose over time.
4. Expansion/Contraction:
Temperature fluctuations from heating and cooling systems within a home may cause drywall joints and tapes to expand and contract, thus weakening their bond strength over time and making them prone to coming loose from walls or ceilings.
Proper installation techniques should be used when taping drywall joints to reduce any potential expansion/contraction movement from occurring that could cause the loosening of tapes over time.
5. Improper Drywall Compound:
A major cause behind loose mesh drywall tape is the improper application of joint compound or other adhesive material when attaching it to walls and ceilings.
If too much joint compound is used, or if it’s not allowed enough time to set before painting or other activities fully, this can lead to premature peeling and bubbling over time. Proper preparation ahead of time with ample drying time is key here!
5. Age:
As drywall ages, its adhesive backing tends to lose some of its stickiness, making it less likely to hold its grip against walls or ceilings for extended periods without further deteriorating, eventually becoming loose over time.
Can You Glue Peeling Drywall Tape to Repair it?
Yes, you can glue peeling drywall tape to repair it. This usually requires a specialized drywall adhesive, such as a mastic joint compound.
To apply the adhesive, you will need to spread it evenly across the area where the tape is peeling away from the wall and press firmly to secure it. Once applied, allow the adhesive to dry completely before proceeding with any further painting or decoration work.
Topics of Discussion: Can you fix ripples in drywall tape?
Can You Caulk Over Drywall Corner Tape to Repair it?
Yes, you can caulk over drywall inside corner tape to help seal any gaps around them and improve the appearance. But caulk will only be effective long-term if the home environment is well-conditioned.
Ensuring that there are no drafts or moisture build-up inside your home that could cause gaps and cracks in the caulk over time. Also, ensure your caulk is specifically designed on walls. General-purpose caulks may not provide enough adhesion when used in this way.
Safety Considerations When Repairing Drywall Corner Tape
Maintaining the structural integrity of walls requires fixing drywall corner tape; if done wrong, you can do serious damage. Below are some key safety considerations that should be considered when undertaking a repair job.
1. Wear proper safety equipment: When working with drywall, always wear the appropriate safety gear, such as gloves, goggles, and dust masks, to protect your eyes and lungs from potential airborne particles.
2. Check for electrical wiring: If the area you’re repairing contains electrical wiring, turn off the power before beginning work to avoid electrocution or fires due to sparks created by drilling or cutting near exposed wires.
Also, it is always a good idea to have a professional electrician check the wiring before beginning repairs just in case any hidden wiring present could be dangerous if disturbed during repairs.
3. Utilize proper tools: To repair drywall inside corner tape properly, you will likely need special tools such as putty knives, taping knives, and sandpaper to create a smooth finish around the corners where the two walls meet.
It is also important that these tools are kept sharp, so they do not cause extra damage to the wall surface when used for repairs; this can be done by regularly honing the blade with a whetstone or having them professionally sharpened if needed.
4. Prepare surface for repairs: Before applying new wall corner tape, all surfaces must be clean of dirt and debris, which can cause air pockets between layers of tape that can lead to weakening adhesive bonds over time.
5. Test adhesion strength: Once new corner tape has been applied, you must test its adhesion strength by lightly pressing down on areas where the seam touches other walls or ceilings.
Fixing Drywall Corner Tape: Easy Techniques for Professional Results
Drywall corner tape can provide many benefits for homeowners, but it needs to be addressed immediately if it begins to peel off or separate from the corners.
Repairing peeling or separating mesh drywall tapes requires some knowledge and skill, but with the proper techniques, you should be able to fix your wall problem in no time successfully.
It’s important to remember that safety should always come first when dealing with wall-related repairs, so make sure you take all necessary precautions when handling the materials. Whether you patch minor peels or replace entire strips of tape, by following these steps, your walls should look as good as new.


