Last Updated on March 22, 2023
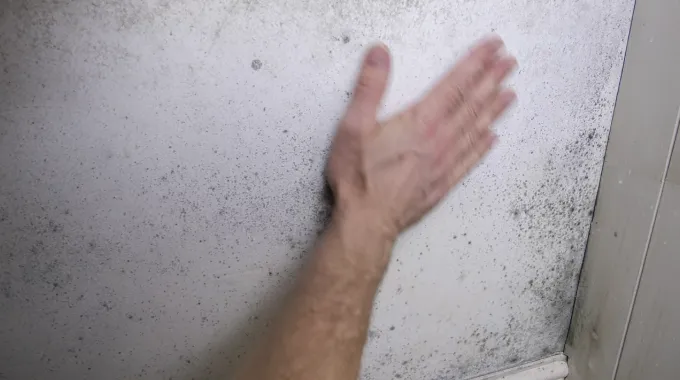
Got mold on your drywall? Don’t let it get serious. Besides looking bad, mold spores can make you sick. Thus take quick action to tackle the problem before costly repairs are necessary. Sealing off that pesky fungus with promptness and precision will keep the spores away and keep your house healthier.
But how to seal mold on drywall from both coated or uncoated surfaces? Thankfully, encapsulation is an effective way to seal mold on drywall. This is a process of sealing the mold with a non-toxic special coating solution, trapping it in so that it cannot spread and cause no harm to your drywall.
Whether you’re dealing with painted or unpainted surfaces, different methods are required. To ensure a successful mold sealing process and keep your drywall looking pristine, you first have to figure out what kind of drywall you have. Keep reading to learn more about sealing mold on drywall.
How to Seal Mold on Drywall: 2 Methods
If you’re facing a mold outbreak on your drywall, it pays to know what type of wall covering you’ve got. The sealing process for uncoated and coated drywalls differs substantially, so do the research before giving those pesky spores the death blow.
Let’s discuss how to seal mold on both coated and uncoated drywall with some easy steps:
How to Seal Mold on Coated or Painted Drywall?
To properly seal the mold off and protect other drywall areas, you need to follow these steps:
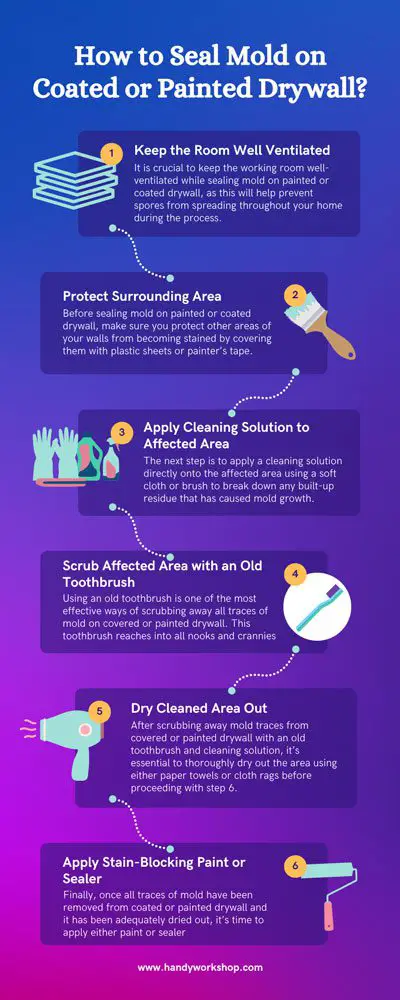
Step 1: Keep the Room Well Ventilated
It is crucial to keep the working room well-ventilated while sealing mold on painted or coated drywall, as this will help prevent spores from spreading throughout your home during the process.
To ensure adequate airflow in the room, open windows and doors when possible and consider running a fan if necessary.
Step 2: Protect Surrounding Area
Before sealing mold on painted or coated drywall, make sure you protect other areas of your walls from becoming stained by covering them with plastic sheets or painter’s tape. Doing this will also stop any excess cleaning solution from getting onto other surfaces in your home.
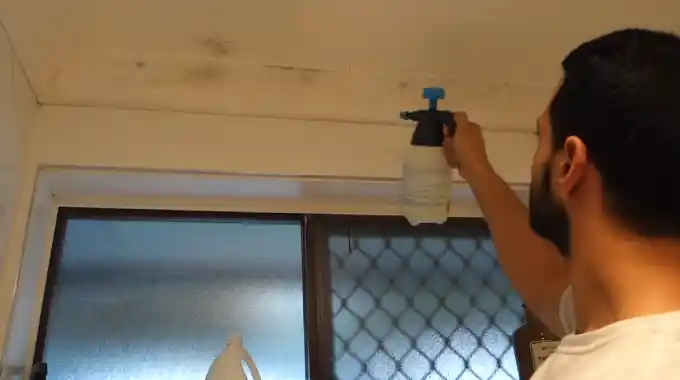
Step 3: Apply Cleaning Solution to Affected Area
The next step is to apply a cleaning solution directly onto the affected area using a soft cloth or brush to break down any built-up residue that has caused mold growth. It will create an encapsulation barrier around the visible mold, so it can’t spread.
You should choose a non-toxic mold cleaner specifically designed for removing mold and mildew stains that won’t contain bleach, as this can damage many surfaces over time.
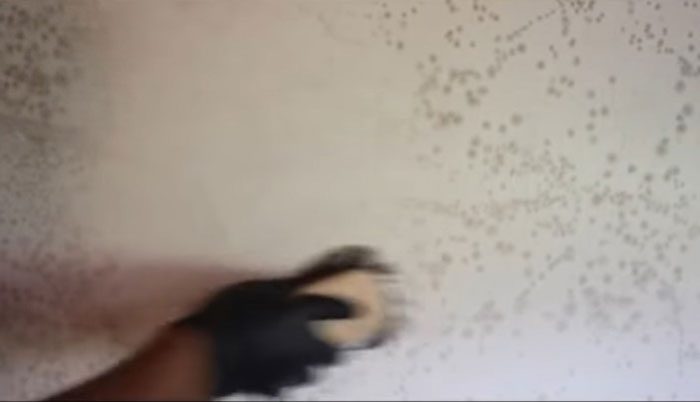
Step 4: Scrub Affected Area with an Old Toothbrush
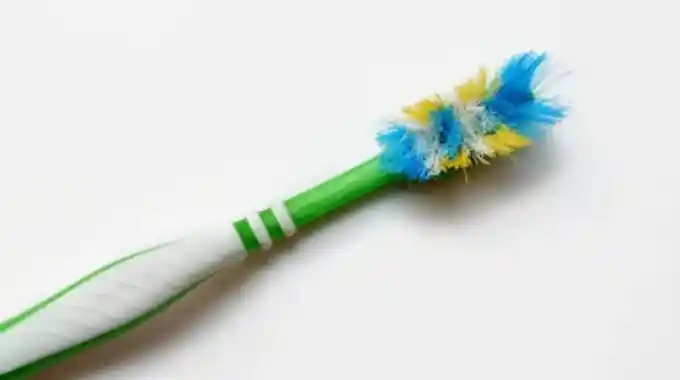
Using an old toothbrush is one of the most effective ways of scrubbing away all traces of mold on covered or painted drywall.
This toothbrush reaches into all nooks and crannies where dirt and grime may be stuck. It will help ensure that all the molds have been removed before moving on to the step.
Step 5: Dry Cleaned Area Out
After scrubbing away mold traces from covered or painted drywall with an old toothbrush and cleaning solution, it’s essential to thoroughly dry out the area using either paper towels or cloth rags before proceeding with step 6.
This will help ensure that no moisture remains, which might cause mold spores to spread again.
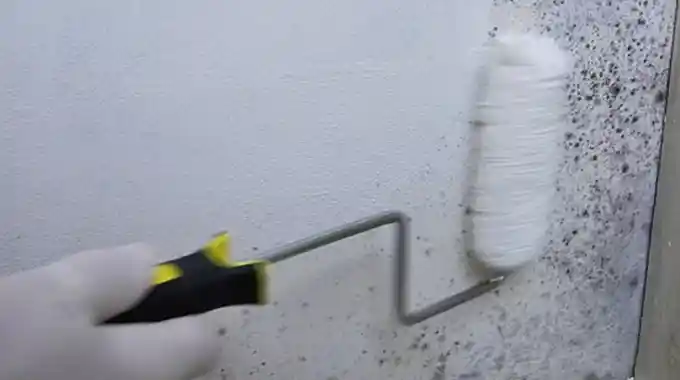
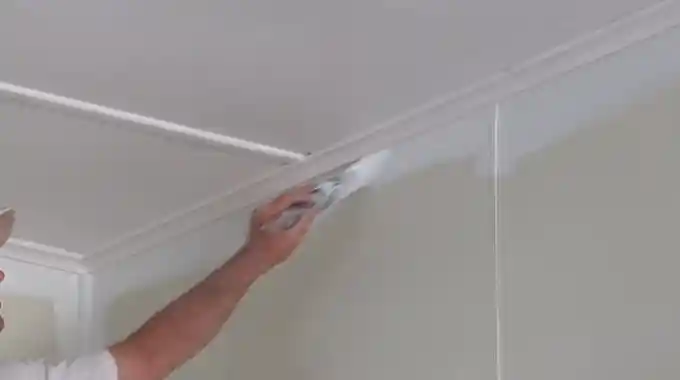
Step 6: Apply Stain-Blocking Paint or Sealer
Finally, once all traces of mold have been removed from coated or painted drywall and it has been adequately dried out, it’s time to apply either paint or sealer (such as Zinsser mold-killing sealer) over the top to prevent further growth from occurring.
Choose latex-based paint if you want something more decorative, or opt for epoxy resin sealer for maximum protection against water intrusion and future staining problems. You can use a paintbrush, roller, or sprayer to apply the sealer.
How to Seal Mold on Uncoated or Non-Painted Drywall?
For proper mold removal and protection of uncoated or non-painted drywall areas, you have to follow these steps:
Step 1. Cover the Underneath Area
To cover the working area underneath, use a sheet of plastic sheeting designed for construction projects. Secure it in place with painter’s tape so that it covers the entire area where the mold is growing. This will help prevent additional dampness and keep moisture out of the area while working on it.
Step 2. Mark and Cut the Area
Measure and mark around the perimeter of the affected area with an appropriate marking tool, such as a pencil or pen, then use a utility knife or jigsaw to cut along those lines and remove any portions of drywall damaged by water or mold growth.
You Also Might Be Interested: Do Professionals Use a Specific Size of Drywall Mud Knife?
Step 3. Apply a Stain-Blocking Sealer
After removing the affected part from the wall, apply a stain-blocking sealer to the surrounding surface before applying any new drywall material. This will help prevent mold growth and protect against future water damage or mold outbreaks.
Be sure to use a quality product specifically designed for interior home applications. Avoid using solvent-based sealers outdoors inside your home, as they can be too harsh for indoor surfaces.
Step 4. Fit the New Piece of Drywall in the Hole
Once you have applied the sealer, fit your new piece of drywall into your hole, and line up all edges even before you begin nailing it in place, This will ensure a consistent finish when completed.
Also, don’t overdrive nails into walls, as this can cause cracks or defects in finished walls. Use only enough force necessary when driving nails into walls without forcing them.
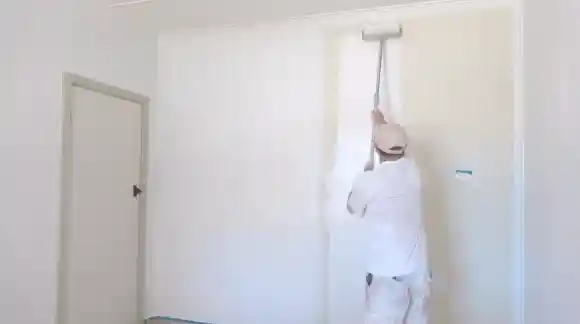
Step 5. Apply Joint Compound
Now apply the joint compound along seams where the two meet and use an appropriate trowel for even coverage. But remember, feathering those edges well is key so that no line can be seen between them when you’re finished. That way, you’ll get perfect-looking seamless results every time.
Step 6. Smooth the Joint Compound After it Dries
Let the joint compound dry completely before sanding down any joints where the two pieces meet. Use fine-grade sandpaper for best results, and finish by lightly wiping away dust residue. This will allow for seamless blending between old and new sections of the wall after the painting is done later.
Should Drywall Mold be Removed Before Sealing?
Yes, removing any mold from the drywall is essential before sealing it. This is because mold spores can still be present even after visible signs of the mold have been washed away. The spores are easily spread and can cause health problems if airborne.
If left unchecked, the mold spores can also damage the drywall sealer by causing discoloration and weakening its ability to provide a waterproof barrier. Removing the mold before sealing ensures that your drywall remains healthy and free from damage for many years.
What Kills Mold on Drywall?
Combining bleach and water is an effective solution for killing mold on drywall surfaces. When mixed at a ratio of one part bleach to two parts water, this mixture will disinfect and destroy any existing molds while preventing future growth.
It’s important to note that this mixture should not be used on painted or recently varnished surfaces as it may damage them in eliminating the mold. Also, safety precautions should always be taken when using this mixture, such as ensuring adequate ventilation in a room where bleach will be used.
Can Black Mold be Cleaned from Drywall?
Unfortunately, cleaning black mold from drywall is impossible without professional help due to its potential toxicity if inhaled or ingested in large quantities. Not only can breathing in the spores cause respiratory issues, but black mold has been known to cause skin irritation in some cases.
So don’t attempt to handle large deposits on your own regardless of how safely you think you could do it with protective gear like gloves etc.
In most cases, having a professional come in and assess the situation will allow them to determine what type of treatment needs to be done based on how much of an infestation there is.
Can Inside Drywall Mold harm the Drywall Sealer?
Nope, drywall mold can’t hurt a sealant right away, but those ugly discolorations are enough to make you hit the panic button. You may have to apply additional coats of coating and spend extra time putting on sanding & polishing.
Moisture and humidity are insidious foes that, left unchecked, can do a number on materials, in the long run, leading to expensive repairs. That’s why it pays to check for regular maintenance and inspections.
Does Painting Over Drywall Mold Seal it?
No, painting over drywall mold does not seal it. While the mold may be covered up, this does not prevent future growth and only hides it from view. Mold spores can still grow and spread in damp, dark places, even if painted over.
To truly stop future growth, a proper mold treatment must be applied, including using products specifically formulated to kill and remove existing molds and sealing any areas prone to further moisture and humidity accumulation.
How Do You Stop Mold from Coming Back on Drywall?
The best way to prevent mold from growing on drywall is to use a dehumidifier and monitor humidity levels to maintain low moisture levels in the air. This will help prevent ongoing condensation, which can encourage the growth of new molds in damp environments.
Also, all areas with previous signs of mold should be treated with a product specifically designed for killing and removing them and sealing them against moisture accumulation, such as leaks or cracks in walls or ceilings.
Protect Your Home: Keep Out Mold With Drywall Sealing
Sealing mold on drywalls is a must for ensuring the longevity and safety of the house’s occupants from mold-related issues. Whether coated or uncoated, drywalls need careful preparation for mold removal by first removing all spores using various available products.
Also, encapsulating mold on drywall is an excellent way to keep the problem from getting worse and reduce the risk of potential health risks associated with its spread. While this technique does not eliminate existing mold spores, it does provide an effective barrier against future infestations.
Homeowners should only attempt encapsulation if they are confident in their ability to do so safely and correctly, as the improper application may result in further damage or health risks. When done correctly, encapsulation can effectively protect against the future growth of unhealthy molds on drywall surfaces.


