Last Updated on January 25, 2023
Drywall can be tricky to get a smooth finish, making your walls look unpolished. Many people try to do this by sanding down the drywall, but that can be boring and tedious. Skim coating is a much better solution. The question is, why skim coat drywall instead of painting it?
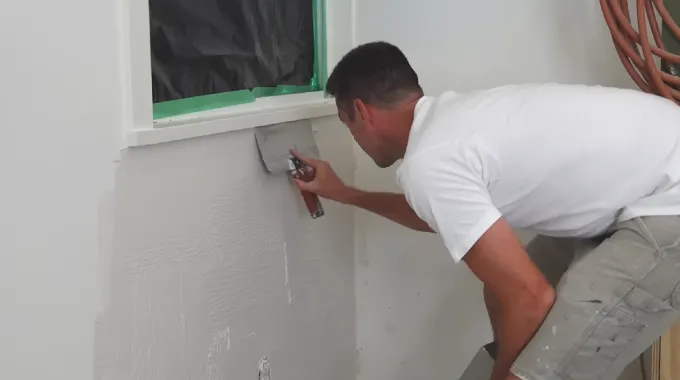
Skim coating is a process of applying a thin layer of joint compound to existing drywall and other surfaces. It’s also known as “floating” because you spread the joint compound over the drywall with a drywall knife or trowel.
The purpose of this article is to explain why you might need to skim-coat your drywall, how it’s done, and the benefits. Read on for more information.
A Look at Why Skim Coat Drywall Provides Benefits
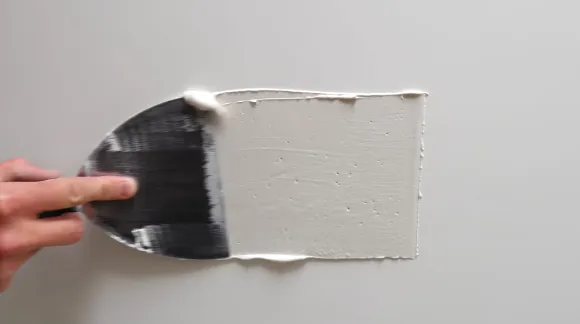
Skim coat drywall provides several benefits for any situation, whether you are starting a new construction project or doing some renovations. Plus, it’s a lot faster than sanding down the drywall and then painting it.
One of the main benefits of skim coating is that it gives you an incredibly smooth surface, free from bumps and flaws, making your walls look more polished and professional. This makes it easier to apply wallpaper or tile to your wall without any unsightly bumps or creases.
Skim coating also helps to even out walls and ceilings, making them look neater and more uniform. It can also help to fill in any gaps or cracks in the drywall, preventing any further damage from occurring. This makes your walls stronger and more durable over time.
You can also benefit from skim coating if you’re trying to give your walls a unique texture. By varying the type of joint compound used and the techniques employed, you can create different effects that will make your walls stand out from the rest. Some other benefits are:
Increases Durability
Skim coating drywall also increases its durability. The joint compound used in a skim coat provides an additional layer of protection for the drywall, which means that it will be less likely to be damaged by impacts or other types of wear and tear.
From a practical perspective, this will save you money in the long run, as you won’t need to repair or replace your drywall as often.
Better Insulation
Skim coating drywall also helps to increase its insulating properties. This is because the layer of joint compound adds an extra layer of insulation between the wall and the outside world. This can help to keep your room warmer in winter and cooler in summer.
And, if you’re trying to make your home more energy efficient, the skim coating can help with that too. The insulation layer will help reduce air leakage and keep the hot or cold air in, which helps reduce heating and cooling costs.
Can Be Used on Any Type of Drywall
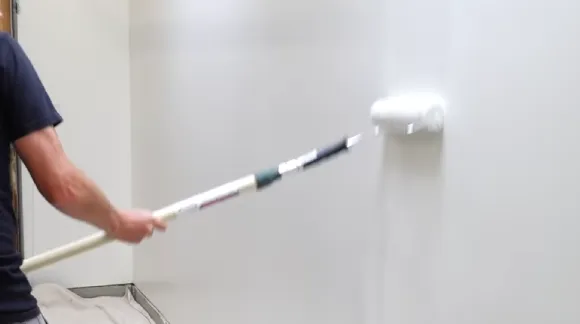
The major benefit of skim-coating drywall is that it is applicable to all types of drywall, regardless of its thickness or type. The skim coating will improve the appearance and performance of your walls, regardless of whether you have standard drywall or thicker fire-rated drywall.
Overall, a skim coating is an excellent way for anyone looking to improve the look of their drywall and make it look more polished and professional. Just be sure to use the right equipment and safety precautions when skimming coating, as it can be a tricky process.
You Can Also Read: Is it better to sharpen dry or wet drywall knives?
What Is the Disadvantage of Using Skim Coats on Drywall?
While skim coating can be used to repair damaged drywall or to prepare a surface for painting, there are some disadvantages to using this technique.
Adding a skim coat to a wall is more time-consuming and expensive than simply texturing it. And because skim coats are so thin, any damage to the surface is more noticeable than it would be with a textured wall. But not to worry. A skim coat is still a viable solution for most drywall projects.
Another potential issue with a skim coating is that it can be difficult to achieve a uniform finish when working on large surfaces. Applying joint compound and smoothing it out across an entire wall can take practice, and you may not get the same results each time.
What Types of Skim Coats Are Often Used for Drywall?
Two types of joint compounds can be used for skim coating
Setting-type joint compound: The setting-type joint compound does require mixing before use, but it is much harder than the ready-mixed joint compound. As a result, it is often the best choice for skim-coating projects.
Ready-mixed joint compound: This compound is easier to work with, as it doesn’t require mixing before use. It also doesn’t set as hard as setting-type joint compounds, so it may not be ideal for all applications.
How Do You Skim Coat on Drywall?
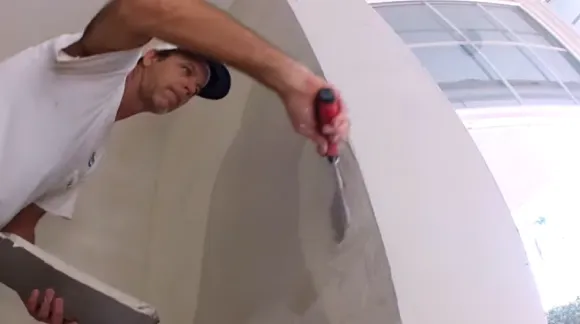
Now that you know why to skim-coat drywall, the next step is to learn how it’s done. The basic steps are:
1. Preparation
Skim-coating can be done by hand or with a machine, but either way, you’ll need to start with a clean surface. That means sanding the walls to remove any bumps or imperfections and then cleaning them thoroughly to remove any particles.
To do that, you can use a drywall sander and vacuum, or you can use a damp cloth and a scraper for smaller areas. But whatever you do, make sure to wear a dust mask and goggles while sanding the drywall.
2. Mark Out the Area
Use a pencil to draw a line around the entire perimeter of the area you want to cover. Once you have your outline, double-check your measurements and ensure that you are happy with the size of the area you will be working with.
This will help you focus on only that area instead of covering too much at once. With a clear plan in place, you can now begin the task of skim coating your drywall.
3. Mix the Joint Compound
To achieve the best results, it’s important to mix the joint compound properly. In general, the package should tell you how much water and powder you need, but keep in mind that the amount of water you add will vary based on the humidity and temperature in your area.
Too much water will make the joint compound harder to work with and more likely to sag, while too little water will make it difficult to spread evenly. The best approach is to add less water, as you can always add more if necessary.
4. Spread the Joint Compound
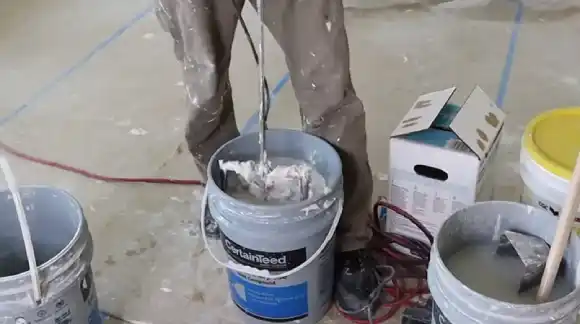
Once you’ve mixed the joint compound, it’s time to spread it onto the wall.
There are two ways to go about spreading the joint compound of a skim coat onto drywall, and which method you choose will depend on the tools that you have available as well as your own preference.
If you have a drywall knife, you can use this to apply an even layer of the joint compound directly to the wall. Simply dip the knife into the joint compound and then spread it out in a smooth, even motion.
Alternatively, if you have a trowel, you can use this first to apply the joint compound to the wall in ridges and then use the trowel to smooth it out.
Whichever method you choose, be sure to follow your markings as a guide so that you end up with a uniform coating across the entire surface.
5. Let the Joint Compound Dry
Although the joint compound is often thought of as an adhesive, it is a type of plaster that is used to fill gaps and cracks in drywall. Once applied, the joint compound will eventually harden as it dries.
The drying process is dependent on a number of different factors, including the type of joint compound that was used, the thickness of the application, and the humidity and temperature of the room.
Generally, it is best to allow the joint compound to dry for at least 12 hours before sanding or painting. Sometimes, waiting up to 24 hours or even longer for the joint compound to harden completely may be necessary.
6. Sand and Finish (Optional)
Once the joint compound has completely dried, you may find that there are still some imperfections on the wall. If this is the case, you can use fine-grit sandpaper to smooth out any bumps or ridges.
Alternatively, if you like the texture of the wall as it is, you may choose to leave it as-is and simply apply a coat of paint on top. This is the ideal option if you are looking to add color but don’t want to change the texture of the wall.
No matter your route, a skim coat applied to drywall can help create a more beautiful and durable finish for any space. So, if you have some drywall that needs a little bit of extra love, a skim coating is the perfect solution.
How Many Layers of Skim Coat Do You Need For Drywall?
In general, you will need to apply at least two coats of skim coat joint compound, also known as mud.
The first coat should be fairly thin, and you should not wait for it to dry before applying the second coat. Once you have finished covering the entire wall with the first coat, go back to the beginning and start again, this time dragging your trowel across the surface to create a smooth finish.
Depending on the level of imperfections in the drywall, you may need to apply additional coats. If you are unsure, it is always best to take extra caution and apply an extra layer or two. After all, it is easier to sand down a wall that is too smooth than trying to repair a wall that is not smooth enough.
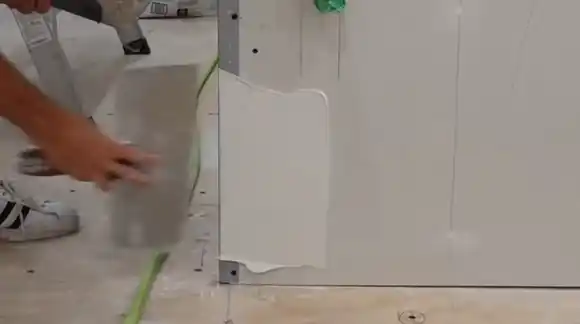
Do Painters Skim Coat On Drywall?
Yes. Even many painters will use skim coating as part of their painting process.
A thick layer of the joint compound can be applied to the surface of the drywall before the walls are painted. This skim coat fills in any grooves or imperfections and provides a smooth, even base for whatever design you choose to apply.
Painters may also use the skim coat technique to cover up any repairs that have been made to the walls, ensuring that the finished surface looks flawless.
Skim coating is an important skill for painters to have and should be factored into their pricing structure when hiring a professional painter. It is also worth noting that some painting companies will offer this service as an add-on to their standard painting package.
What Happens If You Don’t Skim Coat Your Drywall?
Without skim-coating your drywall, the paint will absorb differently from the joint compound and drywall paper. This can make the tape joints really visible, especially if the paint has a sheen, like semi-gloss or gloss paint.
Skim coating is when you apply a thin coat of joint compound to your drywall. It smooths out the surface and can help hide imperfections. You already know why skim-coating drywall is important and how to do it, so keep this step in mind if you want a professional-looking surface.
And it’s also a good idea to skim-coat your drywall before painting, especially if you’re using a high-sheen paint. If you don’t want to skim-coat your drywall, you can use a primer designed for new drywall. This will help to even out the absorption of the paint and make the tape joints less visible.
Possibly a Good Match:
