Last Updated on March 29, 2023
Gluing drywall tape may seem like an easy fix to wall damage, but it can often lead to worse problems than it solves. Homeowners should look for alternative solutions to keep their walls looking great without the risks of gluing down loose drywall tape.
Before using drywall tape for DIY repairs, consider the risks and conditions that could lead to costly mistakes.
Problems such as adhesive quality issues, wall damage risk, cost considerations, or poor strength can cause moisture problems leading to potentially disastrous mold growth.
Be sure you have a proper technique in place with high-quality materials, preparation strategies, and adequate support of your surface before making any changes near humidity-prone areas within your home.
Why Loose Drywall Tape Should Not Be Glued Down: Causes of Problems
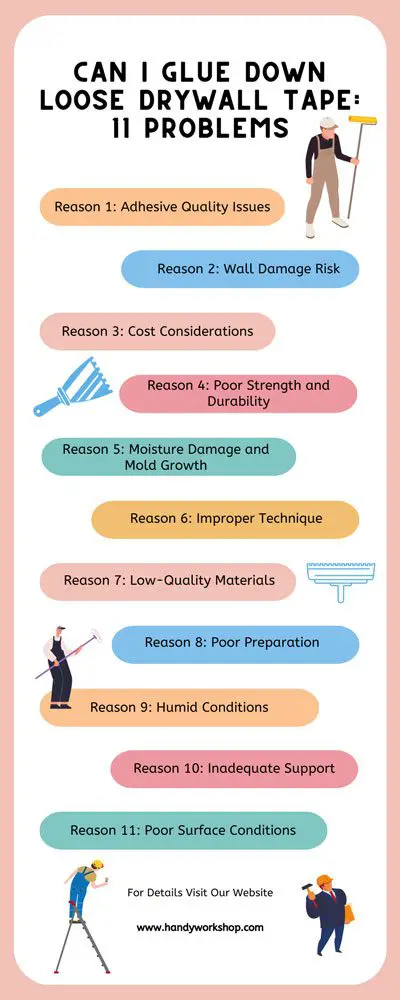
Reason 1: Adhesive Quality Issues
Gluing down loose drywall tape is not recommended as the quality of adhesive used may be inadequate. Further, it can result in a weakened joint that could break or rip over time and often requires more labor than simply taping.
Therefore, cost considerations might lead to lower-quality adhesives being employed, which puts at risk the proper bonding of wall surfaces with studs behind them.
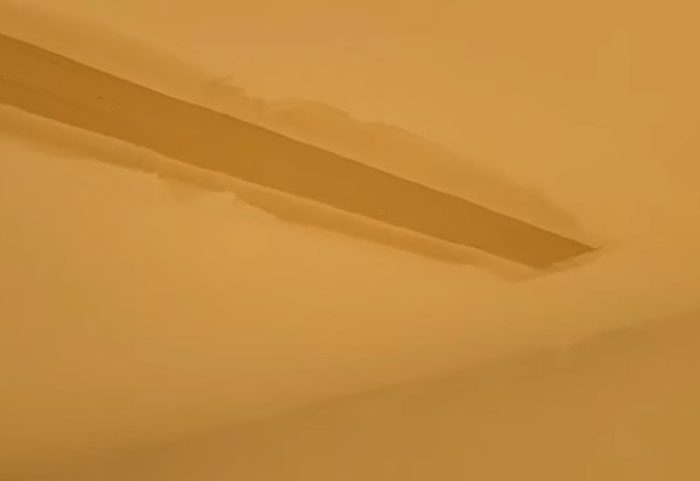
Reason 2: Wall Damage Risk
Applying adhesive to secure drywall tape may result in irreparable damage, such as warping and discoloration of the wall surface due to solvents found within the glue.
Over-application could also cause seepage into seams resulting in visible patching around joints. Exercise caution when using adhesives for this purpose.
Reason 3: Cost Considerations
Loose drywall tape gluing should be approached with caution, as costs for both adhesive and necessary tools can accumulate quickly. Furthermore, labor may take longer than usual when using glue instead of just mud.
Not to mention the additional expense from any potential mistakes that require repair work. All these factors need careful evaluation before making a decision about whether or not to proceed with this method.
Reason 4: Poor Strength and Durability
Inadequate adhesion between drywall and adhesive can lead to weakened strength and durability. Moisture intrusion amplifies this problem, potentially causing significant damage.
Specialized adhesives are available, which may improve performance over time; however, it is important to select the correct option for the best results.
Reason 5: Moisture Damage and Mold Growth
To ensure all areas of your home are protected from potential water damage, it is important to take the proper steps when applying glue to exposed surfaces. Neglecting these precautions can lead to mold growth which may have far-reaching repercussions for your wallet and well-being.
Reason 6: Improper Technique
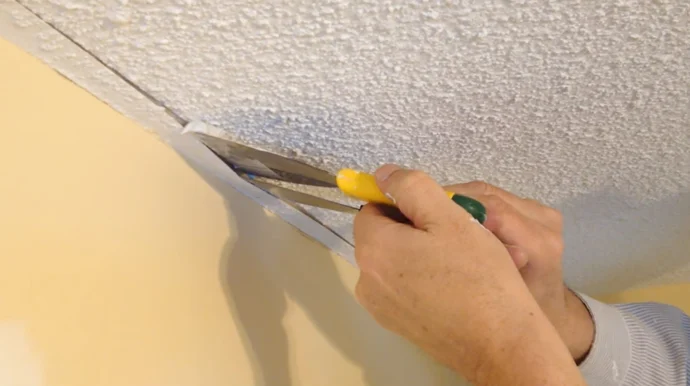
Sealing loose drywall tape requires the skillful use of a taping knife. If done incorrectly, air bubbles can form beneath the surface or leave an uneven and lumpy finish.
The further improper technique could see it lift away from its base, resulting in costly repairs and potential structural harm if left unchecked.
Reason 7: Low-Quality Materials
Opting for inferior materials when adhering to drywall tapes can prove costly in the long run.
Thin paper and foil tapes are prone to dislodging from nails or screws, necessitating repairs or replacements if chosen instead of a sturdier fiberglass mesh tape.
Ensure you use only high-quality products designed specifically for taping drywalls to protect your project’s integrity.
Reason 8: Poor Preparation
Secure adhesion of your drywall tape is essential for a smooth finish and lasting results. Proper preparation before gluing down the tape will guarantee the adhesive bond holds, so dirt on walls, bumps, or dips cannot compromise structural integrity over time. Start with the correct surface prep now.
Reason 9: Humid Conditions
Ideal drywall taping conditions require low humidity levels, as moisture can affect adhesive bond strength and result in mold growth. Consider local weather before commencing any project that requires the application of tape to a wall.
Reason 10: Inadequate Support
Poorly attached drywall tape can cause uneven application and damaging results. To maintain the integrity of wall surfaces, it is essential to securely fasten every contact point between them and the tape with nails or screws.
Neglecting this step may lead to sagging, peeling away from walls, and irreparable structural damage in time.
Incorrect positioning, insufficient nails, and other support features can cause the tape to sag over time, resulting in an unappealing aesthetic and potential structural damage.
Reason 11: Poor Surface Conditions
Drywall tape adhesion is dependent upon proper wall preparation before application. A clean surface free from dust, dirt, and excess joint compound must be established first.
Otherwise, weak bonding or an unappealing finish may result. Smoothness should be achieved by sanding away any bumps or uneven surfaces before affixing the tape for optimal results.
Consequences of the Problems [ Gluing Down Loose Drywall Tape ]
A. Unsightly Appearance
Improperly gluing drywall tape can not only compromise the aesthetic of a room but its structural integrity too. Bubbling, wrinkling, and misalignment will be magnified in some rooms due to the strong lighting, such as bubbles and bubbles along your taped line.
B. Loss of Time and Money
Incorrectly installed drywall tape can result in costly and time-consuming repairs, requiring more labor, materials, and money beyond the initial cost of specialized tools. Lack of attention to detail at the outset may even lead to further damage that will necessitate professional services or additional products for repair.
C. Structural Damage
Poorly affixed drywall tape can wreak havoc on the structural stability of walls, inviting cracks and sagging. Humidity amplifies this problem by loosening adhesives which further contributes to wall degradation.
Left unattended, these gaps between boards will let cold air into your home in winter, causing increased energy bills due to poor insulation efficiency.
Prevention and Solutions for Avoiding Potential Problems When Gluing Down Drywall Tape
Preparation
It’s essential to thoroughly clean and measure the wall before applying drywall tape. This ensures a secure fixing, with no gaps or cracks for dust particles to settle.
Then, check that your measurements are correct and confirm its flatness so it will adhere properly. Once these steps have been completed, you can confidently begin gluing down the tape!
Application
Applying drywall tape correctly is essential to ensure a successful installation. Using an appropriate squeegee tool or roller.
Press the tape firmly against the wall and secure it with generous amounts of adhesive on both sides for optimal coverage.
Special attention must be paid to prevent gaps or wrinkles from forming between pieces; these can lead to adhesion failure if left unchecked.
Quality
The strength of a drywall tape adhesive is essential for its success. Poor-quality material can lead to peeling, which may require costly repair efforts in the future; hence, always seek out reliable manufacturers who offer superior products at reasonable prices for maximum results and durability.
Temperature
Temperature is critical for ensuring a successful adhesive bond when using drywall tapes. Variations in temperature can create issues with performance and bonding strength, impacting the long-term look and durability of your project.
Before application, check temperature levels carefully. After use, keep an eye out for shifts that may destabilize bonds leading to peeling or crumbling surfaces.
Alternative Ways To Secure Loose Drywall Tape
Re-Tape with Better Quality Materials & Techniques:
An economical and efficient fix for loose drywall tape involves re-taping the loose area using high-grade materials such as mesh, paper, or fiberglass.
Further preparation of the wall with cleaning and sanding rough areas is necessary to ensure a durable bond that won’t be affected by future maintenance.
For best results, make sure you apply the tape uniformly against your walls.
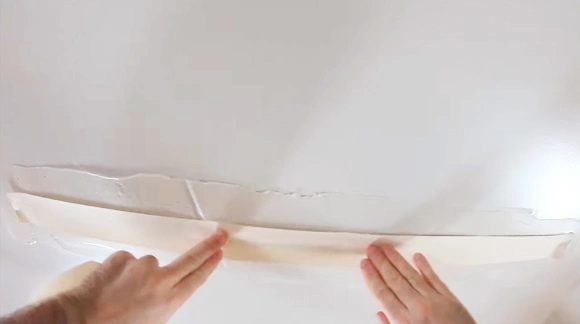
Fill Gaps with Spackle Compound:
Repairing loose drywall tape by filling the gaps with a spackle is an effective solution.
Before application, ensure that the area has been cleaned and prepped; applying a smooth layer of spackle using a putty knife will give the best results.
After drying and sanding as needed, painting can be done for further enhancements if desired.
Patch & Skim Coat Existing Section:
Repairing loose drywall tape requires adhesion and skimming to correct the problem successfully.
Remove any remaining pieces of broken or lifted tape before applying a specialized adhesive patch, followed by an even skim coat for ultimate uniformity when finished. Allow approximately 12-24 hours for drying time until complete.
Install Veneer Plaster Over Existing Wall
Veneer plaster is an ideal solution for attaching loose drywall tape and enhancing a wall surface. It requires careful preparation beforehand, but with only hours to wait until it dries, you’ll be able to obtain reliable protection that lasts far longer than conventional taping.
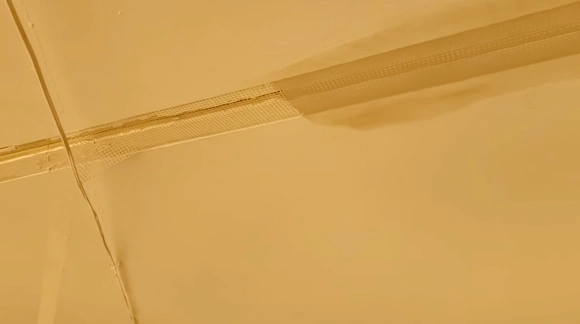
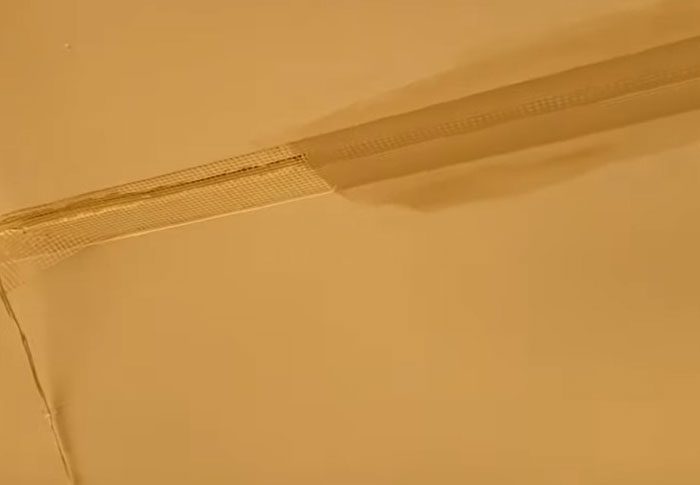
Install an Adhesive-Backed Metal Corner Bead
Adhesive-backed metal corner beads provide a simple and economical solution for improving the protection and longevity of your walls.
Easily installed without special tools or skills, this self-adhering product creates a secure seal between adjoining wall edges that resists cracking over time.
Homeowners can enjoy reliable performance with no extra tape or nails needed to complete the job.
Secure with Construction Adhesive
Applying construction adhesive is an effective way to secure loose drywall tape without needing replacements. Simply apply directly onto the backside of each piece and press firmly against its adjoining surfaces within a wall cavity.
Safety precautions should be strictly followed during their application process as vapors can potentially cause health risks – ensure ventilation at all times!
Replace Taped Seam with Wood Trim
Adding decorative wood trim around doorways and window frames is an effective way to create a professional, aesthetically pleasing look while enhancing insulation efficiency.
This method replaces traditional paper-thin joint tapes with thicker pieces of pre-cut or hand-cut-out wood, providing stronger protection against air infiltration & moisture. Additional details, such as moldings and coved corners, can also be added for enhanced visual appeal.
Consider Spray Foam Insulation as an Alternate Solution
As an alternative to budget and structural constraints, spray foam insulation is a viable solution for securing loose drywall tape.
This process involves spraying low-pressure foam on affected areas which expand upon application, forming thermal baffles and air seals that reduce energy loss in the home while simultaneously strengthening existing frames & joints prone to cracks or gaps.
Spray foams are lightweight yet durable. Perfect for long-term use regardless of the environment.
Clean Surface, Prime, and Paint
Start the project by removing dirt and debris from the drywall tape area with a damp cloth. Then, apply an oil-based primer to ensure the adhesion of the paint when it is put on afterward.
Lastly, use even brush strokes or a roller for each coat of premium acrylic latex paint, drying thoroughly between layers if necessary.
Inspect Other Surrounding Areas Carefully
Inspecting walls, ceilings, and surrounding areas for signs of damage is key to preventing future drywall issues. Take a look at all seams and corners as well: if additional pieces are found that indicate potential problems.
They should be addressed promptly. Don’t forget to check for any bulging sections in the structure. This could point towards water damage which requires professional attention immediately.
Utilize Professional Assistance if Necessary
To ensure lasting repair results, professional help may be necessary for complex jobs like large tape removal or water damage. Contractors with the experience and knowledge of proper techniques can prevent additional issues that might arise from incorrect application methods or materials.
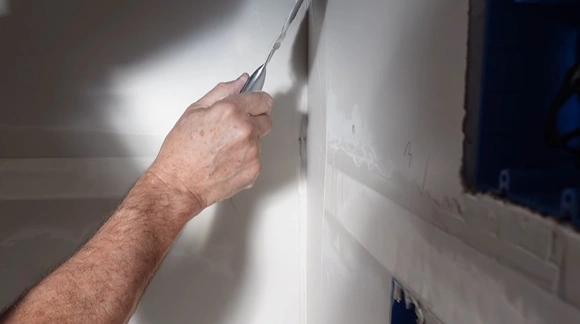
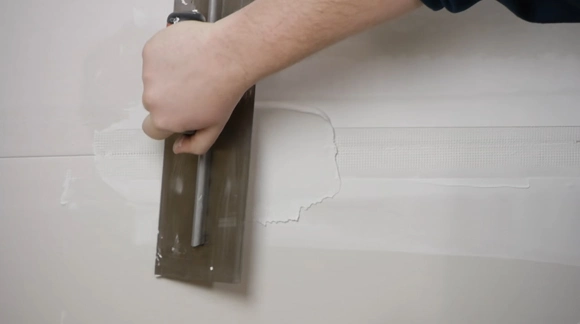
Use a Wide Blade Putty Knife and Joint Compound
To effectively repair weakened seams on walls and ceilings caused by age or fluctuating temperatures, use a wide-blade putty knife paired with a joint compound.
The putty knife will help scrape old adhesive residue while the joint compound covers newly exposed areas for seamless integration back into surrounding surfaces once dried and painted.
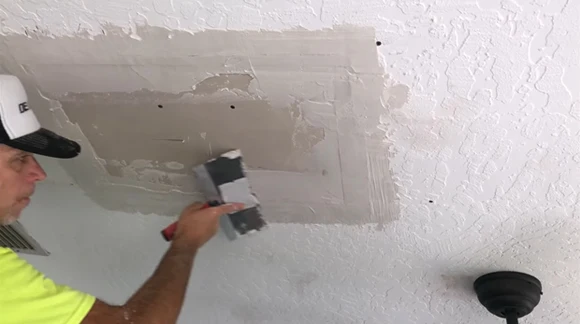
Use Mesh Drywall Tape and Joint Compound
Secure drywall with mesh tape and joint compound. Cut the tape larger than needed, cover the damage using a putty knife or trowel, then apply liberally with joint compound for an even finish. Allow proper drying time before adding two coats of additional strength and protection from moisture/contaminants.
Purchase Self-Adhesive Wall Repair Fabric Strip
To secure loose drywall tape, use a fabric strip that adheres to the wall. Fabric strips adhere firmly to wall surfaces and other materials beneath them (such as plaster).
Its strong adhesive properties make it ideal for securing loose drywall tape on walls damaged by water or other elements that can cause sticking points with other methods.
To install this repair fabric strip, measure out what size is needed before cutting it with scissors. Then peel off the backing paper before pressing it onto the affected area until all sides are firmly secured.
Use an Electric Heat Gun for Problematic Sections
An electric heat gun is an effective solution for repairing drywall inconsistencies and providing extra security against future damage or detachment.
This heating tool, combined with a wide putty knife to apply light pressure, enables weakened sections of wall material to be pressed back into place safely.
Ensuring durable protection against any accidental impacts or moisture seepage in your home.
The Bottom Line
In conclusion, while glue-down applications may be an attractive option due to their affordable price tag, they come with several potential risks if done incorrectly or without proper consideration for environmental factors such as temperature or humidity levels.
Poor adhesive quality issues, along with wall damage risks, are just two of many reasons why it’s not wise to opt for glue-down drywall tape over traditional methods such as taping and mudding or using corner beads or corner clips/trowels, etcetera.
By taking special care when preparing surfaces properly and using high-quality materials, you can greatly reduce the chances of experiencing negative results from a poorly executed glue-down application.
It’s important to remember that improperly applied adhesive will leave you with an unsightly appearance that will require more time and money to fix correctly so it pays off to go about it carefully.