Last Updated on November 22, 2022
Homeowners often experience problems with drywall corners. The problem with drywall corners is that they are very susceptible to damage. Over time, the joint compound that is used to hold the drywall together can break down, leaving gaps and cracks. Not only does this make your home look unfinished, but it can also lead to expensive recurring repairs.
Are you tired of seeing cracks in your drywall corners and worried that you can caulk drywall corners on your own? It will surprise you to know that caulking is an effective solution. The caulking helps to create a seal between the two pieces of drywall and prevents cracks from appearing in the corners. But before you begin caulking, there are a few things you should keep in mind.
We will discuss everything you need to know about caulking drywall corners, the process, and some tips that will assist you in achieving the desired results.
Can You Caulk Drywall Corners: Detailed Information
Have you ever noticed cracks in the corner of your closet or other low-priority areas and wondered why they weren’t taped and mudded like the rest of the drywall? The simple solution is that caulking is an effective way to seal gaps and cracks in drywall corners.
Caulking drywall corners is a great way to save time and money on home renovations. By caulking the corners, you prevent further damage to the drywall and potentially save yourself from having to replace the drywall entirely. It is made of silicone, latex, or acrylic, and it can be applied with a caulking gun or by hand.
It is important to keep certain things in mind before caulking. If you don’t prep the surface correctly, the caulking will not adhere to the drywall and will eventually peel off. Also, if you apply the caulk the wrong way, it will create a mess. Therefore, it’s important to know how to caulk drywall corners properly.
So now that you know caulking is a good solution, let’s take a look at the process and a few tips that will assist you.
Supplies Needed:
- Caulking gun
- Tube of caulk
- Putty knife
- Sandpaper
- Pencil or pen
- Rag or paper towel
- Step ladder (optional)
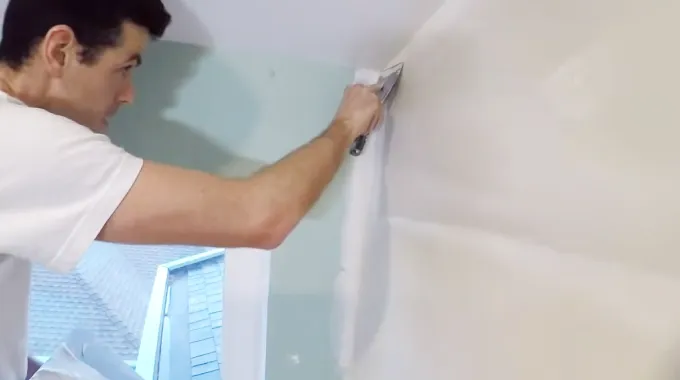
Step 1: Prep The Surface

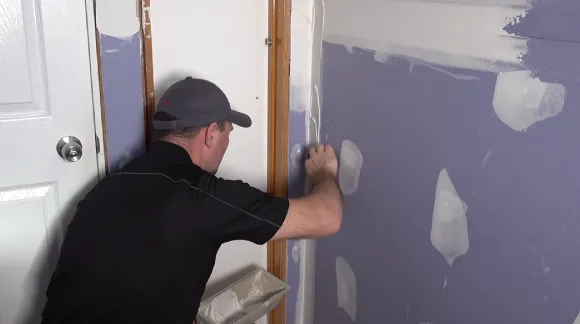
You need to prep the surface before you add any caulk. If the surface is old and cracked, you’ll need to remove all of the old caulk before you add the new caulk. If the surface is painted, you’ll need to scrape away any loose paint before you add new caulk.
Preparing the surface first will help the caulk to adhere properly and create a lasting seal. Caulking inside corners requires a few extra steps. To begin, score any old caulk or paint that is on the surface with a utility knife. The new caulk will adhere better if this is done. Wipe away any particles with a damp rag.
Step 2: Cut the Tip Of the Caulk Tube
Before you can begin caulking, the caulk tube’s tip needs to be cut. The size of the hole will determine how much caulk is dispensed. A small hole is best for small cracks and gaps, while a larger hole is best for larger cracks and gaps.
Caulk tube tips should be cut with a sharp knife. Place the knife at a 45-degree angle and cut away the tip of the tube. Be sure to cut an opening that is slightly larger than the crack or gap you’re trying to fill. Doing so will ensure that the caulk fills the entire space and forms a tight seal.
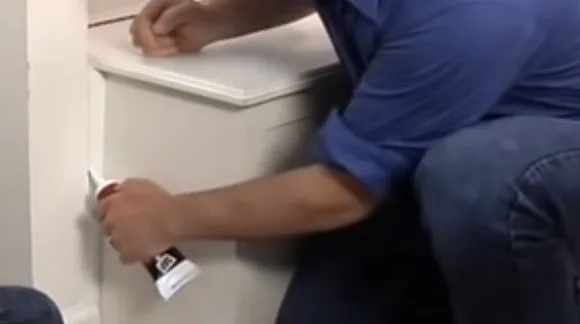
Step 3: Insert the Tube of Caulk Into the Caulking Gun
Once you’ve cut the tip of the tube, you’ll need to insert it into the caulking gun. To do this, pull back on the plunger until it locks into place, then insert the tube into the barrel of the gun. Squeeze the trigger to release the plunger, then position the tip of the tube against the corner that you’re trying to fill.
Slowly squeeze the trigger as you move along the joint. Be sure to release the trigger before you reach the end of the joint. Otherwise, you’ll have a mess on your hands. Continue moving along the joint until it’s filled to your satisfaction. Release any pressure on the trigger, then set down your caulking gun.
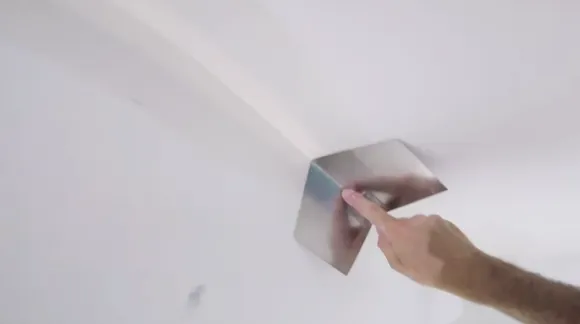
Step 4: Smooth the Caulk
Once you’ve applied the caulk, you’ll need to smooth it out. You can do this with your finger or a putty knife. If you’re using your finger, simply run it along the joint to smooth out the caulk. If you’re using a putty knife, hold it at 45 degrees and run it along the joint.
Be sure to smooth out the caulk before it dries. If you wait too long, the caulk will harden, and you won’t be able to smooth it out. Also, be careful not to apply too much pressure when smoothing out the caulk. Doing so will cause the caulk to squish out of the joint and create a mess.
Step 5: Remove Any Excess Caulk
It’s important to remove any excess caulk from the surface. Otherwise, it will become difficult to paint or wallpaper over. The best way to remove excess caulk is with a putty knife or a utility knife. To start, you will need to score the caulk with a knife. This will help to break the seal and make it easier to remove.
Then, pry the caulk away from the surface with the knife. You may need to use a little force, but be careful not to damage the surface beneath. Finally, use a damp cloth to wipe away any residual caulk. Once you’ve removed the excess caulk, you can proceed with painting or wallpapering as usual.
Caulking is a simple task that anyone can do, but it’s important to do it right. By following these simple steps, you’ll ensure that your caulk lasts for years to come.
A Few Recommendation Caulks for Drywall Corners
Always try to use the right and quality materials for your project because it will make a difference. There are many different types of caulk on the market, so it’s important to choose the right one for your needs. For example, if you’re caulking around a shower, you’ll need to use a waterproof caulk that can withstand high temperatures and moisture.
Here are some recommendations for caulks that can be used on drywall:
Elastomeric Patch and Caulking Compoun

Elastomeric patching and caulking compounds are often used to fill nail holes, cracks, or gaps in masonry surfaces. Because these products are designed to flex and move with the substrate, they are an ideal choice for repairing expansion joints, cracks in concrete walls, and gaps around doors and windows.
High-Strength Crack Repair Caulking Sealant:
This is a specialized type of sealant that is designed for repairing cracks in walls and ceilings. The sealant is applied to the cracked area and then allowed to dry. Once it is dry, the sealant will form a strong bond that will help to hold the cracked area together.
Elastopatch Textured Caulking Sealant:
Elastopatch Textured Caulking Sealant is a siliconized acrylic caulk that can be used on a variety of surfaces. It provides a waterproof seal that is weather-resistant and mold-resistant. This sealant can be applied to both vertical and horizontal surfaces, and it adheres well to most common building materials.
Heavy Duty Construction Caulking Adhesive:
Heavy duty construction caulk is a strong, flexible sealant that is used to fill gaps and cracks in a variety of materials. It is made from a variety of synthetic rubber as well as plastics and can be used on both interior and exterior surfaces. Construction caulk is typically applied with a caulking gun and will cure within 24 hours.
Acrylic Latex Caulking Sealant:
Acrylic latex caulk is a versatile sealant that can be used for a variety of purposes, from filling cracks in drywall to attaching molding. It is easy to apply and forgiving of minor errors, making it a good choice for do-it-yourself projects. This type of caulk can be painted over once it is dry.
These are only a few of the many different types of caulks that are available on the market. When choosing a caulk for your project, be sure to consider the specific needs of your application.
When Should You Caulk Wall Corners Before or After Painting?
This allows for a clean, neat line and avoids the risk of smudging or damaging the paint. As long as trimming or molding is installed over the caulk line, it is possible to apply the caulk after painting. In this case, it is important to wait until the paint is completely dry before caulking, as wet paint can cause problems with adhesion.
Ultimately, the best approach is to carefully consider the situation and choose whichever option will result in the best-finished product.

Where Is It Not Appropriate to Use Caulking?
It’s important to allow air circulation in these areas to prevent moisture build-up and mold growth. Moreover, weep holes need to be kept clear so that water can escape from the home. Failure to do so can result in serious water damage.
It is recommended to leave the garage door panels unsealed so that they can expand and contract as needed. By avoiding these areas, you can ensure that your home is properly sealed and protected from the elements.
Is It Possible to Caulk Over Caulk On Drywall Corners?
The caulk tends to be more effective when it’s applied to a clean surface, so if the old caulk is heavily damaged or corroded, you may be better off removing it entirely and starting fresh. But if the old caulk is in good condition, caulking over it is perfectly fine.
Does Silicone Caulk Stick to Drywall Corners?
One type of caulk that is often used in home renovation projects is silicone caulk. Silicone caulk has many benefits, including its ability to create a strong seal and its moisture resistance. As well silicone caulk can also be used to adhere paint to surfaces.
When using silicone caulk on home renovation projects, it is important to test the spackling compound on a small area before applying it to the entire surface. This will help ensure that the paint adheres smoothly to the silicone caulk.
Is It Normal For Paint to Crack In Drywall Corners?
Temperature changes can also cause paint and plaster to contract on your walls, which can lead to cracking. Insufficient surface preparation can also cause cracking. It may be difficult for the new paint to adhere properly if you do not clean and sand the surface properly before painting.
Also, too-thin paint can split. Paint that’s too thick dries clumpy and swollen, causing cracks. Although paint cracks in drywall corners, you can prevent them. Before painting, use drywall tape, and make sure to use the correct type of paint for your walls. Follow the above-mentioned advice, and you can ensure that your walls are painted properly for years to come.
Recommended Article To Read:


