Last Updated on January 26, 2023
Seams between pieces of drywall are inevitable, no matter how carefully you plan or how expertly you execute the installation. At the same time, drywall tape can help to disguise these seams. It is essential to tape drywall seams for an attractive, smooth, and continuous surface, but it can be tricky if you don’t know how do you have to tape drywall seams correctly.
Not taping drywall seams is one of the fastest ways to ruin a new paint job or sheetrock installation. A drywall seam left untapped is one of the most common mistakes made by DIYers, and it’s also one of the easiest to avoid. But how do you do it?
Have no fear, though. We’ve got the answers you need to tape your drywall seams and guarantee a flawless finish properly. Read on for all the tricks and tips you need for smooth drywalling success.
How Do You Have to Tape Drywall Seams?
It’s easy to tape drywall seams once you know the basics. When you tape drywall seams, you need to pay attention to the direction of the paper drywall tape. The long edges of the paper tape should be parallel to the studs. This helps the tape bond to the wall and provides a stronger overall hold.
For taping drywall seams first, you need basic tools and supplies. Here’s what you need:
- Utility knife
- Drywall tape
- Joint compound
- Putty knife or taping knife
- Dust mask and safety glasses (optional)
Once you have the necessary tools, it’s time to start taping drywall seams. Here are the steps for taping drywall seams correctly:
Step 1: Apply Joint Compound to the Gaps
Applying joint compounds to drywall seams is an important step in the process of taping and drywall finishing. The joint compound is a plaster-like material that is used to fill in the gaps of the drywall sheet. Once the joint compound is in place, it needs to be smoothed out so that it can dry evenly.
For this step, you should use either a putty knife or a taping knife. Smooth out the joint compound until it is level with the surface of the drywall. If you are applying joint compounds to multiple sheets of drywall, make sure you use enough pressure so that the compounds will bind together.
If you are using a setting type joint compound, mix it with water to the consistency of a thick paste. Then, spread it on the joints with your putty knife or taping knife. Try to keep the compound as level with the drywall as you can. Apply gentle pressure to the compound to get a uniform surface.
Always try to use the best type of joint compound for the job. There are a lot of different kinds of joint compounds available, so make sure to choose the one that is best for your project. Here are some recommendations that might help you:
Fiber-Reinforced Spackling Compound for Drywall
The 3M fiber reinforced spackling is a quick-drying, high-performance bathroom drywall mud that makes repairs 5X faster than traditional vinyl spackling. It’s perfect for repairing holes 3 to 5 in diameter, both indoors and outdoors.
Onetime Lightweight Spackling for Drywall
This is the perfect solution for quick and easy repairs on the bathroom drywall and ceiling. It fills cracks, dents, nailheads, and other holes in just one application, and due to its lightweight nature, doesn’t require sanding after application.
Heavy Duty Wall Repair Spackle for Drywall
For those who are in need of a reliable and easy-to-use spackle, this is the way to go. This product will make your life much easier as it eliminates the hassle associated with other types of bathroom drywall joint compounds.
Quick Set Drywall Mud for Drywall
The Aersileng quick set drywall mud is a high-quality waterproof and moisture-resistant bathroom drywall repair material that can be used to repair holes in walls, cracks on the wall, air conditioning pipes, and other places.
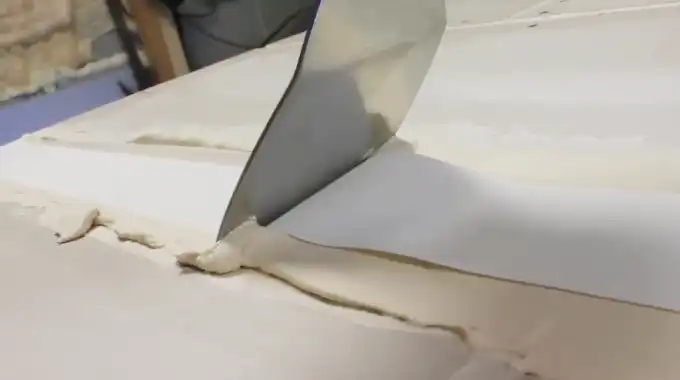
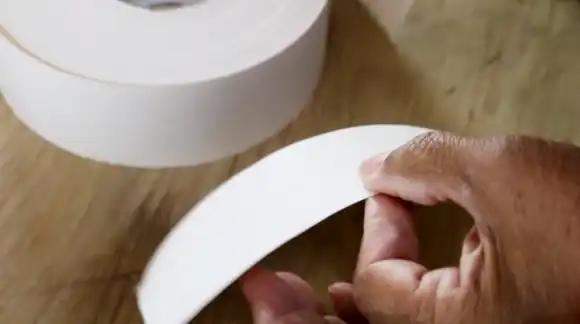
Step 2: Cut and Apply the Drywall Tape
Once you have applied joint compound to the seams, it’s time to wrap the seams with drywall tape. Drywall tape is a strip of paper or fiberglass mesh tape that is used to cover seams in drywall. The process of taping drywall seams is fairly straightforward. There are two main types of drywall tape: Self-adhesive tape and non-adhesive tape.
When you’re ready to begin taping, use a knife or scissors to cut the tape at the length that you need for each seam. Make sure to leave about 2 inches of overlap on each side of the joint where you apply the tape. Once you have cut your pieces, peel off any backing from the tape and press it into the joint compound with a taping knife.
Then spread a thin coat of joint compound over the drywall tape. The best way to do this is with a taping knife, but you can also use a putty knife. Make sure you apply even pressure so that the joint compound adhere properly to the tape.
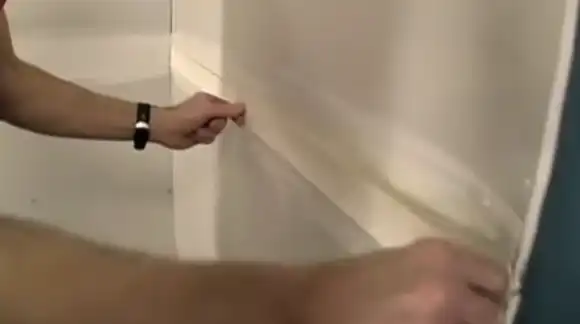
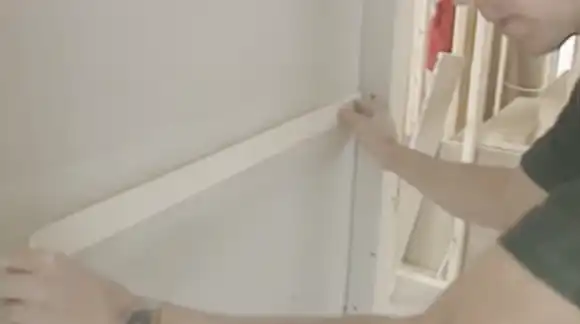
Step 3: Tape the Corners and Edges
When it comes to taping drywall seams, there are two main areas that you need to focus on the surface seams and the corners. Corners can be especially tricky since they require multiple layers of joint compound and taping.
Let’s start with the corners. Put the paper or mesh tape in the corner by crimping it sharply. To position the tape exactly in the corner, stroke your knife over both sides of the corner quickly and lightly. Once the tape is in place, use your knife to apply pressure and flatten it out.
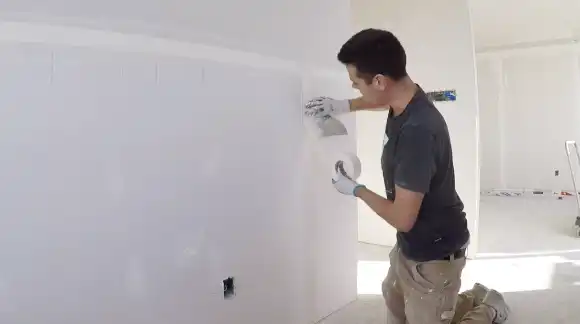
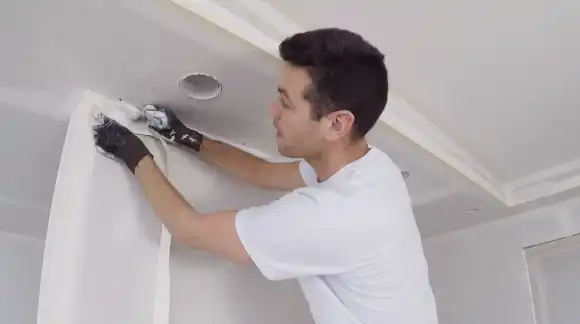
Step 4: Sand the Walls
Taping drywall requires sanding the seams to ensure that all joints are smooth and level. You want to use fine-grit sandpaper so that you don’t damage the drywall. Begin by sanding along the length of the seam, and then work your way across the width.
Be sure to go slowly and evenly to avoid creating any new cracks or divots. Once you’ve finished sanding, you can wipe away any excess mud with a damp cloth. Now your drywall is ready for painting or priming.
Taping drywall seams is a simple process that can be done by almost anyone with the right tools. It’s an essential step for creating a smooth and level surface on your walls, so make sure to follow these steps when taping your next project.
Is It Okay to Fill Gaps In Drywall Before Taping?
Anyone who has ever attempted to repair a hole in drywall knows that it can be a frustrating process. Even small gaps can be difficult to fill, and if not done correctly, the repair will be noticeable. While it may be tempting to try and save time by filling the gaps before taping. If the gaps are not filled properly, the tape will not adhere correctly, and the repair will be visible.
For best results, fill the gaps with drywall compound first and then tape the joint. This will ensure that your repair is as invisible as possible. The following steps will help you achieve a professional-looking result if you are new to taping drywall.
What Happens If You Don’t Tape Drywall Seams?
Actually, not taping drywall seams is a common mistake that can lead to future problems. Without the tape, the drywall seam between sheets of drywall will remain visible, creating an uneven and unprofessional finished surface. Also, several potential problems could arise from not taping the seams.
Here are some of the issues that could arise:
- Moisture can get in and cause mold, rot and other damage.
- Cracks may form along the seams as the walls settle over time.
- Paints and other materials may not adhere properly to the walls.
- Dust and debris can accumulate in the seams, reducing air quality.
- Unattractive and noticeable seams remain visible.
So if you don’t want to deal with any of these problems, it’s best to tape your drywall before painting or priming. Don’t be intimidated by the process, it’s easy to do once you get the hang of it.
How Large a Gap Can You Tape In Drywall?
Even so, it’s important to note that try to fill any gaps larger than 1/2″ with a drywall compound before taping. When using either type of tape, be sure to apply a thin layer of joint compound over the entire length of the tape to help prevent cracks.
Is It Necessary to Completely Cover Drywall Tape With Mud?
This ensures that the tape will adhere properly to the wall and that any seams or joints will be completely seamless. The tape can also be protected over time by covering it with mud or joint compound. Even though it may take a bit more time to apply the mud or joint compound properly, doing so will result in a better-finished result.
You Can Also Read: Is it a good idea to seal interior stacked stone?
Does Drywall Taping Really Need to Be Done?
So now that you know the importance of drywall taping and how you have to tape drywall seams, you can begin your next project with confidence.
Relevant Article To Read:


