Last Updated on September 13, 2023
Would you consider installing stone veneer outside as part of your home renovation project? If so, you may wonder whether installing the veneer over the cement board is possible.
Installing stone veneer over cement board outside can be an attractive option that many homeowners choose for their exteriors. It is suitable for exterior building materials due to its durability and resistance to moisture damage. It also provides a flat, stable base for the stones to adhere to.
Although installing stone veneers directly on cement boards is possible, proper preparation and installation techniques are essential.
Here, we’ll discuss everything you need to know about installing stone veneers over cement boards outside. Let’s take a look at the steps involved in the process.
How Can You Install Stone Veneer Over Cement Board Outside?
Installing stone veneer over cement board outside can enhance the appearance of your home’s exterior. Here are the ten major steps to guide you through the process:
- Step 01: Prepare the surface
- Step 02: Plan the layout
- Step 03: Apply a scratch coat
- Step 04: Wet the stone veneer
- Step 05: Apply mortar to the back of the stones
- Step 06: Press the stone veneer onto the scratch coat
- Step 07: Maintain consistent joint spacing
- Step 08: Cut and trim stones as needed
- Step 09: Fill the joints with mortar
- Step 10: Clean and seal the stone veneer
Step 01: Prepare the Surface
To ensure a durable and long-lasting installation, properly prepare the surface before installing stone veneer over the cement board outside.
i) Remove dirt, debris, or loose particles from the cement board surface using a stiff brush or pressure washer. This will ensure that you have a clean and solid substrate to work with.
ii) Apply a layer of weather-resistant barrier over the cement board to prevent moisture from penetrating behind the stone veneer. It protects your installation against water damage.
Step 02: Plan the Layout
Get creative with the design and layout of your stone veneer by planning the perfect pattern that fits the size and shape of your stones.
Consider how you want the stones to fit together, whether equal in size or arranged in a random pattern. You can also experiment with different joint widths to achieve the desired look.
Step 03: Apply a Scratch Coat on the Cement Board
Mix the mortar and apply a scratch coat evenly on the cement board to provide a sturdy base for your stone veneer design. Start by following the manufacturer’s instructions for mixing the mortar.
A trowel spreads the mixture onto the cement board, ensuring an even application covering all surface areas. The scratch coat should be thick enough to create texture and depth but not too thick that it becomes easier to work with.
Step 04: Wet the Stone Veneer
To properly wet your stone veneer, submerge it in water for at least 5 minutes before installation. This process saturates each piece and reduces its porosity, making it less likely to absorb moisture when applied to the cement board outside.
Step 05: Apply Mortar to the Back of the Stones
Spread a layer of mortar on the back of each stone, ensuring even coverage and leaving no gaps. Use your trowel to apply enough mortar to fully cover the back of the stone without it dripping or oozing out from the sides.
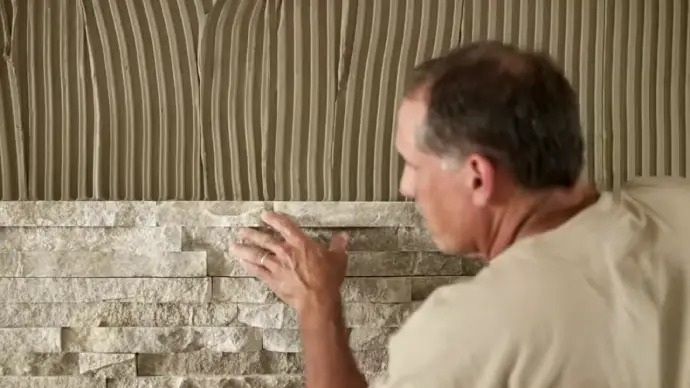
Step 06: Press the Stone Veneer onto the Scratch Coat
Wiggling your stones slightly while placing them on the scratch coat will ensure a secure placement for your beautiful new wall. Press the mortar-coated side of each stone into the scratch coat when working from bottom to top.
You should press each stone firmly to prevent any shifting or movement later. Take your time with this step and check that each stone is level before moving on.
Step 07: Maintain Consistent Joint Spacing
Work your way up the wall using spacers or shims between each stone to achieve a cohesive and uniform appearance. By maintaining consistent joint spacing between the stones, not only does the wall look better, but it also allows for proper mortar application.
You need to use spacers to avoid having uneven gaps between the stones, resulting in an unprofessional and unsightly finish. Using spacers or shims is relatively simple. Insert them between each stone as you lay them down, ensuring that they’re placed at regular intervals along the length and height of the wall.
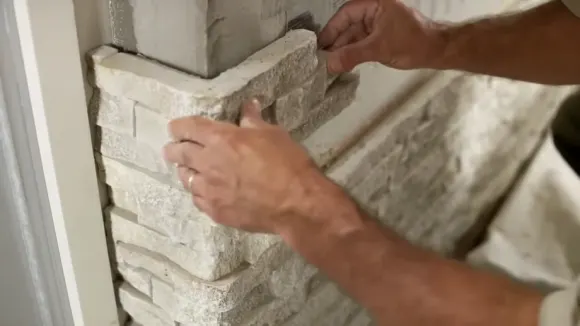
Step 08: Cut and Trim Stones As Needed
If you want your stone veneer to look seamless and professional, cutting and trimming stones as needed is crucial. A masonry saw or grinder will help you achieve the precise fit for corners, edges, and openings.
When cutting stones, wear protective gear such as safety glasses and gloves to avoid injury by the concrete saw. Take your time and make sure you’re cutting in a straight line.
Step 09: Fill the Joints with Mortar
Achieving a seamless and professional look for your stone veneer requires filling the gaps between stones with mortar. It ensures the joints are completely filled, improving your installation’s overall structural integrity.
To fill the gaps, first remove the spacers. Then you can use a pointing trowel or grout bag and press the mortar into each joint. Make sure to take extra care when filling in areas where two different types of stones meet, as this will prevent any visible gaps from forming.
Step 10: Clean and Seal the Stone Veneer
Once the mortar has cured completely, you can begin cleaning up any excess mortar on the stone’s surface. Use a brush or hose to remove any debris or particles that may have accumulated during installation.
After the stone veneer has been cleaned and dried, you can apply a stone sealer to protect it from damage caused by water, stains, or other environmental factors.
A high-quality sealer will also enhance the appearance of your stone veneer by bringing out its natural colors and textures. When selecting a sealer, make sure it is specifically designed for use with natural stone products and follow all manufacturer instructions carefully.
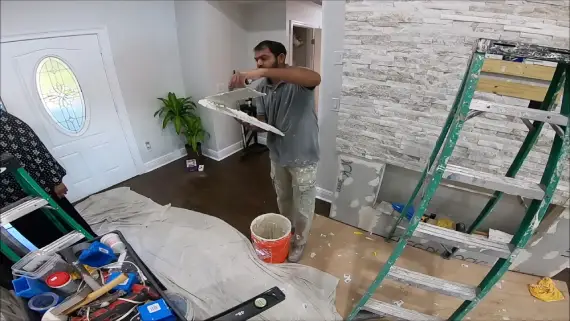
Install Stone Veneer over Cement Board to Transform Your Outdoor Space

Installing stone veneer over cement board can elevate the aesthetic appeal of your outdoor space while offering durability to withstand environmental factors. But, correct installation is crucial to prevent moisture penetration damage.
With the right materials and techniques, you can enjoy an attractive, durable outdoor space that stays stylish year after year. So, transform your outdoor space today by opting for stone veneer over cement board and create a beautiful living area that you can enjoy.