Last Updated on September 13, 2023
A cement board is the right material for your home or building project if you need a durable and long-lasting material. Although cement board is often used as an underlayment for tile floors and walls, it’s also great for outdoor applications.
Proper installation allows cement boards to withstand harsh weather conditions and provide a stable substrate. Whether working on a patio, siding replacement, or any other outdoor project, you should know about using cement boards outside.
Curious about using cement boards outdoors? We’ll answer all your questions and walk you through the proper installation steps.
How Do You Fasten the Exterior Cement Board? A Step-By-Step Guide
If you’re wondering how to fasten the exterior cement board, keep a few key steps in mind. The quick steps are:
Step #1: Prepare the Work Area
Step #2: Position the Cement Board
Step #4: Secure Screws along the Seam
Step #5: Insert Screws across the Surface
Now let’s get into the details.
Step #1: Prepare the Work Area
Before you start, ensure the area is clean, dry, and sturdy enough to handle the weight you’re installing. This means removing any debris or loose materials that may interfere with installation.
Ensure that the underlying structure is also sound and capable of supporting the weight of the cement board. Before beginning work, you must check for potential hazards, such as electrical wires or pipes.
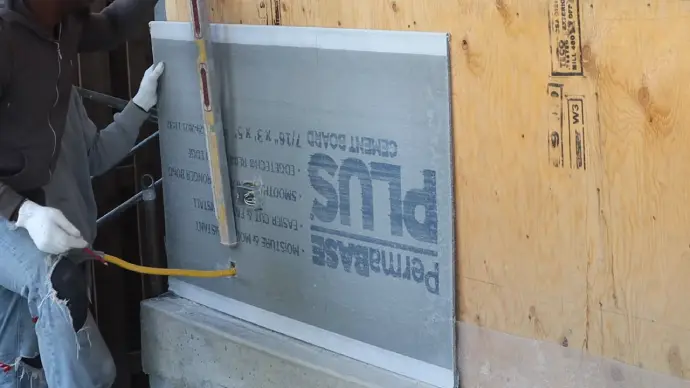
Step #2: Position the Cement Board
Place the cement board in its desired location, ensuring it lines up perfectly with the underlying structure. Keep a small gap of about 1/8 inch between adjacent panels to allow for expansion.
Ensure no gaps or spaces are left on the edges of the cement board, as it may cause moisture damage and weaken the structure.
Step #3: Mark Screw Locations
Use a marker or pencil to mark the places where the screws will go, usually along seams and evenly spaced. This step is crucial to ensure the cement board’s securely fastened and won’t come loose over time.
Make sure to mark the locations precisely, as any deviation can lead to uneven installation. You’ll also need to use an appropriate screw size and length for your specific project, as it will affect how well the cement board holds up over time.
During this step, double-check your markings before proceeding with the installation.
Step #4: Secure Screws Along the Seam
Put the screws along the seam to finish off your project. Feel the satisfaction of knowing that your hard work paid off.
With the cordless drill and screwdriver bit, position a screw at the first marked location along the seam of the cement board. Apply gentle pressure and drill the screw into the board until it’s snug.
Repeat this process for all the marked locations along the seam. You must ensure that each screw is securely fastened so your cement board can withstand any weather outside.
Step #5: Insert Screws Across the Surface
For ample support and stability, insert additional screws every 8 to 12 inches across the surface after you secure the screws along the seam.
This will prevent any potential sagging or instability due to weather conditions or other external factors.
Spacing out the screws evenly ensures that the entire surface is properly supported and can withstand any pressure or weight.
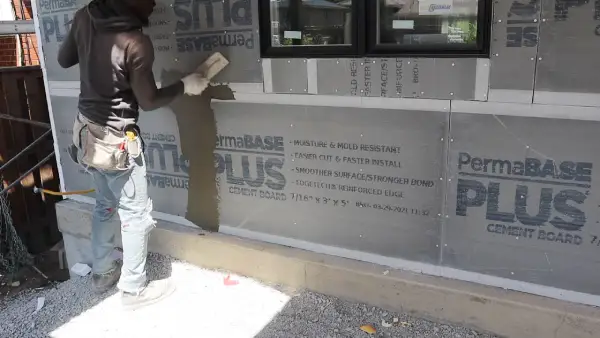
Step #6: Finishing Touches
When all the screws are in, and any gaps are filled, it’s time to ensure the surface is smooth and stable. Take a good look at the cement board and make sure there are no visible gaps or irregularities.
If you spot any, fill them with a suitable cement board patching compound according to the manufacturer’s instructions. This will help prevent water from seeping into gaps and causing damage over time.
Once you’ve finished filling any gaps, give the entire installation one final inspection to make sure everything looks solid and secure.
How long will the cement board last outside?
When installed properly and maintained well, cement board as exterior siding has a lifespan of up to 50 years. This durable material is known for resisting fire, rot, and insects.
But, the actual lifespan of cement boards can vary depending on several factors. Among them are the specific brand and quality used, the installation method employed, and the climate conditions in the area.
For instance, harsh weather conditions like extreme cold or heat can cause faster deterioration of cement boards.
Can water penetrate the cement board?
A cement board’s resistance to water penetration makes it a suitable choice for moisture-exposed areas.
While cement board isn’t totally waterproof, combining cement with Redgard or reinforcing fibers creates a solid, non-porous surface. So, it doesn’t allow water to pass through easily.
If the joints between cement boards aren’t properly sealed, or there are cracks or gaps in the surface, water can get in.
Does mold grow on the cement board?
A cement board composition and lack of moisture absorption make it inhospitable to mold growth. Unlike wood or drywall, which can be susceptible to mold if exposed to dampness, cement board provides no food source for spores.
This makes it an excellent choice for outdoor use, where it may be exposed to rain or other forms of moisture. With cement board, you can rest easy knowing that your outdoor building projects will resist water damage and mold growth.
Can you tile directly onto the cement board?
You can tile directly on cement boards as long as they’re properly installed and secured.
Before tiling, ensure that the seams between the cement boards are covered with suitable joint compound or mortar and properly taped. This helps create a smooth and even surface for tiling.
What is the thickness of the exterior cement board?
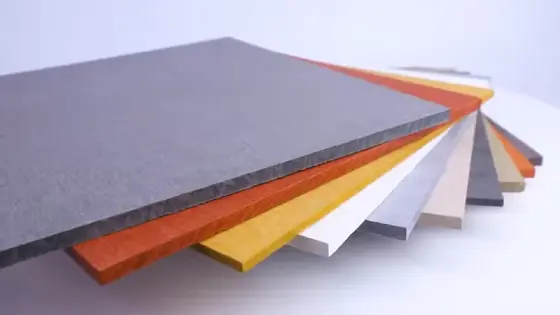
The thickness of exterior cement boards varies based on their applications, ranging from 1/4 to 19/16 inches or 6 to 40 mm.
This versatility in thickness provides load-bearing capacity and accommodates different requirements. Whether you need a thinner board for easier installation or a thicker one for added strength, there are plenty of options.
With this range of thicknesses, exterior cement boards are an ideal choice for construction projects where durability and strength are essential.
Can I paint over the exterior cement board?
You can paint your exterior panels using the right techniques and materials to give them a fresh look.
Before painting the cement board, make sure the surface is prepared. To begin with, clean the board thoroughly to get rid of dirt, dust, and loose particles.
After you clean the surface, apply a high-quality exterior primer to promote adhesion.
Allow the primer to dry completely before applying your desired exterior paint using a brush or roller according to the manufacturer’s instructions.
Keep in mind that cement boards have a smooth surface but possess pores that allow them to absorb paint more easily than traditional cement.
Follow these steps to make your exterior cement board panels look great and last long.
Build with Confidence Using Cement Boards Outside
You now know everything you need to know about using cement boards outside. The right tools and techniques make it a durable and reliable choice for your exterior projects.
Always use galvanized or stainless steel screws to fasten the boards securely, and leave at least a 1/8 inch gap between each panel to prevent moisture buildup.
When properly installed and maintained, cement boards can last decades to 50 years without rotting or warping. It’s also resistant to water damage and won’t attract mold or mildew.
And if you want to add some extra flair, paint over your cement board with a high-quality exterior paint compatible with concrete surfaces. So, get out there and start building with cement board as your trusty sidekick.


