Last Updated on September 16, 2023
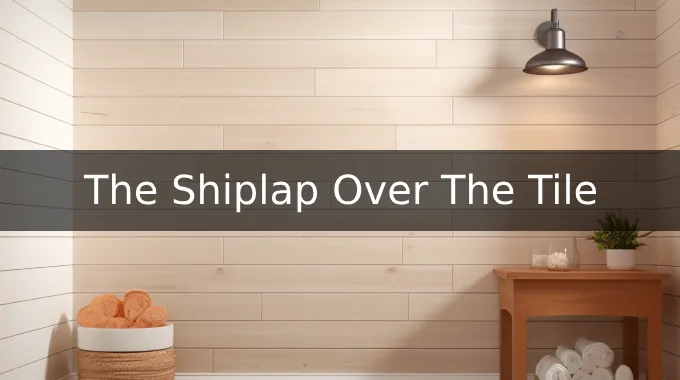
Shiplap is a popular interior design trend that is taking over homes across the globe. But if you want to add some rustic charm to your previous tiled walls, can you put a shiplap over the tile? When homeowners want to update their bathroom or kitchen without removing tiles, they face this dilemma.
You can install the shiplap over the tile. To do so, prepare the tile surface by cleaning it thoroughly. Next, measure and cut the shiplap panels to fit your wall dimensions. Then, apply adhesive to the wall surface using a caulk gun and secure the shiplap panels.
This article will cover installing shiplap over existing tile, including what type to use and how to deal with gaps between panels. So keep reading and get ready to transform your tiled space into a charming, rustic retreat with the timeless beauty of shiplap.
How to Install Shiplap Over Tile?

To install shiplap siding over the tile, you will need to follow a series of steps.
- Step 1: Prepare the tile surface
- Step 2: Measure and cut shiplap panels
- Step 3: Apply adhesive to the wall surface
- Step 4: Press and secure the shiplap panels to the wall
- Step 5: Interlocking the shiplap panels
- Step 6: Caulk the seams
- Step 7: Optional primer (for added moisture protection)
- Step 8: Final touches
Step 1: Prepare the Tile Surface
Before beginning the installation process, ensure the tile surface is clean and free from dirt or debris. Start by removing furniture, fixtures, or obstacles from the area where you plan to install the shiplap.
Then, take a microfiber towel and thoroughly clean the existing tile surface. Make sure to remove any dirt, grease, or debris that may be present.
Step 2: Measure and Cut Shiplap Panels
Begin by measuring the area where you intend to install the shiplap. Make sure to measure twice to avoid any errors. Consider any cutouts needed for outlets, switches, or other fixtures on the wall.
After obtaining precise measurements, you can cut the shiplap panels to fit the measured area. If your project requires trimming around edges or corners, installing trim pieces before attaching the shiplap panels is recommended.
Step 3: Apply Adhesive to the Wall Surface
Begin by applying the adhesive using a trowel or putty knife, spreading it evenly across the wall. Be careful not to apply too much, as excess adhesive can cause oozing and create a messy appearance.
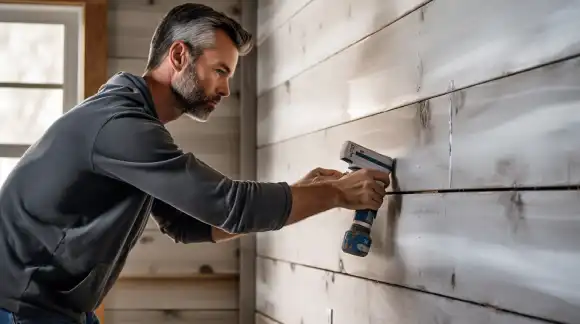
Step 4: Press and Secure the Shiplap Panels to the Wall
Once you have spread the adhesive, place and press each shiplap panel firmly against the wall, aligning it properly with adjacent panels. Piquing the panels firmly against the wall creates optimal contact between the adhesive and tile surface, ensuring a strong bond.
Use a level to ensure that each panel is straight and level before moving on to the next one. Also, using painter’s tape can provide extra support while the adhesive cures. Simply apply tape strips along each panel to hold them until the adhesive has fully dried.
Step 5: Interlocking the Shiplap Panels
Now that you’ve securely pressed and secured the shiplap panels to the wall, it’s time to move on to the next step: interlocking them. To begin, align the next shiplap panel with the previous one and interlock the grooves.
The grooves are designed to fit together snugly, creating a strong bond between each panel. Press the new panel into place, ensuring it fits tightly against the wall.
Continue this process until you have covered the entire area with shiplap. Remember that you may need to trim some panels to fit around corners and edges. Take safety when using a saw or utility knife for precise cuts.
Step 6: Caulk the Seams
Once the shiplap panels are securely interlocked, it’s time to use waterproof caulking to seal the seams and edges for a polished finish. To begin, apply the waterproof caulk along the gaps between each panel, filling them.
Use a caulk tool or your finger to smooth out the caulk, creating a neat and tidy appearance. Remember to seal along the wall’s top, bottom, and edges where the shiplap meets the tile. This will provide an extra layer of protection against any potential water damage.
Step 7: Optional Primer (For Added Moisture Protection)
Applying an oil-based primer to the wood shiplap panels provides extra moisture protection and helps seal the wood to prevent potential damage. The primer acts as a barrier between the wood and the tile, preventing moisture from seeping through and causing damage.
When choosing an oil-based primer, look for one specifically designed for use on wood surfaces. Apply it evenly using a brush or roller, covering all exposed areas of the shiplap.
Allow it to dry completely before moving on to the next step in your project. By taking this extra precaution, you can ensure that your shiplap installation will be both beautiful and long-lasting.
Step 8: Final Touches (if needed)
To complete the installation, give your shiplap a final coat of paint or stain. This will not only enhance the overall appearance of your shiplap but also provide an additional barrier against moisture and daily wear and tear.
Can shiplap be installed directly over the tile?
You can install shiplap directly over the tile using adhesive to secure the panels if you properly prepare, clean, and use the right materials. Choose an adhesive for tile and wood surfaces to ensure a strong bond between the shiplap panels and the tile.
What type of shiplap is recommended for installing over tile?
PVC shiplap is the recommended type for installation over tile due to its moisture resistance. One of the main reasons why PVC shiplap is recommended for installation over tile is because it does not absorb water.
Unlike other types of shiplap, which may warp or expand when exposed to moisture, PVC shiplap remains stable and unaffected. This ensures that your shiplap will maintain its integrity and appearance even in high-moisture environments.
How do I deal with gaps between shiplap panels?
To seal gaps between shiplap panels, apply waterproof caulking to seal them and prevent moisture from seeping behind the boards. When applying the caulk, fill in all the spaces between the panels and along the edges where they meet other surfaces.
Use a caulk gun for precise application and smooth out any excess with a putty knife or finger. This will ensure that it remains effective even in humid environments.
Transform Your Tiled Walls with Stylish Shiplap
As you can see, installing shiplap over tile is not only possible, but it’s also a great way to add some warmth and texture to your home. Following the steps outlined above, you can easily transform your tiled walls into a beautiful shiplap feature that will impress your guests.
Opt for a thinner shiplap to minimize gaps between the tiles and panels. If dealing with textured or uneven tiles, consider using a thicker shiplap or leveling the surface beforehand.
Don’t be afraid to tackle this project independently; with some planning and the right materials, you can achieve a stunning result. So, what are you waiting for? Start measuring those walls and let the shiplap installation begin.