Last Updated on January 21, 2023
If you have drywall in your bathroom, you know how hard it can be to clean it, as drywall is prone to moisture and humidity. Moisture can cause your drywall to crack or become damaged. Thus, tile can effectively protect your drywall against water damage, but can you put tile on the drywall in a bathroom?
Tiles are impervious to water, which will keep your drywall dry. Also, drywall is an excellent substrate for installing tiles because it’s flat, smooth, and easy to work with for a finished appearance. But, when dealing with drywall in this moist environment, you must take extra precautions.
Tile may be an attractive option for your bathroom, but do not forget to consider the long-term durability of the drywall before making a final decision. You can read on to find out how to tile drywall properly in a bathroom and which tiles are recommended for this purpose.
Can You Put Tile on Drywall in Bathroom: Explanation
You can tile over drywall in your bathroom if the area is not subject to excessive moisture. But, it is not recommended to cover drywall with tile in areas prone to water damage, such as the shower. Because this area is prone to seepage of water, leading to water damage, mold growth, and pest infestations.
Aside from that, drywall itself is prone to water damage, and when wet, it is prone to swelling, softening, and eventually disintegrating completely. For this reason, if you choose to cover your bathroom drywall with tile, ensure the entire area is properly sealed from moisture.
Be sure to use a waterproof adhesive and seal the grout to prevent moisture from seeping through. Also, regular maintenance is essential to prevent these problems from occurring.
How Do You Prepare Bathroom Drywall for Tile?
Whether you’re planning to tile your bathroom yourself or hire a professional, you must prepare the surfaces before you begin correctly. Remodeling your bathroom allows you to choose a new tile that reflects your style.
But before you can start selecting color schemes and patterns, you need to ensure that the drywall is smooth and ready for tile installation.
Here are a few simple steps you can take to prepare bathroom drywall for tile:
01. Smooth Out Any Imperfections
If you’re planning to tile over drywall, starting with a smooth, level surface is important. Otherwise, the tile won’t lay evenly, and you’ll end up with an uneven, bumpy finish.
The key is to use medium-grit sandpaper (such as aluminum oxide sandpaper, general-purpose sandpaper, or multi-purpose sandpaper) to gently sand down the surface.
Start by sanding in one direction, then switch to sanding in a perpendicular direction. This will help to ensure that you get all the spots.
02. Clean the Dust
Once you’re done sanding, you must remove dust; otherwise, the adhesive won’t stick. You can use a cordless vacuum cleaner to vacuum up the dust created by sanding. Start by wiping the area with a dry cloth, then use a vacuum cleaner to remove any remaining dust.
If there’s still some dust remaining, you can wipe it down with a damp cloth. Now let the area dry completely before applying primer and adhesive.
03. Apply a Primer
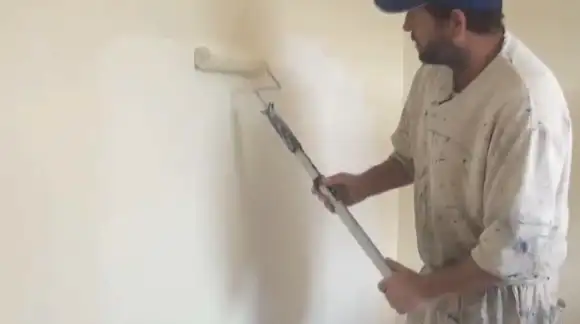
It’s also a good idea to apply a primer before tiling, as this will help the tiles to stick better and create a smooth surface. When applying primer (such as all surface primer or latex-based primer) to drywall for tile, be sure to use a brush or roller designed for water-based primers.
Apply the primer in even strokes, going with the grain of the drywall. Allow the primer to dry completely before continuing with the tile installation.
How Can You Adhere Regular Tile to Bathroom Drywall?
If you intend to tile over the bathroom drywall, you must ensure the surface is smooth and even. Adhering regular tile to drywall is possible, but there are a few steps you need to take to ensure a successful job:
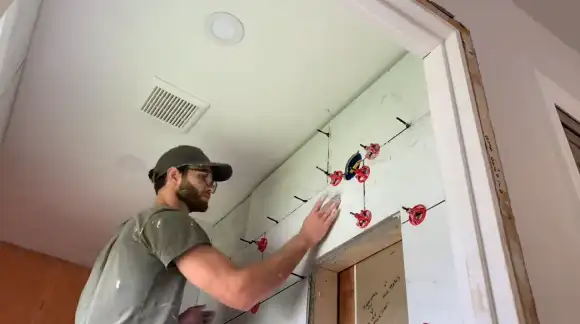
01. Draw Lines
When tiling a bathroom, you must create level lines on the drywall before applying adhesive. This will ensure your tiles are straight. The easiest way to do this is to use a torpedo level. Make a pencil mark on the wall where the highest point is.
Now, holding the level horizontally draws a line from this point to the opposite end of the wall. Repeat this process at the bottom of the wall, making sure that the lines are parallel. Once your lines are drawn, you can begin cutting and laying the tiles.
02. Cut the Tiles to Size
Cutting tiles to size is necessary when adhering them to bathroom drywall. The first thing you need to do is measure the area where you’ll be placing the tiles. Once you have those measurements, you’ll need to transfer them onto the tile itself.
You can use a pencil and a straight edge saw cutting tool, or a wet tile cutting saw from a reputed brand (such as DEWALT, PORTER-CABLE, or SKIL). If you’re using a wet saw, simply line up the tile with the marks you’ve made and cut along those lines.
If you’re using a straight edge (from Firbon or Kreg), you’ll need to score the tile before breaking it along the score line. Once you’ve cut the tiles to size, it’s time to start adhering them to the drywall.
03. Apply Adhesive or Mortar
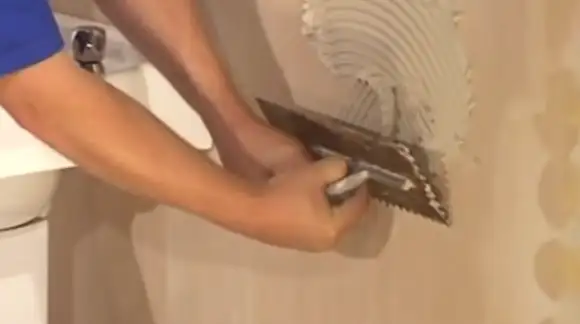
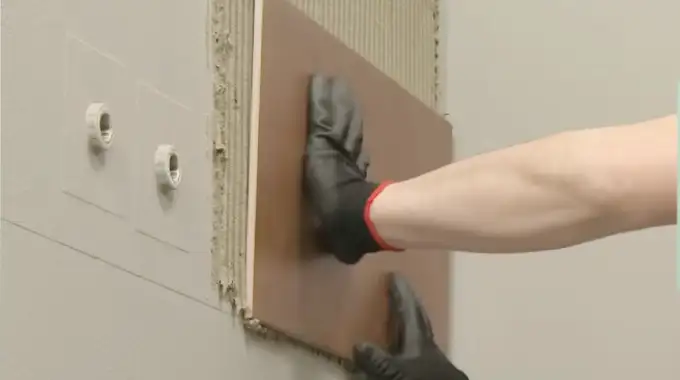
When it comes to adhering regular wall tile to drywall, you’ll need a strong, water-resistant adhesive designed for porcelain or ceramic tile. Start by using a trowel with a thin layer of polyurethane flexible construction adhesive or pre-mixed thin-set mortar over the drywall in small sections.
Spread the adhesive or mortar onto the back of each tile, careful to use only a little. Then, press the tile firmly into place on the wall. Repeat this process until all of the tiles are in place.
04. Fill in the Spaces
After the tiles are in place, fill the spaces between them with waterproof tile grout to create a waterproof barrier. You can use a non-stick molded rubber grout float to push the grout into the crevices and then wipe away any excess using a damp cloth or non-scratch scrub sponges.
When choosing grout, make sure to select a type that is designed for use in wet areas. Once the grout has been applied, allow it to dry completely before using the shower or tub. Regular tiles can provide a durable and attractive finish for your bathroom walls with proper installation.
What Do You Put on Bathroom Drywall Before Tiling?
Priming drywall also helps to maximize adhesion between the tile and the wall or floor surface. It also creates a smoother substrate which can help reduce lippage and make grouting easier. Plus, priming prevents moisture from seeping into the wall and damaging your tiles over time.
You may also apply a bonding agent or waterproofing membrane over larger surfaces before tiling, whichever method is most suitable for your project. When applied correctly, these techniques should provide strong results that will look great for years.
What Kind of Tiles is Best for Bathroom Drywall?
Ceramic tiles are often the most economical choice, but they can be difficult to clean, so a sealant should be applied after installation. But if you’re looking for something more specialized, like glass or mosaic tiles, read their water resistance rating and installation guidelines before investing in them.
Some require specific grouting techniques or extra measures to guarantee no moisture seepage. Also, you should always consider the weight of the tile as it will affect the overall durability of your bathroom walls.
How Much Tile Weight Can Bathroom Drywall Hold?
Generally speaking, experts recommend keeping your total weight per square foot under 15 lbs. If your tile choice is wider or heavier than that, you may need to use a mechanical fastener to support the extra weight.
Also, make sure any substrate you’re preparing for the new tile installation is of sufficient strength for the added burden.
Should I Need Waterproof Bathroom Drywall Before Tiling?
This protective barrier will help keep moisture from seeping into the walls, creating mold and mildew. Also, it prevents damage from occurring behind the tiles if there should be any leakage. Applying a waterproofing membrane also adds extra insurance in case of plumbing malfunctions.
Is it OK to Tile Over Painted Bathroom Drywall?
When tiling over painted drywall, you’ll want to ensure the paint has appropriately adhered and there are no flaky areas before beginning.
If your painted surface was applied more than a year ago, extra measures must be taken by adding a coat of primer before proceeding with the adhesive. It’s always advisable to purchase high-grade tile adhesive so that the tiles remain firmly attached even after years of use.
Possibly a Good Match:


