Last Updated on March 5, 2023
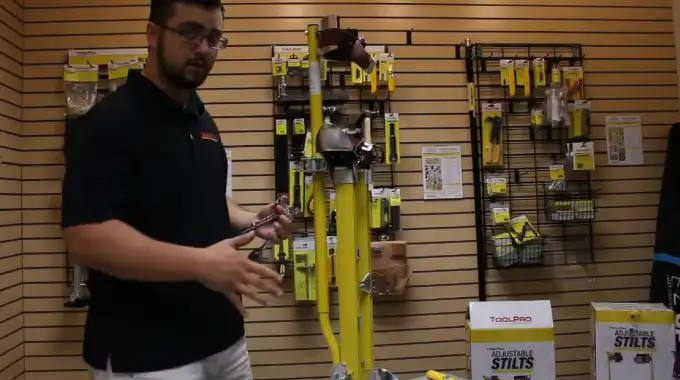
Take the hassle out of adjusting drywall stilts. All you need is some basic tools and know-how, then you’ll be able to tailor your height level for any project.
Adjusting drywall stilts starts with choosing the correct height for getting those jobs done. Then you’ll loosen wing bolts from extension tubes, slide them in or out depending on how far off the ground you are aiming for, and retighten when it’s time to check if everything is stable enough.
Don’t forget about tightening securely, though. Lastly, ensure that when held upside down over the head, they’re at just the right spot before having a go.
Let us show you how to strut your stuff in no time. We’ll guide you every step of the way with our simple stilt-adjustment process.
How to Adjust Drywall Stilts: Step-By-Step Guide
Adjusting drywall stilts is a necessary and useful skill for any painter or handyman since it helps them reach heights more easily and safely. Here’s how to adjust drywall stilts correctly and the steps involved.
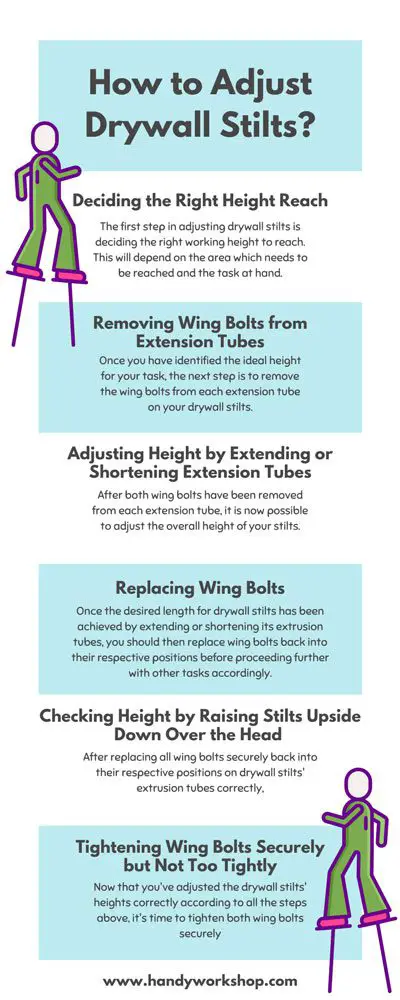
Step 01: Deciding the Right Height Reach
The first step in adjusting drywall stilts is deciding the right working height to reach. This will depend on the area which needs to be reached and the task at hand.
To determine if a taller or shorter set of stilts should be used, measure the ceiling height with a tape measure or other measuring device, and compare it to the desired height.
Don’t forget to factor in any obstacles, such as furniture and other items that might be in the way when using the stilts. Once you have determined what size of stilts are necessary for the job, move on to step two.
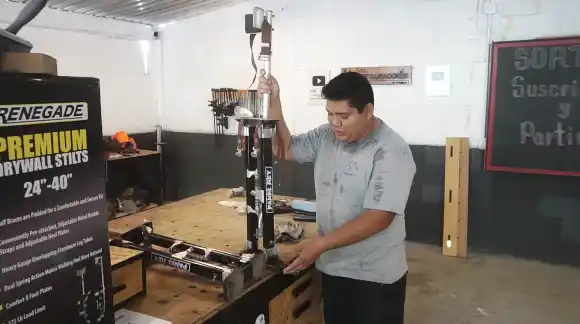
Step 02: Removing Wing Bolts from Extension Tubes
Once you have identified the ideal height for your task, the next step is to remove the wing bolts from each extension tube on your drywall stilts.
This can easily be done by locating each of the two wing bolts located on the lower half of each tube. Using an appropriately sized plier or another tool, grip one side of each bolt and twist counterclockwise until they are completely loose.
During this process, it is essential to be careful not to damage any surrounding materials with any tools or force being applied, as this could result in decreased safety or difficulty during reattachment later on.
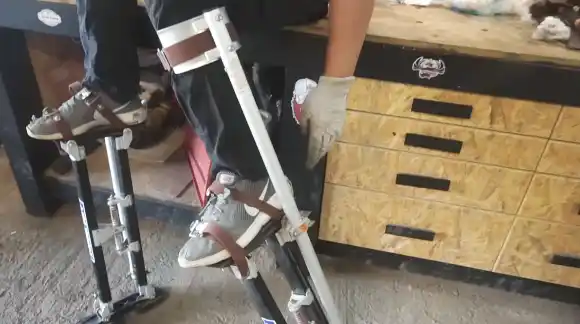
Step 03: Adjusting Height by Extending or Shortening Extension Tubes
After both wing bolts have been removed from each extension tube, it is now possible to adjust the overall height of your stilts. To extend them out further for higher reaches, simply pull out each tube until they are at your desired length.
Being mindful not to over-exert force as this could cause damage to either yourself or your equipment. When extending them out, ensure that there are holes lined up on both sides so that they remain attached when reinserting wing bolts at a later point.
For shorter heights, gently push them back into their retracted position and again make sure there are holes lined up, so they remain secure while using them.
Step 04: Replacing Wing Bolts
Once the desired length for drywall stilts has been achieved by extending or shortening its extrusion tubes, you should then replace wing bolts back into their respective positions before proceeding further with other tasks accordingly.
During this process, ensure that each end of a wing bolt fits snugly into its respective opening without any gaps or spaces in between. Otherwise, they may become loose over time due to wear and tear, causing instability and potential injuries in certain cases too.
After replacing all wing bolts successfully, proceed with checking heights according to the next step below carefully before heading up onto the stilts again.
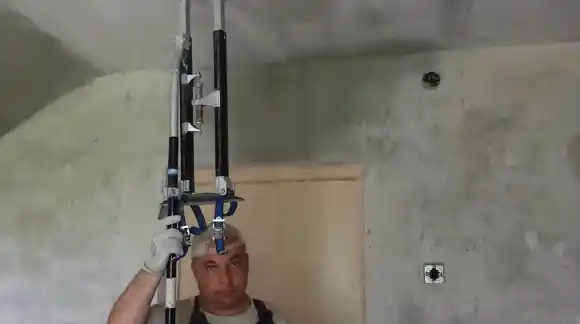
Step 05: Checking Height by Raising Stilts Upside Down Over the Head
After replacing all wing bolts securely back into their respective positions on drywall stilts’ extrusion tubes correctly, you should then check heights by raising them upside down overhead carefully before getting onto them again for other tasks respectively.
This allows you to double-check that earlier adjustment lengths are accurate enough to ensure safety during later use.
Be sure not to skip this step, as incorrect measurements can lead to serious injuries if not taken precautions properly during use later on accordingly. Never rush through these steps, even though time might seem like an issue here sometimes.
Step 06: Tightening Wing Bolts Securely but Not Too Tightly
Now that you’ve adjusted the drywall stilts’ heights correctly according to all the steps above, it’s time to tighten both wing bolts securely, yet not overly tight. Use pliers to grip the sides of those wing bolts respectively and turn them clockwise until they’re snugly in place without gaps.
Do not apply excessive pressure, though, otherwise, you might strip off their screw thread, making them useless. After tightening those screws, you need to revisit the previous steps mentioned above, double-check everything good, go finally start using them safely and comfortably and enjoy the task at hand.
Do Drywall Stilts Make You Faster?
Drywall stilts can help you work faster and more efficiently. By allowing you to elevate your body, you won’t have to constantly bend over or kneel down when working on drywall projects.
With the added height, you can reach high places quickly and effectively, which makes the job easier and faster. Additionally, the adjustable straps ensure that you remain comfortable while using the stilts so that your movements are not hindered.
Plus, drywall stilts are designed with non-skid feet that help keep your balance so that you can focus on the task at hand without fear of slipping or falling.
What Is the Material Used to Make Drywall Stilts?
Drywall stilts are primarily made of aluminum because it is lightweight yet strong enough to support a person’s weight. Aluminum stilts also provide great durability while being affordable too.
Other materials used in making drywall stilts include stainless steel and magnesium. These materials provide extra strength and stability for heavier users who need additional support when working with drywall.
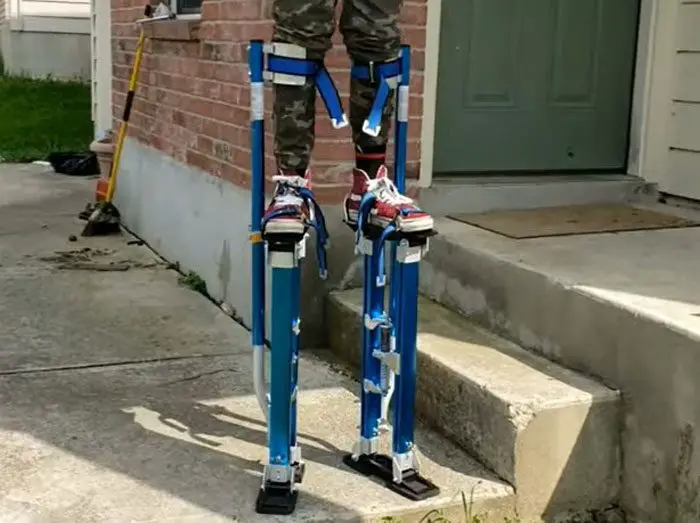
When to Use Drywall Stilts?
Drywall stilts should be used whenever access to elevated spaces is needed for construction purposes, such as hanging drywall sheets or taping seams between them. Using the best drywall stilts allows you to reach higher levels than you can if you paint walls or ceilings in buildings with high ceilings.
They can be used in other scenarios, such as installing crown molding around windows and doors to achieve an aesthetic look without having to climb ladders or use scaffolding structures.
What Should I Wear When Using Drywall Stilts to Remain Safe?
To remain safe while using drywall stilts, it is important to wear knee guards. Knee guards offer an extra layer of protection to the knees and help prevent scrapes, bruises, and other injuries that may be incurred while using stilts.
It is also essential to wear safety goggles to protect the eyes from any debris that may fly up while using the stilts. Wearing long sleeves and pants can help protect the skin from coming into contact with sharp materials or rough surfaces.
A hard hat should also be worn to protect the head from any falling objects or tools. Also, appropriate footwear should be worn when using drywall stilts. Boots are recommended as they provide added traction and stability on uneven surfaces.
Do Drywall Stilts Need Lubrication?
Definitely, drywall stilts need lubrication to work right. It is essential to check that all moving parts are properly lubricated before each use to ensure that they will operate smoothly and without any issues.
Generally, it is best practice to lubricate your drywall stilts with light machine oil to prevent rusting and other wear and tear on metal components.
It is also recommended to occasionally apply a thin coat of grease on all contact points on the drywall stilt’s frame to keep everything running efficiently.
Perfectly Adjust Drywall Stilts for Easier & Safer Work
Adjusting drywall stilts correctly can help make any kind of drywall work easier and safer.
After following the steps outlined in this guide, you hopefully now have a better understanding of how to decide on the right height. Remove wing bolts from extension tubes, adjust the height depending on length, replace wing bolts and check for a proper fit by raising the stilts upside down over your head.
Finally, remember that it’s always important to remember to tighten all wing bolts securely once you’ve finished adjusting them. With everything set up correctly and securely tightened in place, you can now tackle your next drywall projects with ease.


