
Last Updated on March 5, 2023
Don’t make transporting or storing a drywall lift seem impossible. Folding this big machine into smaller parts doesn’t have to be stressful. With the proper techniques, you can make this daunting task easier.
You can disassemble a drywall lift by following a few simple steps, from lowering the cradle to removing and folding the tripod base. Using this method, your heavy-duty job will be complete in no time.
Our discussion will also cover how to disassemble the drywall lift without unique tools and release the brake on the drywall lifter. So if you need to move your drywall lift, read on to see how easy it can be.
How to Break Down a Drywall Lift: Efficient Transport & Storage
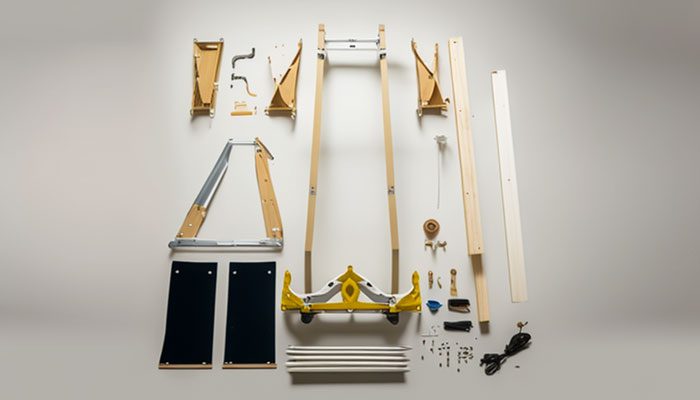
The bulky size of the drywall lift can make transporting and storing it difficult. To make the disassembly process go more smoothly, follow these steps:
Step 1. Turn Down the Cradle
The first step to breaking down a drywall crane for transportation and storage is to turn down the cradle. You can do this by pressing the release buttons on either side of the cradle and slowly lowering it.
Ensure that the crab winch wheel has been rotated forward one full rotation before lowering, as this raises the inner telescoping portion of the panel hoist. Once lowered, ensure all support hooks are closed for safe and secure transport and storage.
Step 2. Invert the Outriggers
The second step is to invert the outriggers. This ensures that they are safely tucked away during transport and storage, avoiding any unnecessary damage or disruption of components.
To invert them, slide each outrigger in until they are flush against their respective sidebars on either end of the panel hoist frame. After sliding them in, close the panel support hooks to keep everything securely fastened while transporting or storing.
Step 3. Remove the Cross-Arms
To remove the cross-arms, you’ll need to press down on their spring tab located at the bottom of each arm. This step aims to allow them to be easily taken apart while ensuring that they stay together when put back together again during reassembly.
Make sure to remove both arms from the lift frame before transporting or storing it away. This will prevent any damage to the lift frame.
Step 4. Unlock the Cradle Tilt Latch
To unlock and remove the cradle tilt latch from its frame, you’ll need to lift it slightly (about 3 inches) until you can unhook it entirely. Doing this will ensure that no unnecessary damage occurs when separating these two components for efficient transport and storage purposes.
When you are done using your drywall panel hoist or storing it, ensure that both pieces are securely fastened together. This will help it work better and be safer.
Step 5. Rotate the Winch Wheel
Now rotate the winch wheel one full rotation forwards. This will raise the inner telescoping section, allowing you to easily access and remove it when needed without worrying about any damage or disruptions occurring due to improper disassembly technique.
Make sure you do this before beginning with the earlier steps involving inverting outriggers and unlocking the cradle tilt latch. They both rely on this particular action being completed before anything else happens.
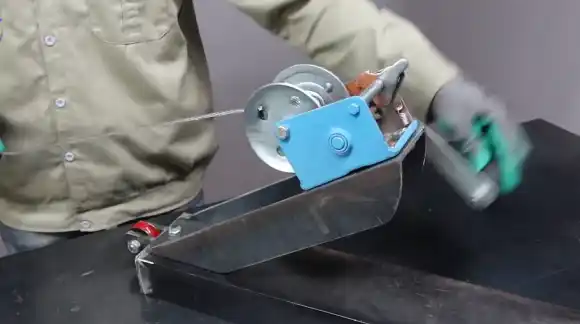
Step 6. Unlock the Winch Assembly
Start by locating the pin that holds the ratchet lever on one side of the winch. Use a wrench to loosen and unscrew the nut that holds the lever in place. Once removed, carefully pull out the pin and set it aside.
Unscrew and remove any other fastening nuts if needed, then pull out both sides of the ratchet lever as far as possible until there is enough slack for you to move it around freely. Release any tension or force from the lever on both sides before continuing with further breakdown procedures.
Step 7. Disengaged Slide Bar Position
Now, the slide bar is disengaged to break down the drywall lift. To do this, locate the two locking pins on either end of the slide bar and use a wrench to loosen their respective nuts.
Then carefully pull out both pins and set them aside so they can be reinserted later without difficulty. Next, push down slightly on one side of the slide bar while pulling up on the opposite side until it is no longer engaged with any mechanical components within its housing unit.
Step 8. Turn Down the Telescoping Sections
The telescoping sections must now be turned down so that all three sections are in their lowest possible positions for efficient transport and storage. To start this process, locate and unscrew any bolts or nuts holding together each section’s respective hinges.
Once loosened, these should be able to be completely removed from their positions with ease. Then slowly rotate each section downwards one at a time until all three fully rotated onto their lowermost positions.
Double-check that none have been inadvertently left behind in an elevated state during this process before continuing with further breakdown operations.
Step 9. Free & Fold the Tripod Base
The last step before packing away your drywall lift is freeing up its tripod base so that everything may fit into a smaller area when traveling or storing it afterward.
Begin by removing all screws present along its outer edges using a screwdriver, followed by gently but firmly pushing downwards on each leg until they come apart (with some resistance).
Make sure not to force anything, as potential damage could occur here. Then, fold up all legs into their most compact forms. Wrap them tightly together using several layers of durable packaging material for maximum protection against outside forces during transport.
How Do You Release a Brake on a Drywall Lift to Fold it Down?
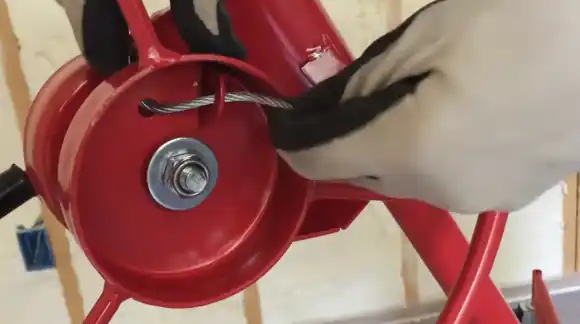
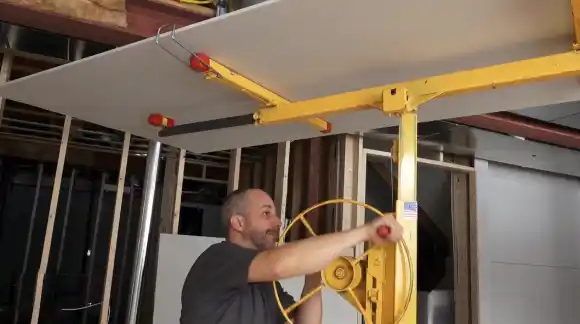
Releasing the brake on a drywall lift is done by gently turning the winch wheel forward. A drywall lift is equipped with a hand-operated winch located in the middle of the lift that operates a heavy-duty steel wire rope that runs through a series of pulleys, allowing it to move up and down.
The brake must be released by turning the winch wheel counter-clockwise or forward for the lift arm to move. The amount of force required varies depending on how much resistance there is from the brake itself.
If necessary, additional leverage can be applied to loosen it further. Once released, it should be tested by moving the lift arm before proceeding with any work tasks. It is essential to ensure that all safety protocols are followed when releasing and engaging any mechanical device such as this one.
Can You Fold the Drywall Lift Without Any Special Tool?
Yes, you can fold a drywall lift without using any special tools. The main advantage of doing this is that it enables the drywall to be moved safely and efficiently. A drywall panel lift is a simple device for lifting heavy pieces of sheetrock or plasterboard onto walls or ceilings.
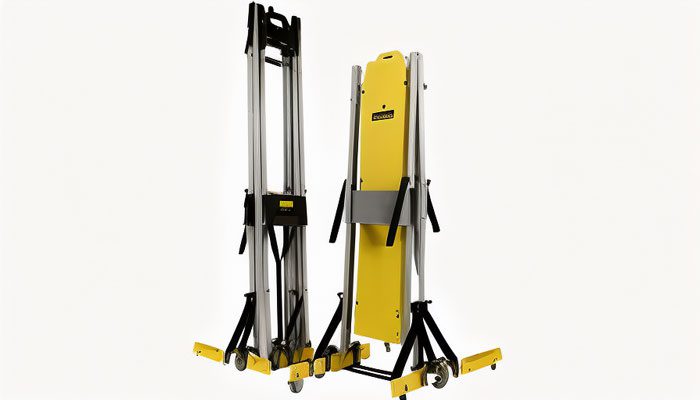
It consists of two arms that are pivoted together at the top, with a locking mechanism at the center. Folding the arms together reduces the lift’s size, making it easier to move or store away when not in use.
Can You Disassemble a Drywall Lift Alone?
One person can disassemble a drywall panel lift on their own with relative ease. Although the weight of the lift itself can make it challenging for one person to move, the disassembly process does not require two people.
The most important thing for a single person to remember when attempting to take apart the drywall lift is to take care of and follow the instructions included with the product.
Fold Away the Drywall Lift for Effortless Transport and Storage
Folding a drywall lift is a great way to save time and effort when transporting and storing the equipment. It’s a relatively simple process that can be done by one person alone & no special tool, or extra muscle power is required.
Releasing the brake allows you to fold the drywall panel hoist safely and securely, ensuring it is ready for transport and storage. With the above steps, you can break down your drywall lift efficiently, saving yourself time and hassle in the future.


