
Last Updated on March 5, 2023
Don’t let a lack of lift stop you from getting your ceiling drywall job done in a jiffy. With the right tools and materials, this tedious process doesn’t have to be daunting or take too long.
Start the project off with a few easy measurements of height and width. Then you’re going to drill a wood block two inches below that ceiling, followed by creating another turning block with a 3/4-inch gap between them.
Next up, get creative as you fashionably fasten those drywall sheets into place with some screws before cutting away any holes necessary around fixtures or electrical outlets. Finally, break apart all leftover blocks, then behold your brand new masterpiece.
Ready to get your adventure started? We’ll be with you every step of the way, providing detailed guidance for an exciting journey. Let’s go.
How to Hang Drywall on Ceiling Without a Lift: Detailed Steps
Effortlessly elevate your next project by following this helpful guide. With the right materials and guidance, you can quickly finish hanging drywall on any ceiling with no drywall lift required. Get ready for a smooth installation with just a few simple steps that make all the difference.
Step 01: Preparing the Room
The first step in hanging drywall on a ceiling without a lift is preparing the room. This includes measuring the length, width, and height of the ceiling and walls using a tape measure.
Mark all measurements to ensure accuracy during installation. Once you have your measurements, it is also essential to calculate the square footage of the area you’re working with to get an idea of how much drywall sheet you will need for the job.
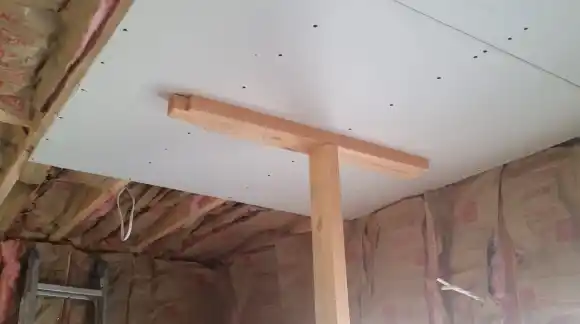
Step 02: Drill a Wood Block Below the Ceiling
Once you’ve got your measurements, it is essential to drill a wood block 2 inches below where the ceiling meets the wall. The block should be about as long as the wall you are drywalling.
To do this accurately, it’s recommended that you use a step stool to reach higher up on the wall if necessary. It’s also essential to use a longer screw, such as one that is 5 inches long, if your wood block is two inches thick.
This will ensure that your wood block stays firmly attached and will not shift or move when weight is placed on it during installation.
Step 03: Make a Turning Block
The next step is creating a turning block. To do this, drill a 1 ft block of wood into one of your ceiling rafters where you’re working.
Measure 4 feet (1.2 m) from your wall and make sure there’s at least a 3/4 inch (1.9 cm) gap between your rafter and block so it stays loose and can move freely when needed while installing the drywall sheets up onto your ceiling rafter later on in this process.
A 5-inch drywall screw should be used for attaching this piece into place securely enough so that it won’t come loose or shift during installation either.
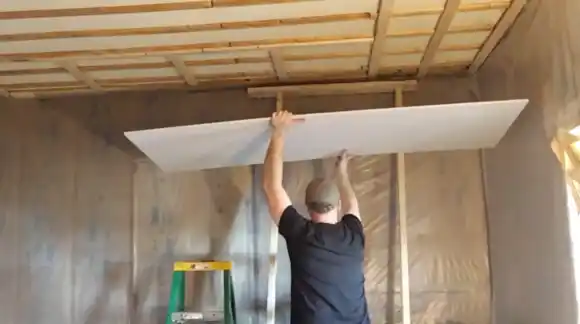
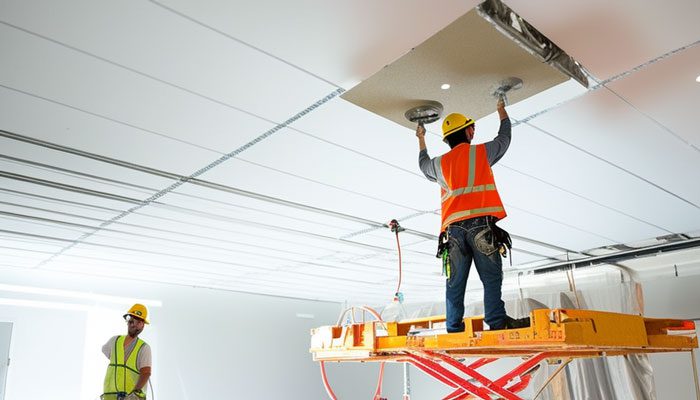
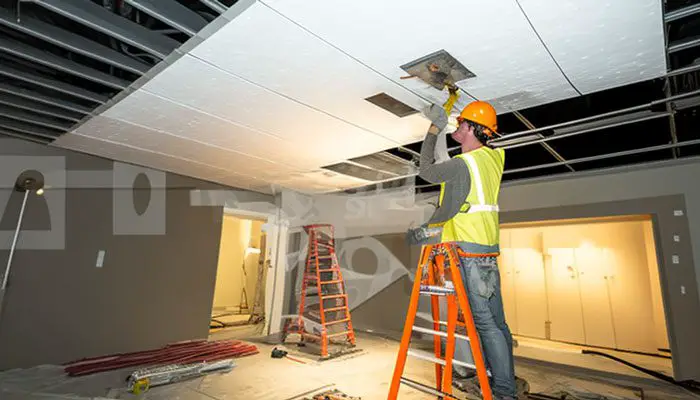
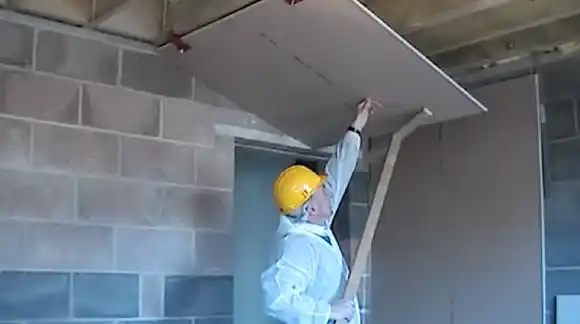
Step 04: Hanging Drywall on the Ceiling
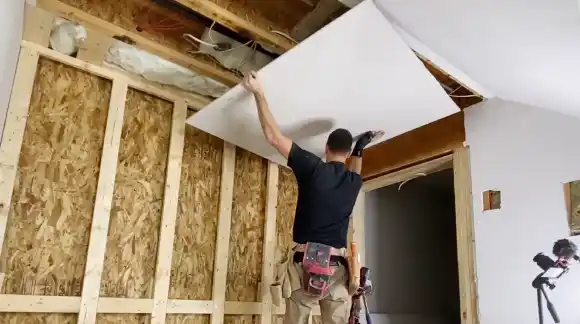
Now that you have made your own turning block, it’s time to hang your drywall sheets on the ceiling.
Start by grabbing one end of your drywall board at its corner and lifting it upwards until it reaches your turning wooden block on the wall that you attached earlier.
Secure one corner of the drywall sheet to the turning wooden block. Climb up your ladder and hold onto the end of the drywall sheet with one hand. Gently guide it upwards until it reaches its proper position against the ceiling corner (while ensuring there is still some space between them).
Step 05: Start Screwing
After hanging one piece of drywall securely against the ceiling joist, begin screwing it into position first by drilling one screw through each rafter located within its coverage area.
Measure half an inch (1.3 cm) away from its edge before drilling through it into each rafter in succession using an appropriate power drill equipped with suitable drywall screws for this purpose.
Also, ensure that four more equally spaced screws are added into each rafter covered by each sheet to provide maximum stability and strength when hanging multiple sheets consecutively from this point onwards.
Step 06: Install All Drywall Sheets In the Same Manner
Once you have completed installing one sheet of drywall panel onto your desired area with all screws tight enough to hold firmly in place.
It’s important to repeat these same steps over again until all areas have been sufficiently covered entirely according to their pre-measured lengths and widths beforehand.
Make sure that all of the screws are tightened properly, and keep track of how much progress you have made so far.
Step 07: Cut Holes to Expose Any Ceiling Fixtures
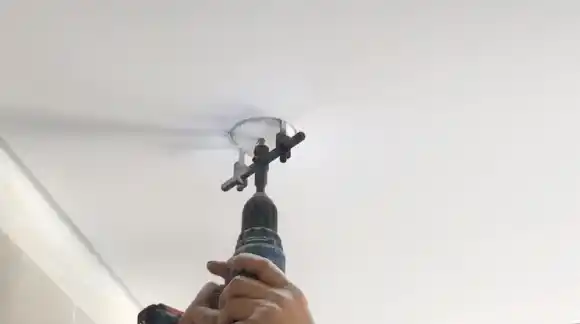
Now that all of your drywall has been secured into place with proper fasteners, you can now proceed with cutting holes if necessary to expose any existing ceiling fixtures. Such as lighting fixtures, exhaust fans, etc.
A special tool known as a drywall cutter can easily cut precise circles of different sizes depending on what fixture needs to be exposed.
This tool works great for cleanly cutting these precise holes without damaging any other nearby areas within your newly finished walls/ceilings where no changes were originally intended during the installation processes beforehand.
Step 08: Remove Any Leftover Wood Blocks
After completing all drywall installation, it’s important to remove all leftover wood blocks on the wall where they were previously installed to hang the drywall, which is no longer needed since the process has been completed.
This way, it keeps the room looking neat and clean while also saving time and effort expended during the next project since those same blocks won’t need to be scrapped down again before starting a new job.
Is Drywall Adhesive Necessary When Installing On Ceilings?
It is not strictly necessary to use drywall adhesive when installing drywall on ceilings, but it can be beneficial.
The adhesive helps to create a solid assembly and reduces screw pops, which can occur when the screws are not firmly held in place.
Also, using an adhesive on the underside of the board helps to ensure that it will stay securely in place even if the screws happen to come loose.
While the glue is not required for most drywall installations, it can provide extra protection against any potential problems in the future.
When choosing an adhesive for this task, it is important to ensure that it is appropriate for drywall use.

Since different adhesives have different properties, some may be stronger than others and, therefore, more effective at keeping the drywall secure.
It is also recommended to look for an adhesive that has been approved by building codes and is suitable for use on ceilings, as this will ensure maximum safety and reliability.
Finally, before applying the adhesive, ensure all other aspects of the preparation process are complete. This includes cleaning the surface of the ceiling and ensuring that all frames and joints are properly aligned.
By following these steps beforehand, you will get a better result from your adhesive application with less effort and time needed overall.
Do You Leave a Gap Between Drywall Sheets to the Ceiling?
It is essential to leave a space between the drywall and the ceiling when you are installing them. This is so that the framing members can move without causing any damage or cracks over time.
Generally speaking, a 1/8 inch space should be left between sheets during installation so that movement can occur without damaging either component.
It is important not to leave too much of a gap. This could potentially lead to other issues, such as heat loss through insulation or water damage due to condensation buildup due to temperature fluctuations from outside sources like windows or doors being opened frequently.
When placing each sheet of drywall against another sheet or against any other wall structure, make sure there is no overlap between them, as this could cause cracking along seams where they meet up due to tension caused by movement over time.
Always ensure that each sheet’s edge is flush with its adjacent piece so that air gaps do not form after everything has been installed correctly.
Otherwise, moisture could become trapped inside the walls creating mold growth over time if left unchecked or, worse still, cause structural damage leading to potential major repairs down the line if not addressed soon enough.
Is It Better to Nail or Screw Into a Drywall on the Ceiling?
When you need to put a screw into drywall on a ceiling, it is always better to use screws instead of nails.
This is because screws provide superior structural strength compared to nails and create a stronger bond with the drywall, reducing the risk of wall damage from sagging or falling objects.
Aside from that, screws create an airtight seal that can help prevent air leakage. They also make it easier to remove and replace components without having to patch up any damaged surfaces.
Nails are not recommended for use in drywall or other materials where strength is of utmost importance.
Nails tend to loosen over time and can tear away at the material they’re driven into, leading to potential damage. They also tend to leave unsightly holes when removed, making them less than ideal for areas where aesthetic appeal matters too.
Overall, when working with ceilings, screws should be used instead of nails if possible. Not only will they provide greater structural integrity but they’ll also look better and last longer than nails would in similar applications.
Does It Matter in Which Direction Do You Hang Drywall on the Ceiling?
The direction in which you hang your drywall on the ceiling matters for both aesthetic and structural reasons.
From an aesthetic standpoint, it is typically best practice to hang the drywall in the long direction so that any seams that appear between different pieces of drywall appear more uniform across the entire length of the wall.
Structurally speaking, hanging your drywall in the long direction generally provides greater stability since this orientation makes it more difficult for any sagging or shifting to occur over time due to its increased strength compared to short-direction hanging.
Unleash Your Inner DIY Pro: Hang Drywall in No Time
Hanging drywall on your own is not as complicated as it may sound when you don’t have access to a lift. By following these simple steps outlined in this blog post, you can properly hang drywall on your ceilings without needing extra help or expensive tools.
In addition to saving time and money, DIY-ers can take pride in knowing that they were able to complete such an intimidating task all by themselves. So why wait? With the right preparation and tools at hand, go ahead and start hanging drywall in your home today.


Разумное отношение к азарту — это подход к азартным сессиям, основанный на контроле и понимании рисков.
Она предполагает добровольное ограничение продолжительности и денег на процесс.
Каждый участник обязан предварительно устанавливать пределы ставок и строго их соблюдать.
https://relax-spb.ru/read-info/2945-semya-olivera-tri-uchredila-fond-ispolnyayushchiy-poslednyuyu-volyu-muzykanta.html
Comment awaiting moderation.