Last Updated on January 31, 2023
Are you looking for a way to disappear those pesky anchor holes in your drywall? Whether they were caused by hanging pictures, shelves, or other items on the wall, filling these holes can be tricky to restore them to their original state. Perhaps you’re wondering how to fill anchor holes in drywall.
Don’t worry! Patching up those pesky drywall anchor holes is easier than you think, just grab a spackling compound and get to work. With the right supplies and a few easy steps, you can quickly spackle those unsightly drywall holes.
From spackling to selecting the right tools, we’ve covered your drywall repair needs. We will provide a quick refresher on filling holes of drywall anchors and what precautions to take when choosing materials for doing so no need to break out heavy-duty items from the garage just yet.
How to Fill Anchor Holes in Drywall: Step-By-Step Processes
Whether moving a picture frame, curtain rod, or piece of furniture, you’ll need to fill the anchor holes left behind with a spackle or compound. The following step-by-step guide will help ensure that your repair job looks clean and professional when completed:
I. Tools and Materials Needed
For this project, you will need a few basic tools and materials.
Equipment/Tools:
- Hammer
- Utility knife
- Screwdriver
- Painter’s tape
- Putty knife or 4-inch drywall knife
- Taping compound tray (optional)
Materials:
- Paper towels
- Electric sander or coarse-grit sandpaper
- All-purpose drywall joint compound
II. Preparing the Area for Filling the Anchor Hole(s)
Once you have acquired all the necessary tools and materials, it’s time to prepare your work area for covering the anchor hole(s). Gently tap away at the drywall to create a concave finish. It’ll give your walls that unique, professional look you’ve been searching for.
Now, use multi-surface painter’s tape to secure any surrounding areas that should not be affected by spackle or joint compound. This could include adjacent walls or trim pieces that could be damaged during the repair process.
Then, use a general-purpose sandpaper sheet to lightly sand around the edge of each hole. This will help ensure that all loose particles are removed from the area before applying spackle or compound.
Lastly, wipe down surfaces near each hole with a damp cloth to remove any excess dust from your sanding activities.
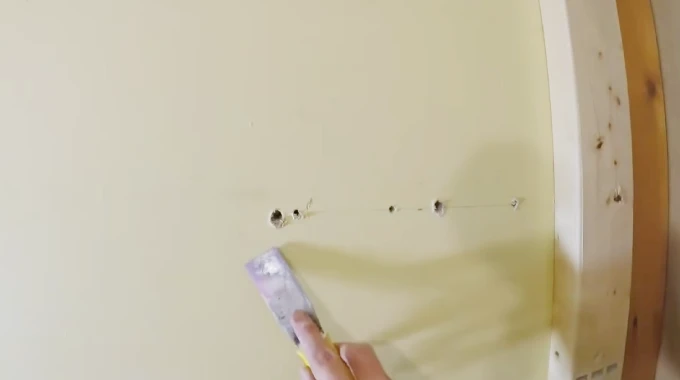
III. Applying Spackle or Compound to Fill the Anchor Hole(s)
When applying a heavy-duty spackle or all-purpose joint compound to fill an anchor hole in drywall, start by pressing enough material into the opening, so it slightly bulges above the surface level of surrounding walls. This ensures that once dried, it won’t sink below its original position when painted over later on in this process.
Gently spread the compound material across surrounding surface areas using a putty knife until even and flush against the wall’s surface. Move the blade slowly in one direction to prevent streaks and unevenness in the final finished product.
Once all of your holes have been filled in evenly across their faces (you may need multiple layers), take your putty knife and scrape away any excess material along its edges so that it’s flush with surrounding drywall surfaces.
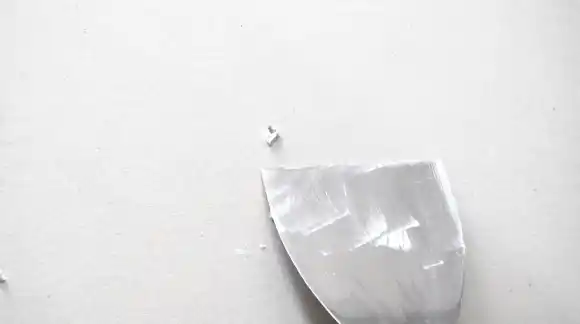
IV. Smoothing Out the Spackle/Wall Patching Compound
After spreading the material, it has to smooth out the spackle or wall patching compound. This should be done with a utility knife or a drywall trowel so that the surface of the patch is completely even and without any bumps or ridges.
The user should work slowly and carefully, taking time to ensure that the patch is as smooth as possible. As they are smoothing out the compound, they should also know how it reacts to any pressure applied.
If it does not seem to stay put, more compounds may need to be added to fill in the hole and stay in place. Once finished smoothing out the patch, users can proceed to the next step.
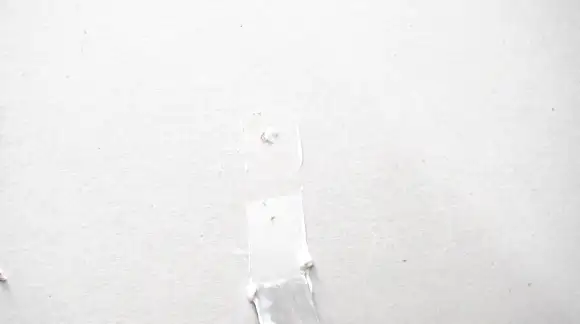
V. Sanding Down and Finishing Off the Area
Filling anchor holes in drywall with spackle/wall patching involves sanding down the area and finishing it after applying spackle or wall patching compound. This is done using an electric sander or some other form of sandpaper, such as a hand sander or sanding block.
To ensure that all parts of the patch are completely smooth, users should use coarse grit paper before gradually moving up through finer grits until they have achieved a fine finish on all edges of their patched area.
After sanding down all edges of their repair job, users should then use a damp cloth over their repaired sections to remove any dust left behind from sanding.
VI. Painting Over Repaired Drywall
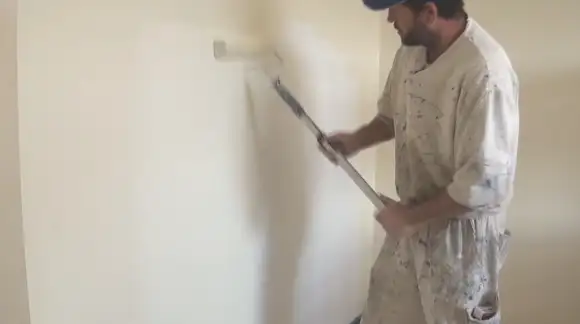
Now transform these drywall joint compounds into a pristine masterpiece with the perfect paint combo. Reach for either latex or oil-based primer and paint to cover patched sections seamlessly, leaving your wall looking better than ever.
Before painting, users should ensure their repair job is fully dried by waiting at least 24 hours from when they finish sanding down all patches before applying paint.
For best results when applying paint, users should use an angled brush for edging around areas where patches have been made and a roller brush for larger areas that require more paint coverage overall.
Also, depending on what kind of finish users want for their project, multiple coats may need to be applied before achieving desired results. This process can take several days since each coat needs ample time to dry before adding another one over top of it.
Can You Use Any Household Items to Fill Drywall Anchor Holes?
No, you cannot use any household products to fill anchor holes in drywall. This is because most household materials, such as wood putty or caulk, are not strong enough and will not provide a secure fit in the hole.
Also, they can shrink over time or become brittle and break off inside the wall. The best material for filling wall anchor holes is a premixed all-purpose drywall joint compound specifically designed for this application. This drywall compound provides a strong hold and will ensure that the patch lasts for years.
How Big of a Drywall Hole Can You Patch With Spackles?
It is possible to patch up to 4 inches (10 cm) in diameter of a drywall hole with a spackle. Spackle is a lightweight material that easily adheres to the surface surrounding the hole and fills it in completely.
It also has good adhesive qualities, so it won’t pull away from the surface when sanded down after drying. It’s essential to make sure that you buy a spackle that is made for repairing drywall, as other types may not be suitable for this application.
What is the Easiest Drywall Mud to Use to Fill Anchor Holes?
The easiest type of drywall mud to fill anchor holes is premixed all-purpose drywall compound. This compound comes ready-mixed and doesn’t need any additional preparation.
It has excellent adhesion properties, which make it easy to apply and provides a strong bond when dry. Also, it stands down very easily when finished, so no visible bumps are left around the patch area.
Factors to Remember When Filling Drywall Anchor Holes With Spackle
Here are a few factors to keep in mind when filling drywall holes with spackle:
- Make sure the holes that need to be filled are completely dry before applying spackle, as moisture can cause the material to become weak and crack or shrink away from the area over time.
- The drywall anchor hole size should be considered when selecting the right type of spackle for the job.
- When preparing spackles for use, follow the product instructions carefully, as each brand will have different mixing ratios and drying times. It’s also essential to make sure you mix enough for your project.
- For best results, try using a putty knife or other flat-edged tool when applying spackle to ensure an even application over all areas needing filling. Always make sure to get rid of excess material that goes beyond the edges of the hole so there won’t be any unsightly bulges once everything dries up.
- Allow plenty of time for the spackle to dry fully before proceeding with additional steps such as painting or sanding. Otherwise, it can affect its long-term durability down the line (especially in high-humidity environments).
- Once everything is drying up, evaluate whether any further filling needs to be done. This is especially true if you opted not to use a joint compound due to its size limitations previously mentioned above.
- Finalize everything by lightly sanding off any remaining excess material on top of what was already filled before painting over it. This helps eliminate potential bumps along with helping achieve a smoother overall look and feel upon completing all tasks involved in a successful drywall anchor/spackle repair job.
Perfecting Patchwork: Patience is Key in Drywall Holes Repair
Filling anchor holes in drywall requires patience and attention to detail. But with proper guidance and information about all the tools and materials required for this job, it can be simple.
So, don’t let those anchor holes be a wall between you and your drywall’s attractive interior. Follow those simple steps and take the hassle out of home improvement with this comprehensive guide on filling anchor holes in no time.


