Last Updated on January 21, 2023
Drywall cracks may not seem like a big deal initially, but left unaddressed, they can cause costly damage. Ignoring the drywall ceiling crack leads to the deterioration of the entire ceiling.
In particular, the joint between the plates of drywall, which are held together by tape and joint compound, could become loose and cause bigger gaps to form.
Fixing a drywall crack can be simple and satisfying, but don’t underestimate the importance of getting it right. There could be disastrous consequences if you botch up. With a joint compound, sandpaper, and a few other tools, you can easily fix drywall ceiling cracks.
Get ready to give your ceilings a facelift and make them look like new. Follow our simple steps below, and you’ll be able to repair drywall cracks in no time.
How to Fix Ceiling Drywall Crack: Steps to Follow
It is important to take extra care when tackling a crack in your drywall ceiling, as it requires more precision than normal wall repairs. To begin the process, you will first need to gather the right tools and supplies.
Here’s what you’ll need:
- Tape Measure
- Drywall Saw
- Putty Knife or Other Scraping Tool
- Sandpaper
- Joint Drywall Compound or Drywall Mud
- Finishing Compound
- Paintbrush and/or Roller
- Patch Kit, If Necessary
Not only gather the supplies, but you also need some safety requirements, such as:
- Eye protection equipment such as goggles, glasses, etc.
- Wear work gloves when handling joint compounds, sandpaper, and other wall repair materials.
- Avoid breathing in any dust from sanding by wearing a face mask.
Once you have all the supplies and safety equipment ready, it’s time to start fixing your drywall ceiling. Here are the steps to follow:
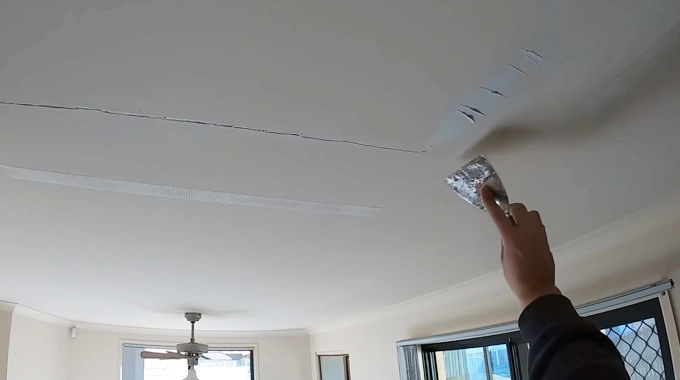
Step 1: Preparing the Crack Area
For fixing a ceiling drywall crack, the first and most important step is properly preparing the crack area. Begin by removing any loose pieces of drywall with a putty knife and vacuum up any dust or debris. You can also use some sandpaper to smooth out the area around the crack.
Then use masking tape, as this will ensure that the edges of the crack are clean and straight. It also helps protect the surrounding drywall from any potential damage caused by applying joint compound.
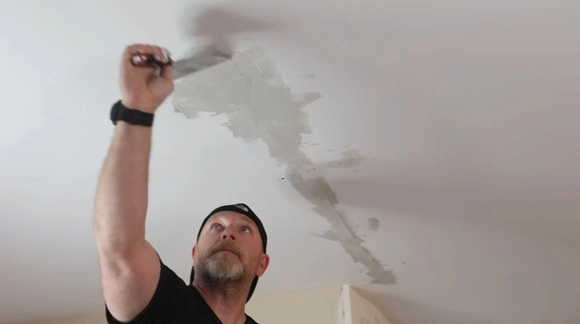
Step 2: Mixing Joint Compound
When you have prepared your crack area, it is time to mix some joint compounds together. You can purchase a ready-mixed joint compound from your local hardware store or home improvement center, or you can make your own using a combination of water and plaster.
You have to create a mixture that is thick enough so that it won’t run or drip when applied but thin enough so that it spreads easily over the affected area. The best way to achieve this consistency is by using equal parts of joint compound and water mixed together until you have reached an ideal thickness.
After that’s done, you can begin applying this compound onto the crack using either a putty knife or a taping knife depending on your preference. Make sure that every edge of the crack is filled in and smoothed out as much as possible before moving on to the next step.
Step 3: Allowing Drying Time
Once you have finished applying joint compound onto your ceiling drywall crack, it is important to allow adequate time for drying before continuing with other repair work, such as sanding or painting over top of it.
This process usually takes between 24-48 hours, depending on factors such as humidity levels and airflow in your home. While waiting for everything to dry completely, ensure not to touch or disturb anything around this area.
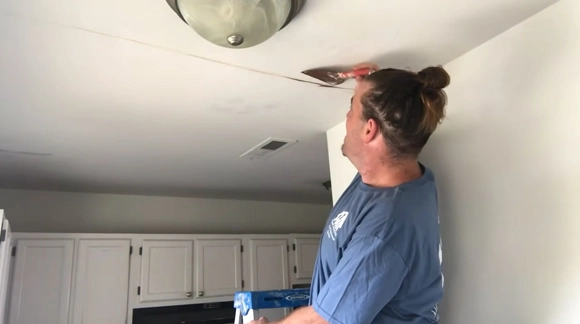
Step 4: Add Several Layers of Joint Compound
After the first layer of the joint compound has dried, you can then move on to adding several more layers. This will allow the surface to be adequately filled in and smooth out any irregularities that may have occurred during the initial application.
You may need anywhere from two to four layers depending on how deep or wide your ceiling cracks are. Each new layer should be lightly sanded down before applying another so that all layers blend together without any noticeable lumps or bumps.
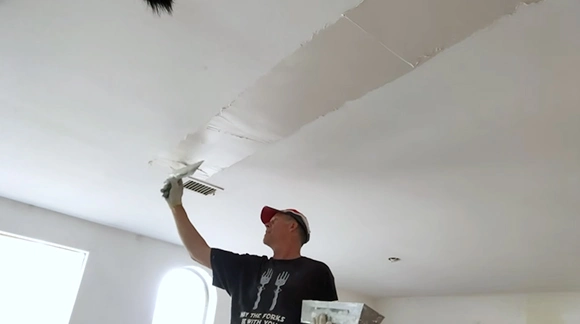
Step 5: Sand Down Areas Around the Crack
Once all of your layers have been added and dried, use a fine-grit sandpaper or sanding sponge to smooth out any uneven areas around your ceiling crack repair patch. This will help ensure that when you paint over it later, no lumps or bumps will show through on your newly repaired wall surface.
Step 6: Prime Around the Crack area
When all of your repairs are complete, it’s time to prime around where you filled in your drywall cracks so they won’t stand out too much when painting over them later on. Use a high-quality primer specifically made for prepping walls prior to painting them, and apply evenly over both sides of where you filled in your foundation repair patch.
With joint compound as well as all around its perimeter so there won’t be any visible lines left behind when you are finished painting.
Following these steps will help ensure that your ceiling drywall crack repair job is done properly and efficiently.
What Causes Ceiling Drywall to Crack?
Ceiling drywall is prone to cracking due to a variety of different causes. Here are some of the most common reasons:
Structural Issues: When construction is done improperly, it can put too much stress on the ceiling drywall, which can lead to cracking. Additionally, improper installation of fasteners when hanging ceiling drywall may cause it to loosen and move over time.
Poor Installation Procedures: If the installation process is rushed or done incorrectly, it can result in a weakened structure. Aside from that, if the wrong type of nails or screws are used for installing ceiling drywall panels, they may not hold up properly and could fail over time from stresses placed upon them during everyday activities.
Poor Quality Drywall Components: Low-grade components such as drywall tape and joint compound may not be able to withstand weight over an extended period of time. Poor quality components might also result in improper adhesion when applied to walls or ceilings, which will cause movement and cracks over time.
Temperature and Humidity Changes: Changes in temperature and humidity inside a home can also lead to cracks in ceiling drywall. As temperatures rise during summer months and fall during winter months, along with accompanying humidity fluctuations, this can create small shifts in different parts of your home’s structure.
Age-Related Deterioration: Aged ceiling materials tend to degrade more quickly than modern ones. Age-related deterioration often leads to problems with ceiling drywall. Because older homes were built using different methods than how we build them today.
Earthquakes and Other Natural Disasters: Natural disasters like hurricanes, floods, earthquakes, etc can all have quite drastic effects on our homes, including broken ceilings. Seismic activity causes sudden shocks throughout buildings whose structural damage might not provide enough protection against them, leading to ceilings being cracked.
When a Ceiling Cracks, Is It Normal?
Yes, it is normal for ceilings to crack. As you know from above, there are many different factors that can contribute to ceiling drywall cracking. The severity of the cracks will vary depending on how much stress has been put on the ceiling and how well it’s been maintained.
Generally, these types of cracks are considered more of a cosmetic issue than a structural one, but they should still be taken seriously and inspected to make sure they do not indicate a larger problem.
In Order to Fill Plaster Cracks, Which Filler Is Recommended?
Polyfilla or powder filler is often recommended for filling plaster cracks. Polyfilla is an easy-to-use compound that is lightweight and non-shrinking. It bonds well with both interior and exterior surfaces, making it ideal for use in plaster repairs.
It also sets quickly, so you can get your wall repair done quickly without too much fuss. Powder filler is a great choice for filling bigger holes and deeper cracks because it dries hard yet remains flexible enough to move with any movement.
Here are some recommendations for filler products:
Joint Compound Spackle Patch: This versatile patch is perfect for repairing all types of walls. It quickly and easily fills in holes, cracks, and gaps with a texture that’s ready to paint and sand. Due to its low-odor formula, it can be used in occupied areas, as it is formulated with high-performance materials to ensure long-lasting results.
Drywall Patch Repair Kit: This kit has everything you need to fix your drywall, including a sturdy patch, a pliable putty knife, a sanding block, and spackle. The materials used in this kit are of high quality and are designed for safety, making your repairs secure and long-lasting.
Ready-Mix Stucco Patch: This easy-to-use mix is designed to be used both indoors and outdoors and can provide a durable and attractive finish wherever it’s applied. The stucco Patch doesn’t require any special tools or supplies. Just mix it with water and apply it to the problem area. It will dry quickly to a strong, solid finish that won’t crack or crumble over time.
Can Ceiling Cracks Be Painted Over Directly?
Smaller cracks may be able to be painted over directly with no need for extra preparation work first. If there are large visible gaps in the ceiling though, then some additional steps may need to be taken before painting to ensure that the paint will adhere properly.
For small cracks, you may find that using heavier-weight paints will help provide better coverage, while stickier types of paint can give better results when dealing with larger cracks where heavier coats are necessary for providing complete coverage.
Is Caulk Able to Fix a Ceiling Drywall Crack?
Yes, caulk is able to fix ceiling cracks, but it should only be used if the width of the crack is less than 1/4 inch wide or if there is only a tiny hairline crack present in the area.
The best type of caulk for this purpose would be either an elastic acrylic caulk or an adhesive silicone caulk. Which offers great pliability and adhesion when applied correctly using typical caulking tools such as a caulking gun or trowel.
Once applied, these types of sealants should last for many years without needing any further maintenance on your part, as they form an effective barrier between your walls and ceilings.
So now that you know the basics of how to fix ceiling drywall cracks, you can confidently tackle any drywall repair project that comes your way.


