Last Updated on July 27, 2023
Ready to take your home renovation game up a notch? Drywall mud is an absolute must for amateurs and pros alike who are serious about sprucing things up around the house.
But before it can be used on projects big and small, proper mixing is essential. With some effort, you’ll really get the most out of your home improvement project.
For a perfect plastering job, mix your drywall mud like an expert. Add water in increments and stir thoroughly until you get the desired consistency. Letting it sit for a few minutes after stirring will maximize its coverage with each application, no pre-mixed mortar is needed here.
You have total control over this process, so make sure to take your time in getting that ideal mixture.
Benefits of Mixing Drywall Mud
Setting Time and Workability
The ability to set and work with drywall mud is one of the primary benefits of mixing it. Setting time is an important factor, as it allows the user to adjust the consistency of the mud according to their needs depending on what type of job they are doing.
Additionally, when mixed correctly, drywall mud will harden properly, creating a strong finish that can withstand impacts and wear over time. Mixing also helps to create a smoother surface for easier application and spreading, ensuring surfaces remain even and uniform.
Easier Spread or Application
When mixed correctly, drywall mud can offer a variety of benefits that make it easier to use than other finishing materials. For example, drywall mud spreads more easily than most other types of plaster or putty.
This makes it ideal for larger surfaces that require uniform coverage as well as for detailed areas such as around nails or corners where precision is key. Mixing also helps ensure a better finish overall, making the end product look more professional and aesthetically pleasing.
Better Durability and Strength
Another benefit of mixing drywall mud is its superior durability and strength compared to other materials. Drywall mud that has been correctly mixed will not only be less likely to crack or flake but will also last much longer than plaster or putty alone before requiring repairs or replacements.
This improved longevity makes it a cost-effective choice for large projects where long-term results are desired. Additionally, since this type of material does not require frequent maintenance once applied, it can help reduce labor costs in both commercial and residential contexts over time.
Common Methods to Mix Drywall Mud
Method A. Hand or Mechanical Mixers for Small Batches
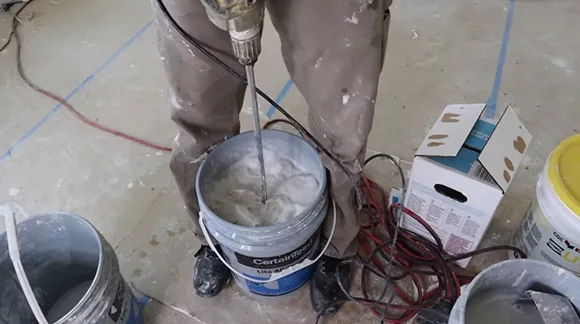
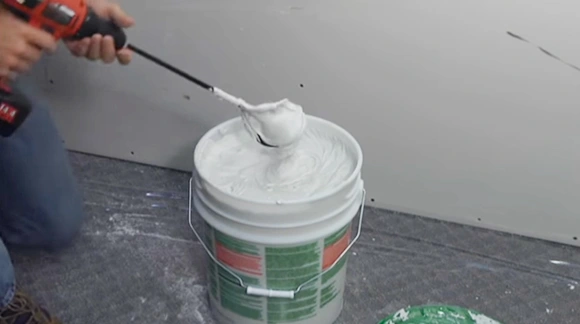
Hand and mechanical mixers are essential tools used to mix drywall mud in small batches. By using a slow-speed drill, a paddle mixer attachment can be used to blend together joint compounds, water, and other additives.
It has been proven that this method is more effective than mixing by hand, as the paddles help to break up any clumps that may be present in the mixture. Additionally, it takes less time and does not require as much physical effort from the user.
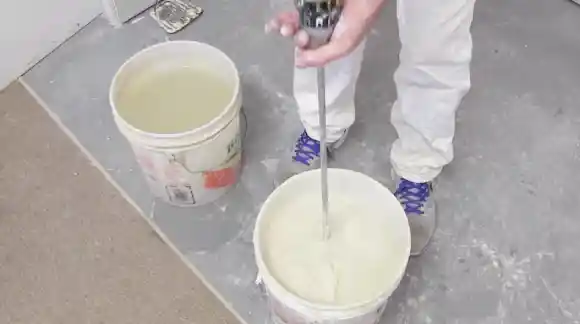
Method B. Bucket Method for Larger Batches
For large batches, professionals often employ “the bucket method” to mix drywall mud. All components are placed directly into the container and mixed thoroughly with nothing but manual tools like trowels or sponges.
This effective technique may take more time than an electric mixer, yet it yields unparalleled results when larger quantities of ingredients require mixing.
To use this approach, all material except water should be added first; break up any clumps, then slowly add water while stirring until achieving the desired consistency is achieved.
Simple Steps in Mixing Drywall Mud for Method A
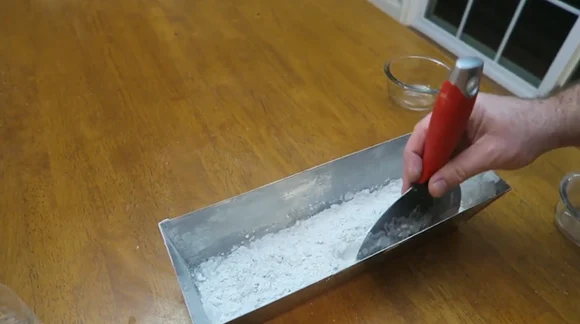
Step 1: Gather Your Materials
Before starting, ensure you have all the necessary materials to complete the job.
This includes drywall mud, water, a mixing bucket, a drill with the paddle attachment (if using the mechanical mixer), a wide-blade putty knife, or a trowel (if using a hand mixer), and masking tape (optional).
If mixing large amounts of drywall mud, it’s recommended that you wear protective gear such as safety glasses and gloves.
Step 2: Prepare the Area
To ensure that your work area is prepared properly before mixing your drywall mud, use a trowel or wide-blade putty knife to scrape away any dirt from your work area. Then use masking tape to cover up any outlets or other components that could suffer damage while mixing your drywall mud.
Step 3: Measure Out Your Materials
Once your work area is prepped, measure out the appropriate amount of drywall mud for your project. Generally speaking, calculate one part of water for every four parts of drywall mud for the best results. Pour these ingredients into your mixing bucket until both are evenly distributed throughout the mixture.
Step 4: Begin Mixing
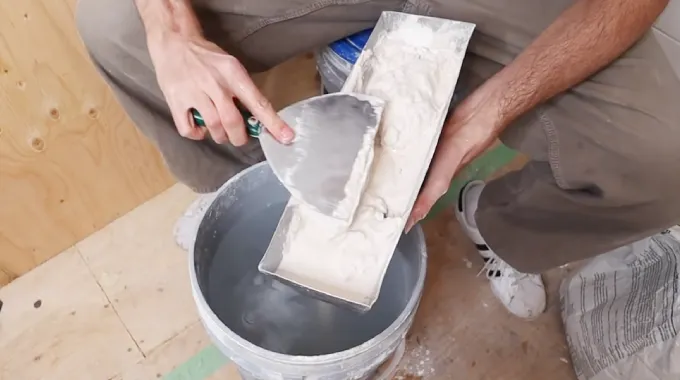
Now that all your ingredients are in place, it’s time to begin mixing. For hand mixers, simply use your trowel or putty knife and start stirring until all ingredients are incorporated together and reach a creamy consistency.
If using a mechanical mixer, attach the paddle attachment to your drill and let it do most of the heavy lifting.
Move at medium speed while constantly stirring so that everything mixes together perfectly without overworking it. This could cause air bubbles within the mixture resulting in an uneven texture once applied on walls or ceilings.
Step 5: Prepare Water
Measure out the amount of water recommended by the manufacturer (or desired consistency) into the bucket. If using cold water instead of hot (as recommended for certain types of drywall mud), let it sit for about 5 minutes to warm up slightly before adding any other ingredients.
Step 6: Add Drywall Mud
Slowly add drywall mud to the bucket as you mix with a stir stick or hand mixer at low to medium speed. Be careful not to introduce air bubbles into the mixture, affecting its quality when applied to surfaces.
Work your way up from small amounts of drywall mud until you achieve your desired consistency e.g., thick but smooth enough to spread easily on walls and ceilings without cracking or crumbling apart when drying after application; always an ideal result.
Step 7: Use Mechanical Mixer (If Necessary)
For larger batches or more consistent results, consider using a mechanical mixer like those found in hardware stores or home improvement centers instead of a hand mixer or stir stick.
Set up according to product instructions and add dried powder ingredients followed by measured water until the desired consistency is achieved. Start mixing at low speed and work your way up as necessary; be mindful of avoiding air bubbles while doing so.
Step 8: Final Checks
When finished mixing either manually with a hand mixer or a stir stick or mechanically with an electric drill or mechanical mixer, check for any remaining lumps in the mixture before proceeding with application onto wall surfaces or ceilings.
These lumps can cause unsightly imperfections once dry. Additionally, make sure that no air bubbles have been left behind in order to avoid any cracks or other deformities once it dries after application. If so, remix until smooth again before usage.
Step 9: Let It Set
Once mixed, let the drywall mud sit for about 10 minutes before applying it to walls or ceilings. This allows air bubbles to settle and creates an even smoother finish once applied on surfaces. Also, remember that not letting it sit too long will result in clumps forming due to excessive settling time.
Step 10: Apply & Enjoy
After 10 minutes have passed, it is time to apply the drywall mud.
Use a trowel or putty knife to spread the mud onto desired surfaces, ensuring enough pressure so that the entire surface is covered uniformly with no bubbling effects present.
If any small bubbles appear, press against them gently with your fingers so they can pop away.
Simple Steps in Mixing Drywall Mud for Method B
Mixing drywall mud for the bucket method is an economical and reliable way to mix large batches of drywall mud for various applications. The following guide will help you achieve a consistent, high-quality mixture that will work great for your project.
Step 1: Gather Necessary Supplies
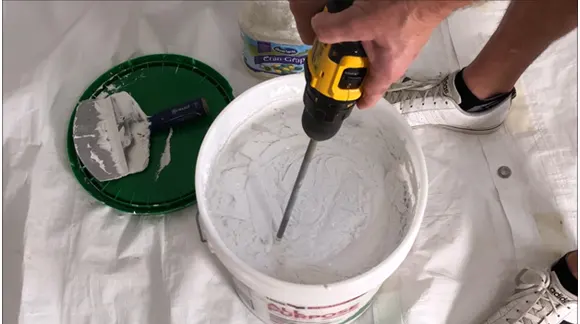
Start by gathering the necessary supplies. You’ll need a drill with a paddle attachment, a mixing bucket, and some joint compound. Make sure to select the right type of joint compound for your project. There are several different types available.
Step 2: Fill Your Bucket with Water
Begin filling your bucket with water. Be sure to use cold water to prevent curdling or clumping in the mixture once you add the joint compound.
As you pour in the water, check with a ruler or measuring cup to ensure enough volume in your bucket to complete your desired quantity of mud mix.
Keep in mind that you should use about half as much water as a compound when mixing for this method.
Step 3: Pour the Joint Compound into the Bucket
Once the appropriate amount of water has been added to the bucket, slowly pour in the joint compound while stirring gently with a paddle attachment on your drill at low speed.
Continue adding compound until all of it has been incorporated into the mix; be careful not to add too much at once, as this can cause lumps and clogs in your mixer paddles or drill bit.
Step 4: Gently Stir
Once all of the joint compounds have been added, continue stirring gently until everything is fully blended together.
This will take anywhere from two minutes up to five minutes, depending on how much material is being mixed together and how fast you are stirring it together with your drill and paddle attachment.
Be sure not to overmix. Overmixing can cause air bubbles which can damage surfaces when applied during finishing stages later on down the line.
Step 5: Turn Off the Drill After It Fully Blends Together
Once everything is fully blended together, the drill can either be turned off or just reduced in speed significantly.
The drill should be rested in one hand above the surface of the liquid mud mix so that any air bubbles being produced by stirring are broken up quickly.
This helps keep finished surfaces smooth and bubble free.
Step 6: Use a Ladle or Scoop to Pour Drywall Mud from the Bucket
When ready, begin slowly pouring mud out of the bucket using a ladle or small scoop. Pour the mud into smaller containers such as buckets or trays. This mud can be used later on after it has dried.
Be sure not to pour too quickly. Doing so could potentially create splashes which could lead to messes that would have otherwise been avoided if done properly.
Do You Sand After Each Coat of Drywall Mud?
Sanding in between coats of drywall mud is highly recommended to achieve a smooth and even finish. The sanding process eliminates any visible ridges or bumps that may have been created during the application of the mud.
It also ensures that the wall is perfectly level, reducing the need for additional coats or repairs down the line. When sanding, use high-quality sandpaper and gently move it back and forth along the work area until you’ve achieved an even surface.
After you’ve completed sanding, use a damp cloth to wipe away any excess dust particles before applying your next coat.
What is the Difference Between Joint Compound and Drywall Mud?
The main difference between drywall mud and the joint compound is their intended use. A joint compound is better suited for patching small holes or cracks in walls and ceilings. While drywall mud works best for larger surfaces such as entire walls or ceilings.
Joint compounds are available in different levels of thickness, allowing them to be used on more delicate projects such as textured walls.
Drywall mud is thicker than joint compound, making it better suited for larger tasks such as taping seams or filling voids between pieces of drywall when constructing new walls.
What is the Easiest Way to Apply Drywall Mud?
To apply the drywall mud, use a paint roller or trowel. If using a paint roller, lightly dip it into the premixed material, then roll it onto the wall from one side to the other until fully covered.
To apply the paint with a trowel, start lightly sliding along the wall surface, forming ridges about a one-eighth inch deep, then use quick back-and-forth strokes until all areas are smoothly coated with an even thickness.
Conclusion
Mixing your own drywall mud is an important step when undertaking any DIY project involving repairs or renovations such as hanging sheetrock vertically on walls or ceilings.
The key to mixing your own drywall mud is finding the right ratio of water and pre-mixed powder. It allows for better coverage and control over how much compound is applied per session and helps ensure that no premixed mortar has been sitting around too long or wasn’t stored correctly.
Too much water will result in weaker mud that won’t hold a shape, while too little water can make it difficult to work with.
Overall, Taking the time to mix your own drywall mud may take extra effort but will pay off with better results in the end.
You Might be Interested:


