Last Updated on March 22, 2023
Drywall tape removal is a key aspect of maintaining smooth walls, as it helps to fill in seams between sheets and prevents further damage, such as bubbling paint.
It prevents further damage from exposed seams or bubbling paint while simultaneously improving the overall appearance of a wall’s joints. Proper maintenance ensures that your drywall looks beautiful both inside and out.
Effective drywall tape removal begins with a thorough inspection, followed by scoring and pulling away the taping. The adhesive residue should be scraped off. Then sanding may be necessary to smooth any remaining rough spots.
Our tips and tricks will help you say goodbye to those unsightly strips without a lot of effort. Learn how simple materials, scoring techniques, or specialized tools can save you time while making sure your results are seamless.
Gather Necessary Supplies to Prepare for Drywall Tape Removal
Point 1. Safety Goggles and Gloves
As you prepare to remove drywall tape, take measures for optimal safety. Goggles shield your eyes from potential particles and fragments, while thick gloves protect your hands against any scrapes or cuts incurred in the process.
Leather or rubber is an ideal material choice for increased security due to its sturdiness. Remember that caution must be taken when handling metal tools used. These instruments can easily cause severe injuries if not managed carefully.
Point 2. Utility Knife and Extra Blades
A utility knife is an essential tool for achieving precise, clean cuts when removing drywall tape. It’s important to have a stockpile of extra blades. The sharper your blade, the fewer passes it takes and the less pressure you’ll exert on them, as they can quickly wear down with repeated use.
Point 3. Drywall Saw or Rasp
When tackling a drywall job that goes beyond simply patching holes, it is beneficial to use the right tools. A saw and rasp can be utilized in tandem for precision when removing larger or smaller sections of tape without damaging wallboard material.
These instruments should always be used with care, though, as they possess the potential to leave permanent gouges if any excessive pressure is applied against the surface.
Point 4. Putty Knife
Putty knives are essential handy tools for preparing a surface before painting or applying other finishes, as well as removing stubborn drywall tape. Putty knives provide an excellent balance of accuracy and gentleness when working with drywalls in preparation for painting or other finishes.
Thin blades allow you to reach detailed edges, while the reduced amount of force needed won’t cause harm to underlying surfaces, making them incredibly versatile in any DIY project.
Point 5. Sandpaper
Following the removal of drywall tape, sanding is an essential step in ensuring a smooth surface. To ensure a flawless finish, smoothly sand away any leftover imperfections with the appropriate grit of 120 to 150 to ensure a seamless finish once painting and other decorative touches are added.
Point 6. Vacuum with a Brush Attachment
Vacuums with brush attachments are a great tool for removing the remnants of drywall tape from hard-to-reach crevices. Their suction power can help to separate chunks stuck together by adhesives, avoiding delays and problems caused when particles clog brushes or rollers during the sanding and finishing phases.
Point 7. Stiff-bristled brush
A stiff-bristled brush is a crucial tool when dealing with drywall tape. A robust brush with stiff bristles constructed from sturdy material that can withstand hard scrubbing and scraping.
Its unique design gives maximum reach into crevices and grooves to ensure no adhesive residue is left behind. Its ergonomic handle ensures comfortable use over extended periods of time.
Point 8. Spackling compound or joint compound
Seamless drywalls require careful taping and finishing. Taping and finishing drywall seams requires two key components. spackling compound and joint compound. High-quality blends of these materials are needed to fill in any gaps or patch holes left during installation, ensuring a level surface ready for painting.
Point 9. Painter’s tape
A key step in preparing for drywall tape removal is using painter’s tape to safeguard walls, baseboards, and other surfaces from the adhesive residue that can damage them. Before beginning drywall taping work, it is essential to prepare adequately.
Prepare by covering baseboards, window frames, drywalls, and doorframes with painter’s tape. The painter’s tape is crucial when protecting these areas during taping work involving spackle, joint compound, and paint.
Point 10. Drop cloth
Drywall taping requires a drop cloth to protect flooring surfaces against any residue created during the process. It acts as an effective barrier against any detritus created by sanding and scraping off old adhesive residue.
Not only does it act as a barrier, but it also keeps dust particles safely contained until the area is ready for painting.
How To Remove Drywall Tape: Step-by-Step Guide
Step 1
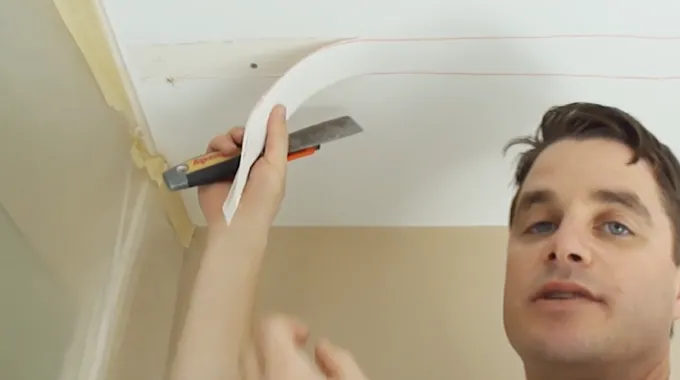
Get started on your drywall removal project by using a utility knife to carefully cut into the seams at each corner where drywalls or ceilings meet. Create an initial opening near the edge of this seam, and you are off.
Step 2
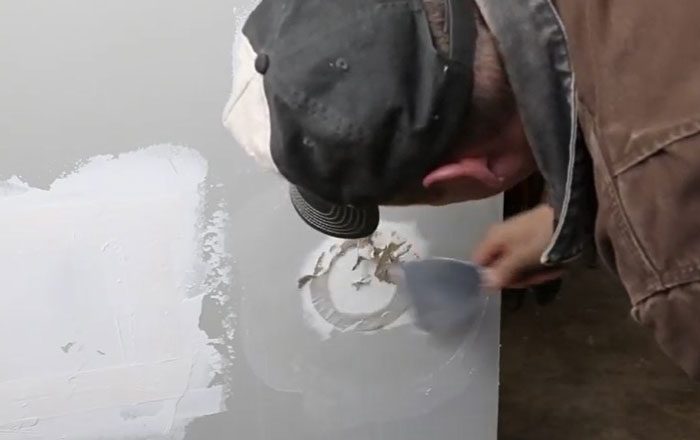
Carefully insert a putty knife between the drywall and old drywall tape, then delicately remove it from the drywall. Exercise caution while using this tool to prevent any damage to your surface.
Step 3
Using either sandpaper or drywall saw rasp, smooth out any leftover areas on the wall where old drywall tape has been removed.
Step 4
Vacuuming the area with a brush attachment will help clear away any residue before progressing.
Step 5
To maximize adhesion and ensure seamless drywall coverage, use a stiff-bristled brush to completely remove any prior residue before applying new drywall tape.
Step 6
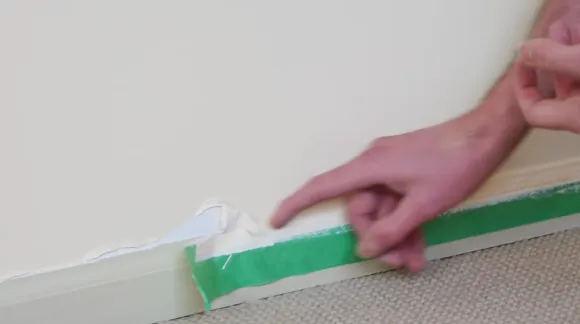
Before spackling begins, line up painter’s tape along the edges of your work area. This provides a firm layer of barrier and ensures that the spackling compound will be restricted to its intended spot.
Step 7
Smooth out imperfections by filling gaps between sheetrock seams with spackling compound or joint compound. Use a putty knife for an even application.
Step 8
Once your paint is dry completely, Carefully and slowly remove the painter’s tape for a flawless finished look.
Step 9
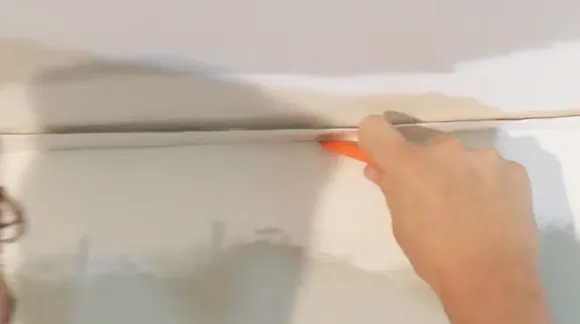
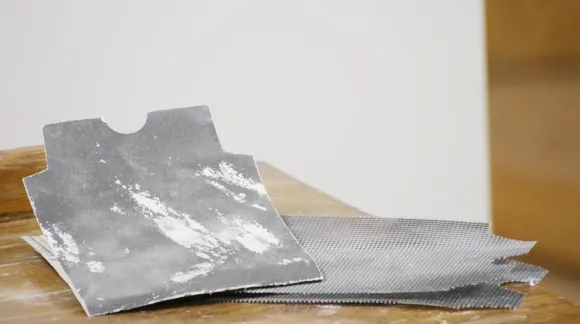
Complete Step 9 by firmly attaching a new roll of self-adhesive drywall taping to your drywall. Secure the product for reliable adhesion with firm pressure on its scrim backing.
Step 10
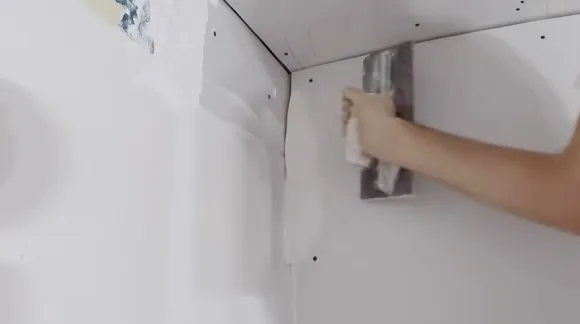
Ensure your newly installed taping material is secure by running a broad knife or blade along its edges for uniform adhesion.
Step 11
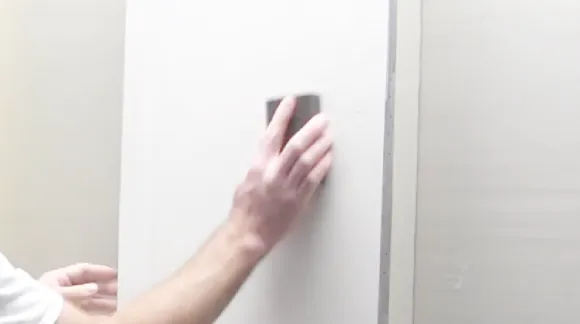
Smooth out any bumps or air pockets that may have formed during application by running your hand along the surface before drying completely
Last step
Taping material must be given ample time to settle before the area can be painted. Adhesive backing on newly installed taping should not be overlooked, as it is essential for a quality finish.
Why Do We Sand After Taping?
Sanding after taping is a vital step of drywall tape removal, helping to create an even and smooth surface. It serves to secure the adhesive quality as well as prevent any gaps between wall material and tape that could cause long-term damage due to temperature or moisture changes.
It levels any bumps or unevenness on the wall’s surface and fills possible gaps between it and the tape to keep moisture at bay. It creates an even surface, ensuring the tape sticks properly and will not peel away with time.
How Long Does the Tape Last on the Wall?
The longevity of drywall tapes on your walls largely depends upon the quality of the product and initial installation. One can expect most to last 5 to 15 years before signs of wear appear.
Changes in humidity levels or temperature shifts may lead to a decrease in stickiness well ahead of this time frame. So regular inspections are paramount when assessing their continuing suitability.
Why is the Drywall Tape Peeling?
Poor installation techniques and inadequate preparation can lead to drywall tape peeling. Poorly executed application and inadequate preparation can cause premature peeling issues due to a lack of pressure or air bubbles present during the bonding process.
The result is a substandard finish. When it comes to ensuring long-lasting results, extra care must be taken during application. The surface should be adequately prepared with dusting or sanding before taping is applied using ample pressure for adequate adhesion.
The Final Verdict
We hope that this drywall tape removal post has provided an informative overview of how to remove your drywall tape safely and effectively. Removing drywall tape is an involved process that requires preparation and the correct tools.
Before beginning any drywall tape-related project, ensure that you have the proper supplies ready for use. Always remember to wear protective gear during any DIY project. With the right supplies and patience, you’ll be able to remove the tape from your drywall successfully.
Even the most stubborn tape, without damaging your walls. Don’t forget to wear safety goggles and gloves when working with sharp tools. Understanding why sanding is necessary after taping and how long the tape should last will make it easier to troubleshoot any problems that may arise during the process.
With these drywall tape removal tips in mind, you should have no trouble mastering this project.


